Payment Plan for Reservations
Overview
- You can now assign a payment plan to a Reservation and manually set/adjust due dates.
- Installment capability is configured at the organization level. If you want it enabled for your community, contact eTrak Support.
- The feature can be enabled when creating a reservation (Catalog, View Scheduler, or Resource Details screen).
- Installments are editable after creation. Admins have additional management capabilities.
How to start
- Create a reservation using one of these entry points:
- The Catalog
- The View Scheduler
- The Resource Details screen
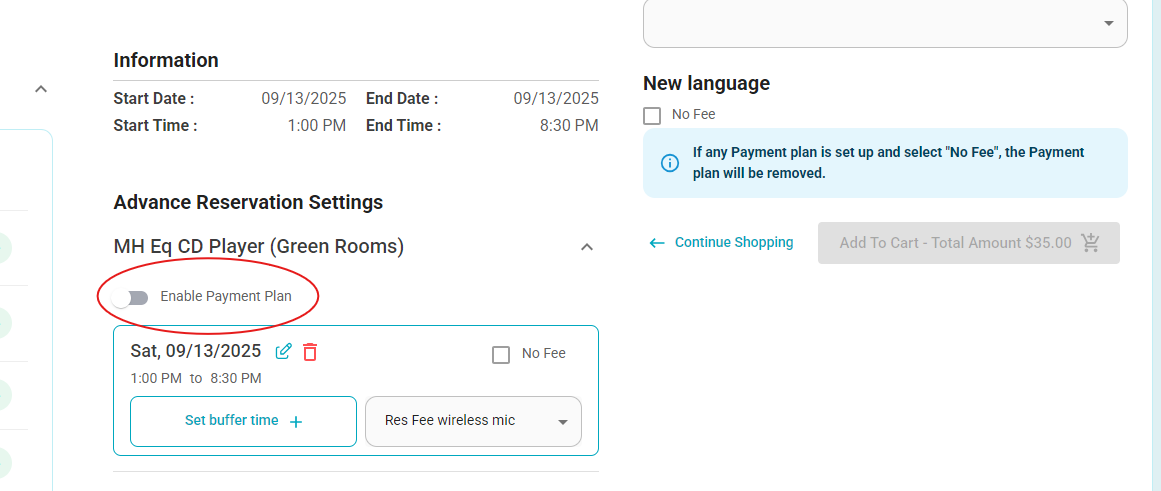
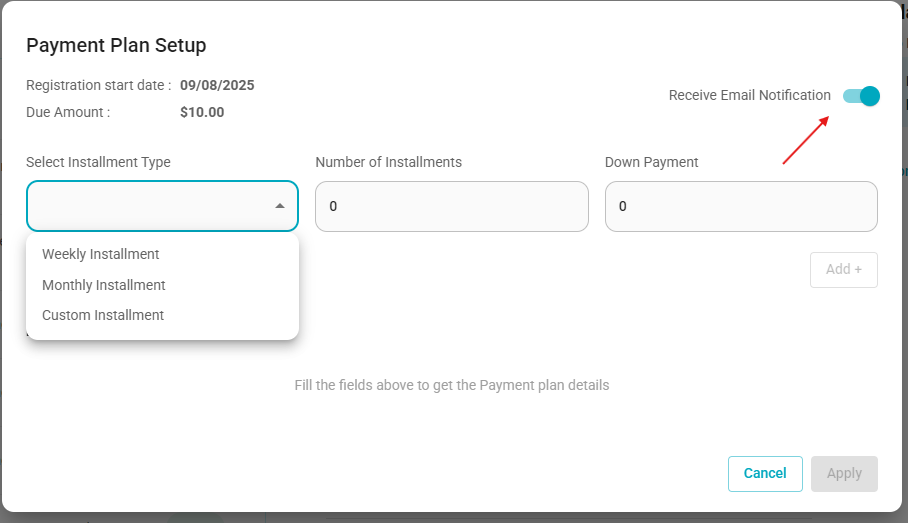
- During the reservation flow you will see an Enable payment plan toggle. Switch it On to configure a plan — a new window opens.
First you will select the type of payment plan you would like to set up:
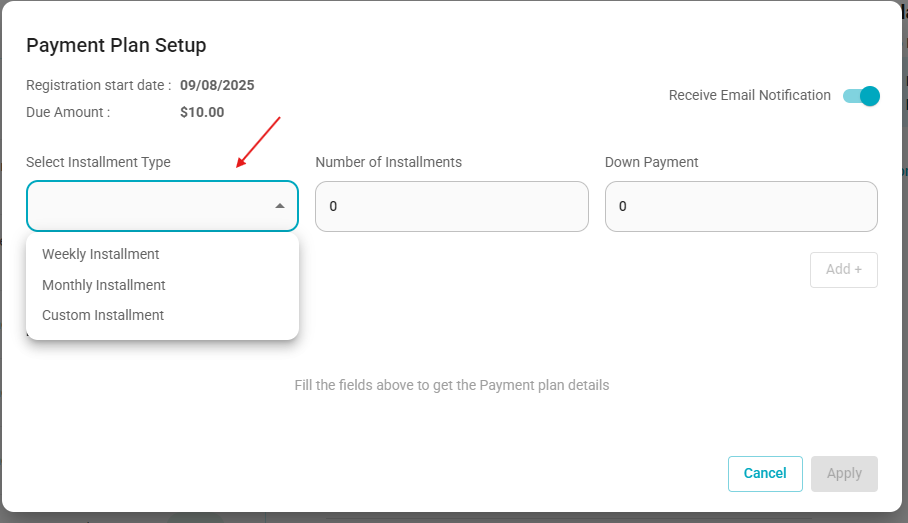
Payment plan types
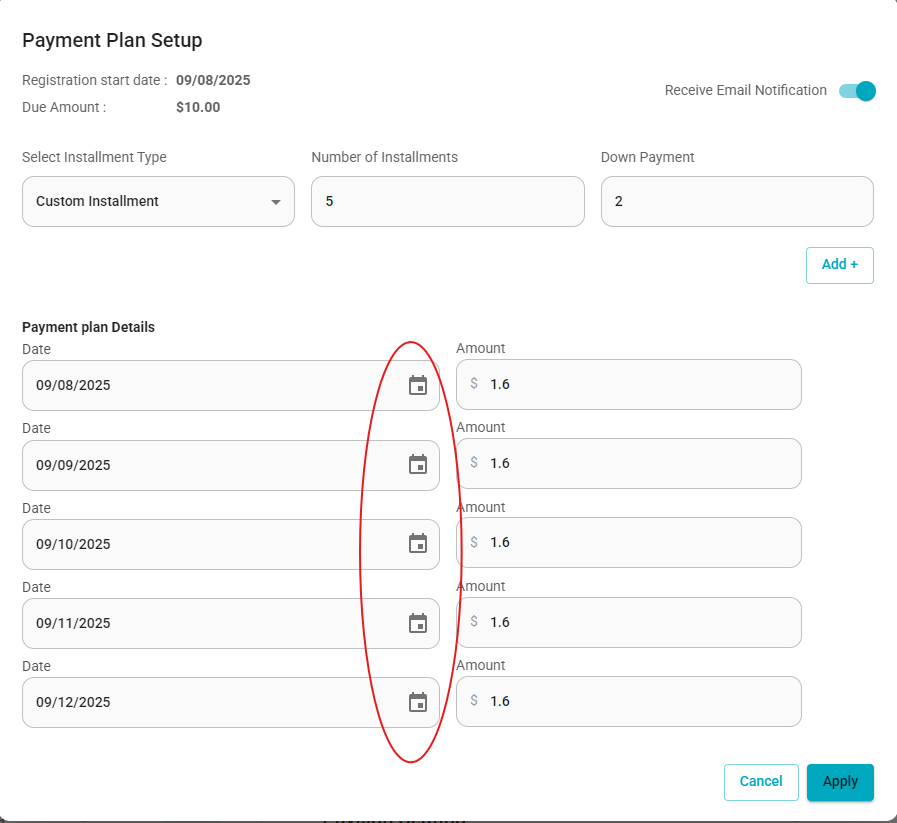
- Custom
- Select the number of payments.
- Enter a down payment (may be $0).
- Click Add+ → the system will populate installment dates and split remaining balance evenly across payments.
- All populated dates and amounts are editable.
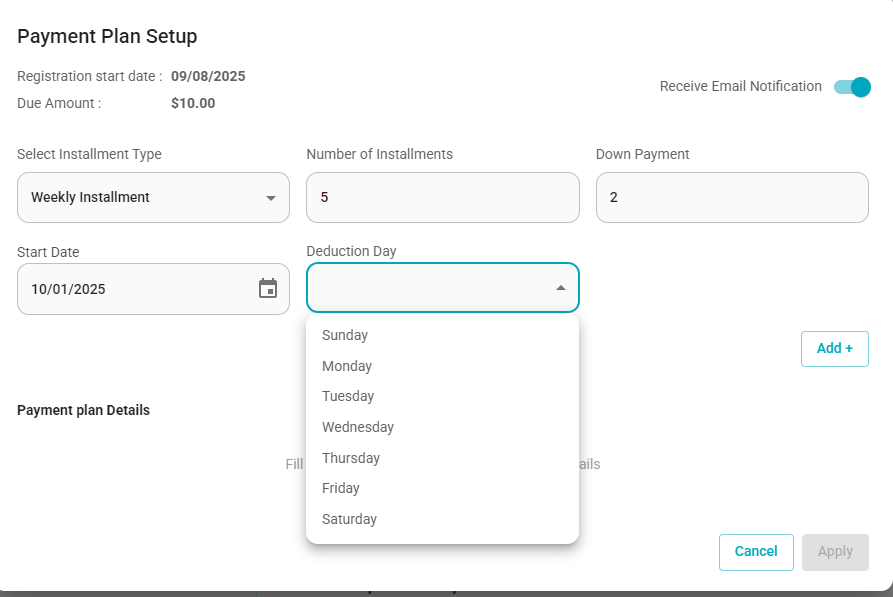
Weekly
- Select a start date.
- Select the day of the week payments are due (e.g., Thursday).
- Click Add+ → the system will populate subsequent due dates accordingly.
- Populated dates/amounts are editable.
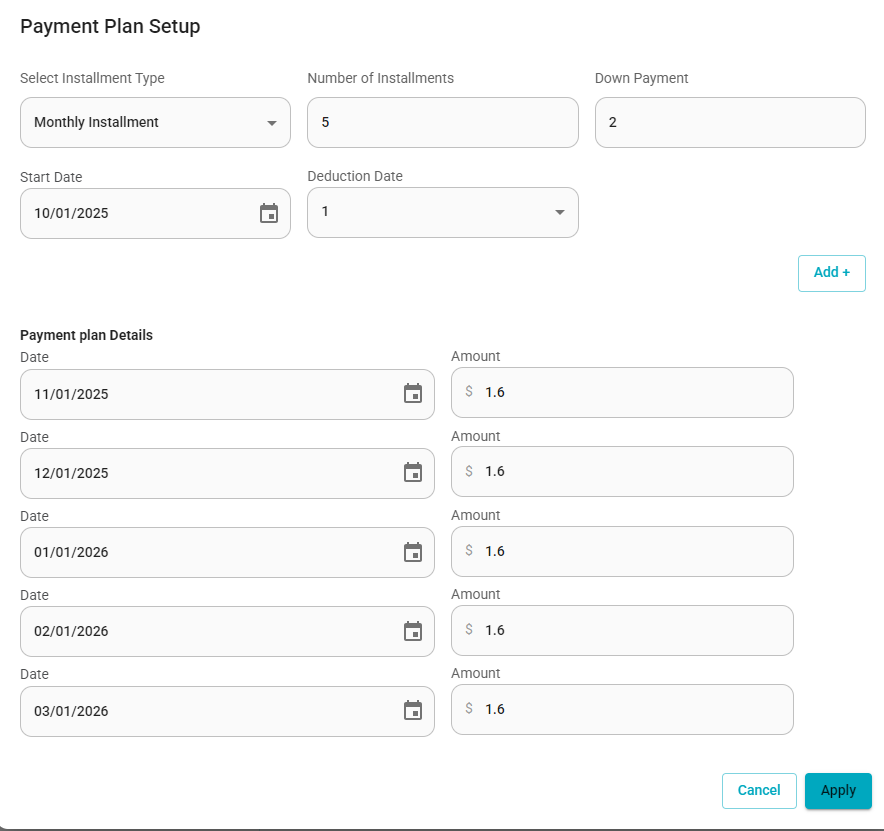
Monthly
- Enter a start date — this determines the day of month the payment is due (e.g., 15th of every month).
- Click Add+ → the system will populate subsequent due dates accordingly.
- Populated dates/amounts are editable.
Important validation & behavior
- The system warns if payment-plan due dates fall after the reservation start date.
- The system warns if the sum of installments does not equal the total reservation cost.
- If you change the down payment and click Add+ again, the installment math automatically recalculates.
Email notifications
- Receive email notification toggle controls customer messaging:
- Off — customer receives the order receipt only.
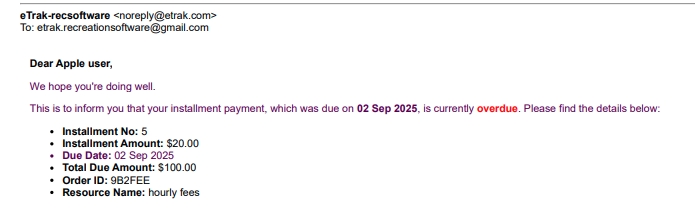
- On — customer receives the order receipt, upcoming payment reminders, and late-payment notifications.
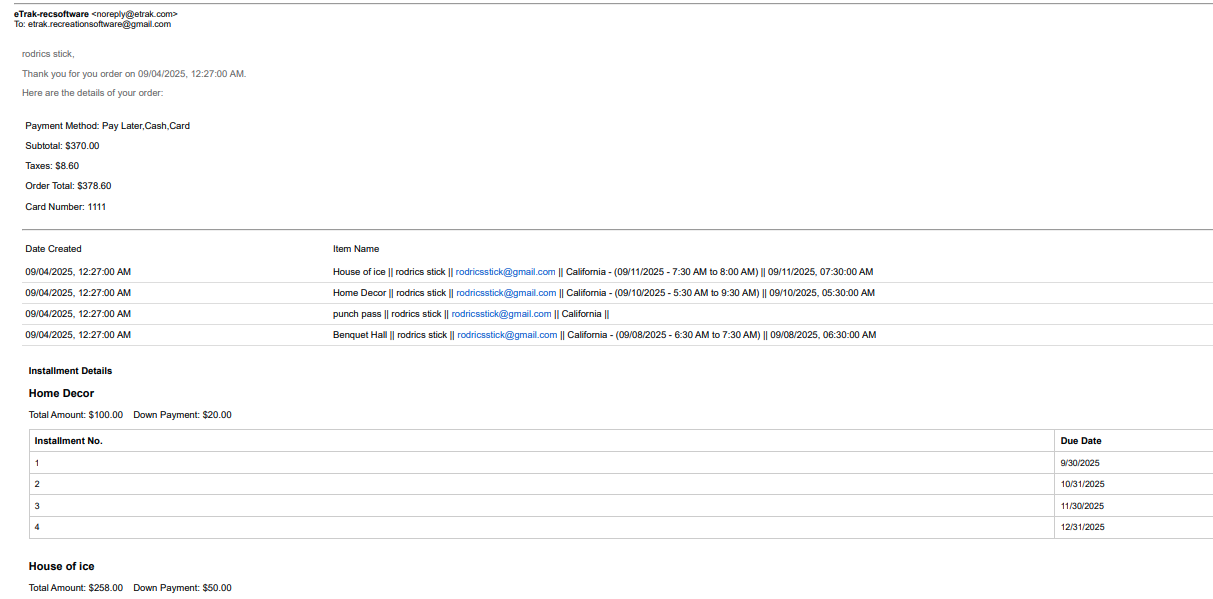
Order Receipt:
Missed Payment:
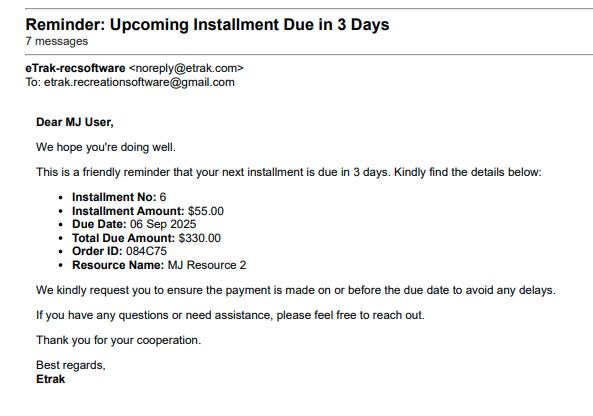
Payment Reminder:
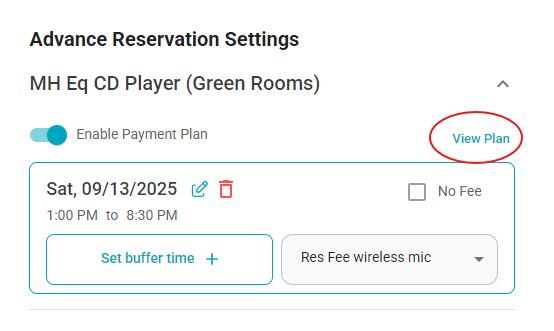
If you save this screen, and need to make adjustments you can by simply selecting the View Plan button that now appears.
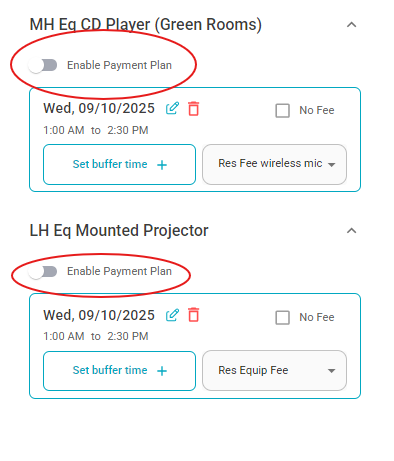
If multiple Resources are being booked for a single reservation, a payment plan needs to be set up for each individual Resource.
Cart & receipt
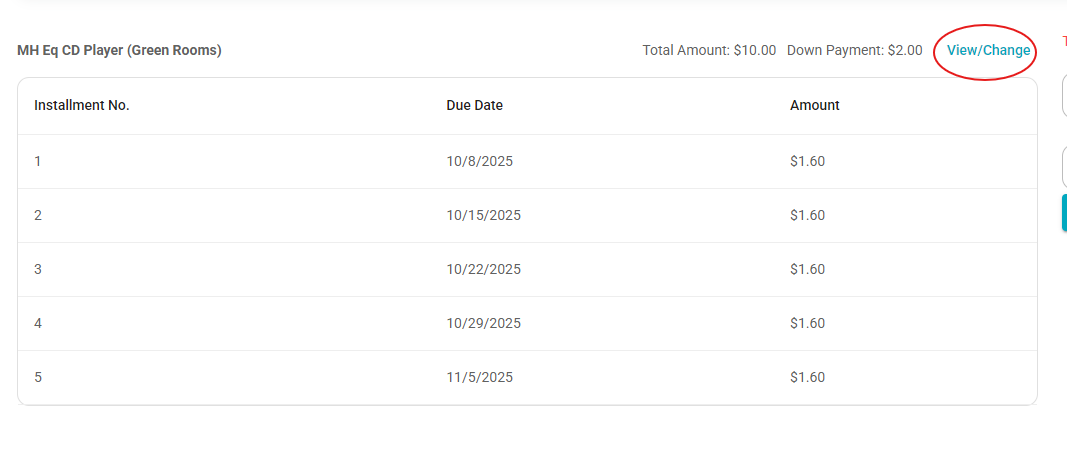
- The payment plan is visible at the bottom of the cart. You can view and edit it from there.
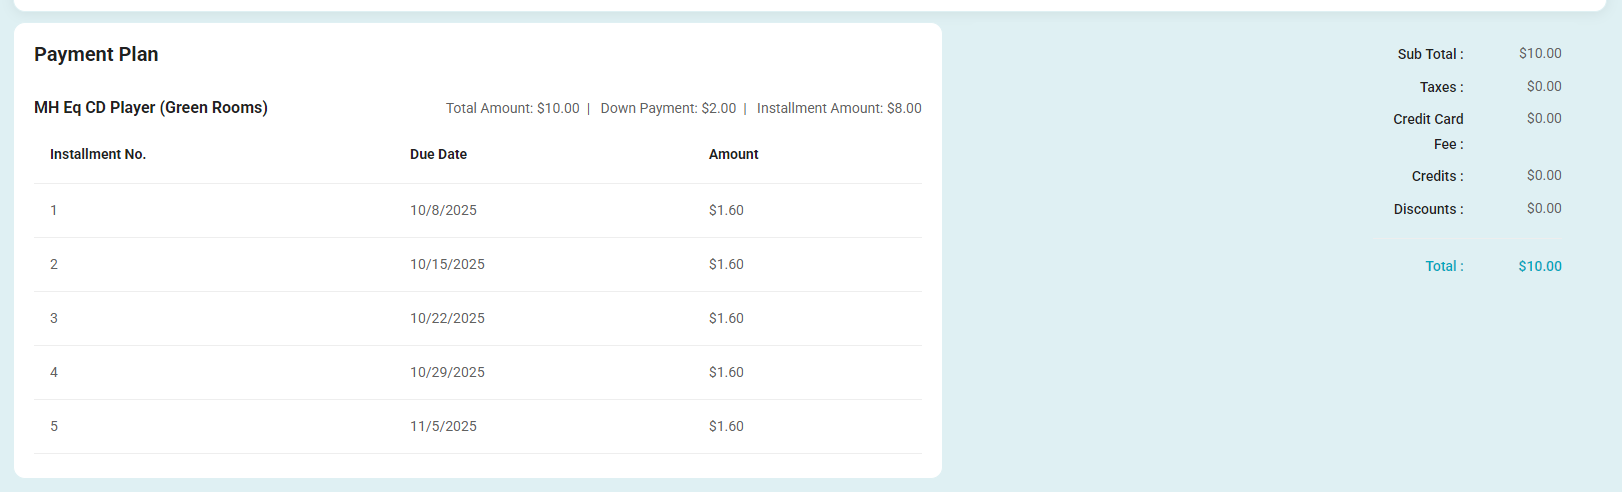
- On the receipt, payment-plan details (amounts + due dates) are displayed.
Limitations
- Discount codes, Account Credits, and Gift Certificates cannotbe applied to the payment plan during setup.
- You can apply Account Credits or Gift Certificates to an existing payment plan from the user profile after the plan is created.
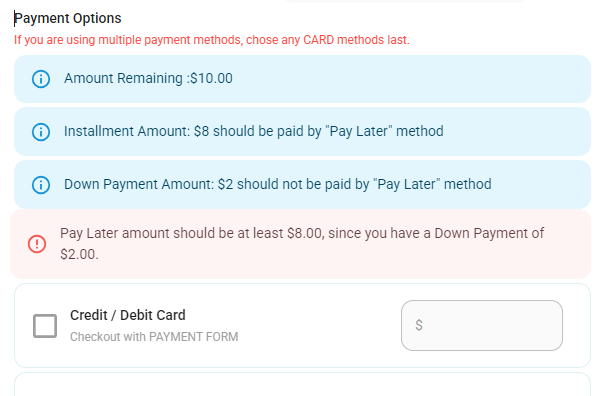
Checkout behavior
- If a down payment exists, select a payment method for the down payment only.
- Any future amounts must be checked out using the Pay Later method; the cart will show this.
On the receipt you will see the payment plan information including amounts and their corresponding due dates.
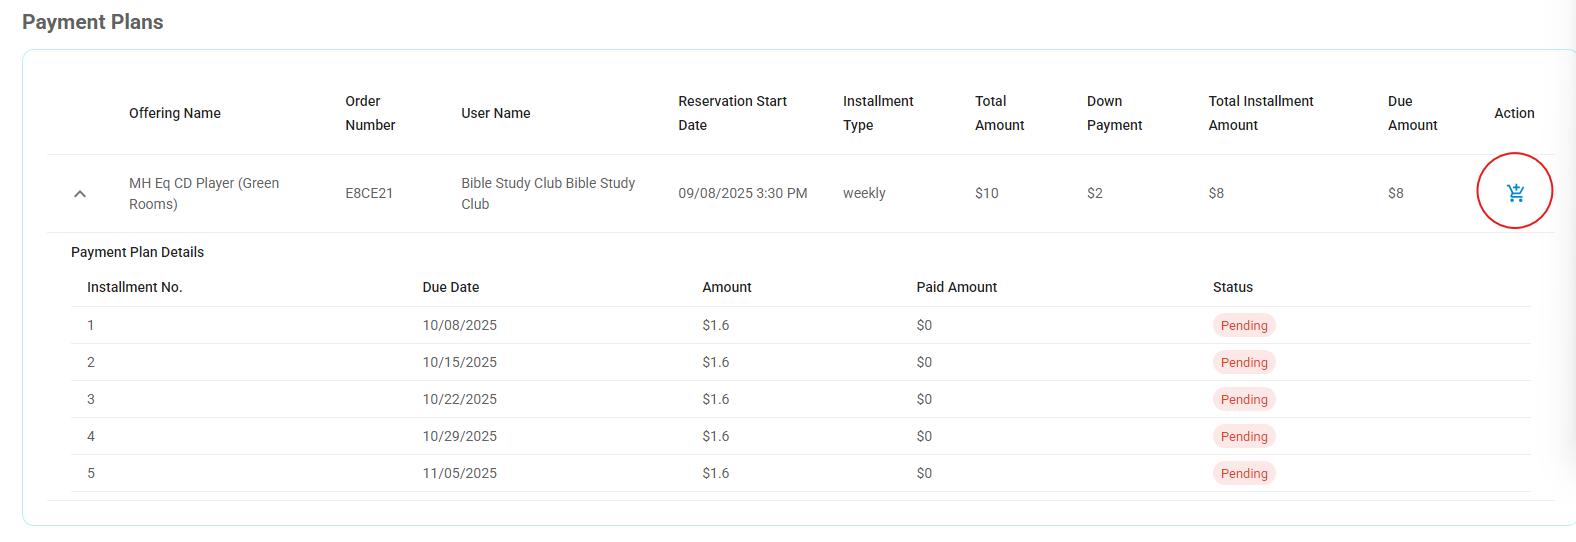
Paying installments
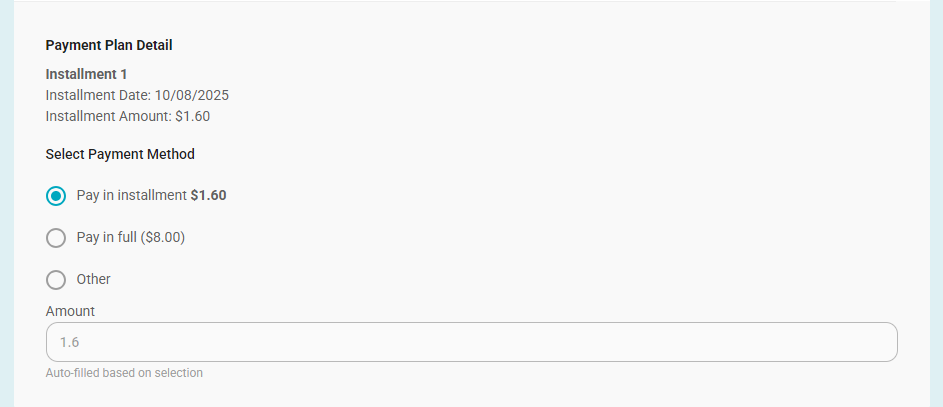
- From the user profile → Payment Plans, clicking a plan/cart shows three payment options:
- Pay installment
- Pay in full
- Pay other
- Admin users can post a payment for less than the minimum due. End users can only pay the minimum due or more.
Editing / Adding a plan after reservation creation (Admin only)
- If a reservation was created without a payment plan, an Admin can:
- Edit the reservation via Resource Details and save any additional charge.
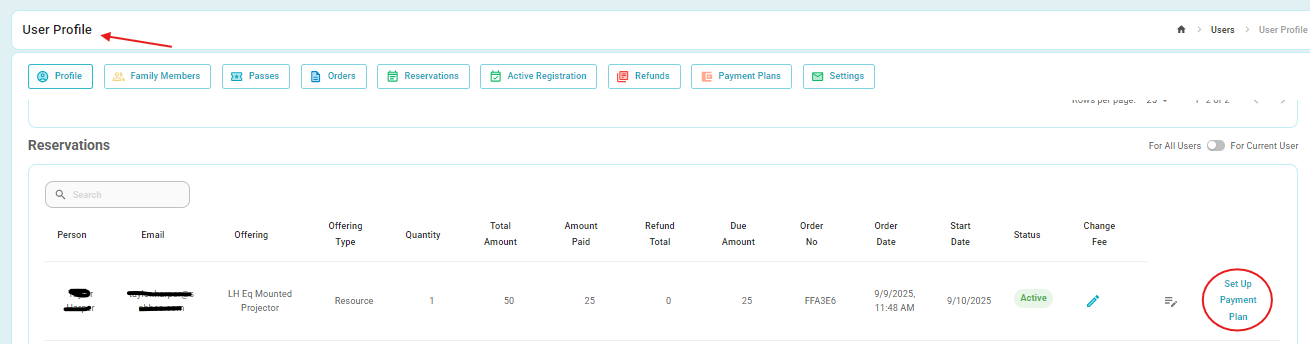
- Go to the Reservation line in the User Profile and select Set up payment plan.
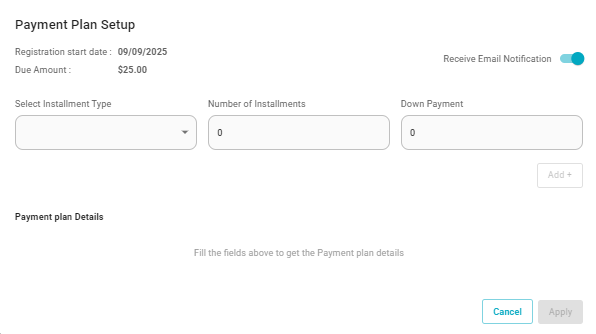
- The same form as above will open for you to populate the information.
- When a payment plan is canceled, refunds must be processed from the Orders area. Each payment made must be refunded individually.
Limitations
- Decreasing the total fee in a payment plan is not supported at this time — only increases are allowed. This may be revisited in a future release.
Was this article helpful?
That’s Great!
Thank you for your feedback
Sorry! We couldn't be helpful
Thank you for your feedback
Feedback sent
We appreciate your effort and will try to fix the article