Unlike Programs sessions allows for you to program an offering that allows you to set a schedule of items for people register without them having to register for all of them.
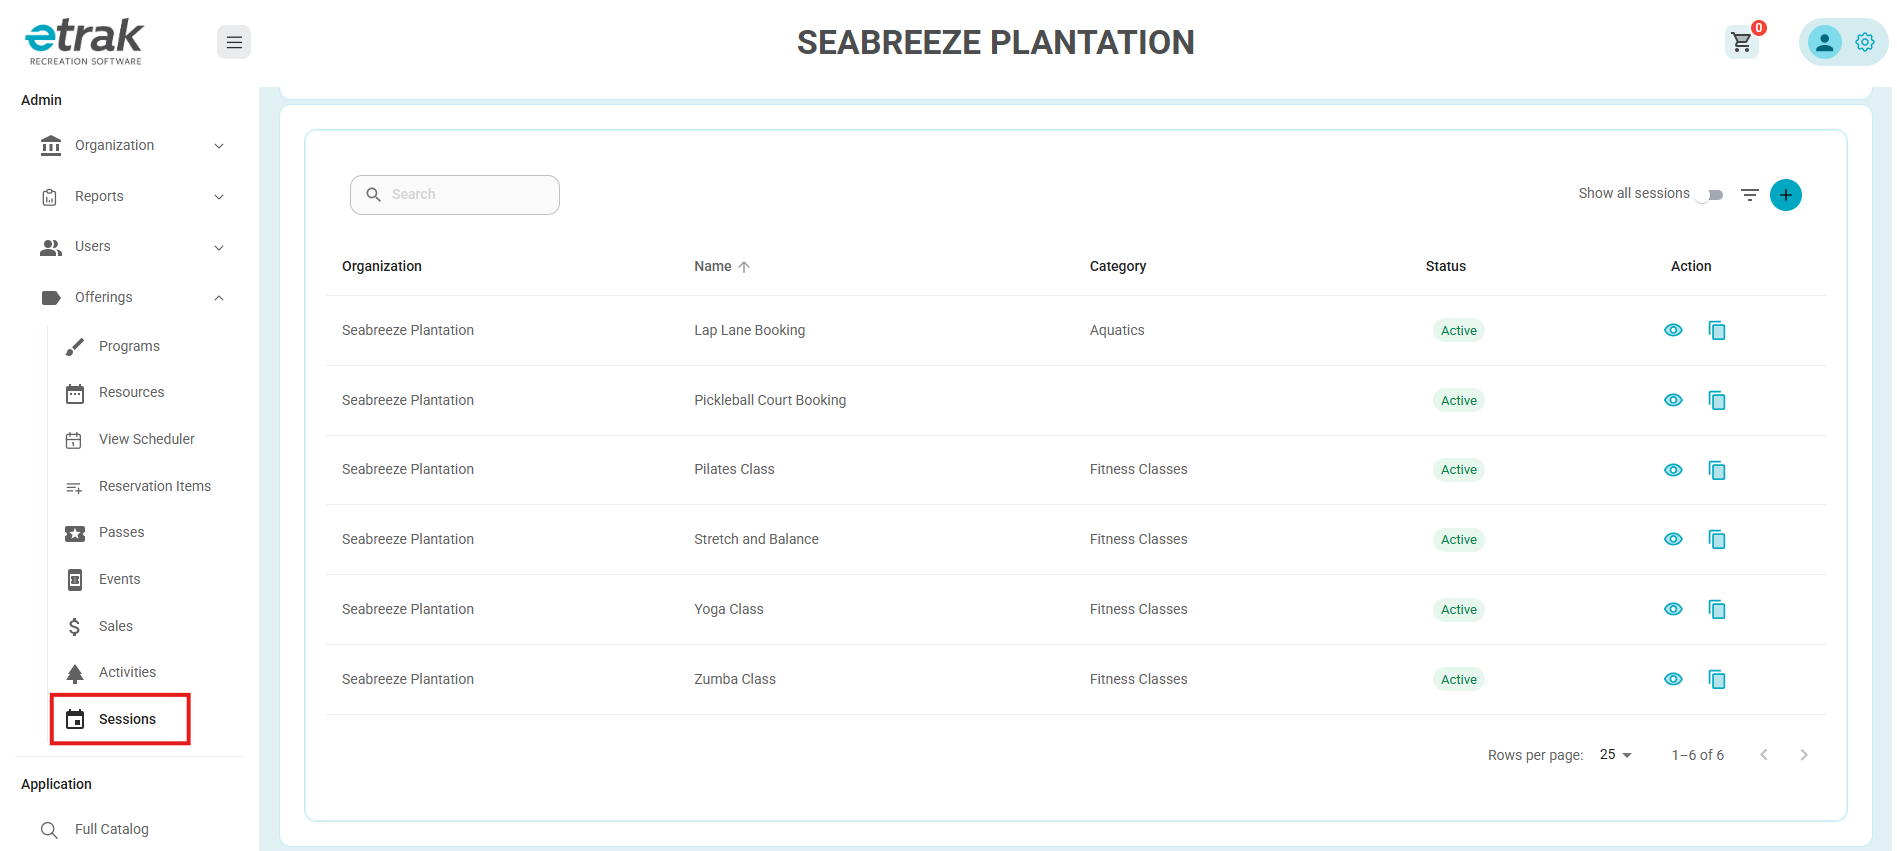
1. Navigate to Sessions in the left Menu:
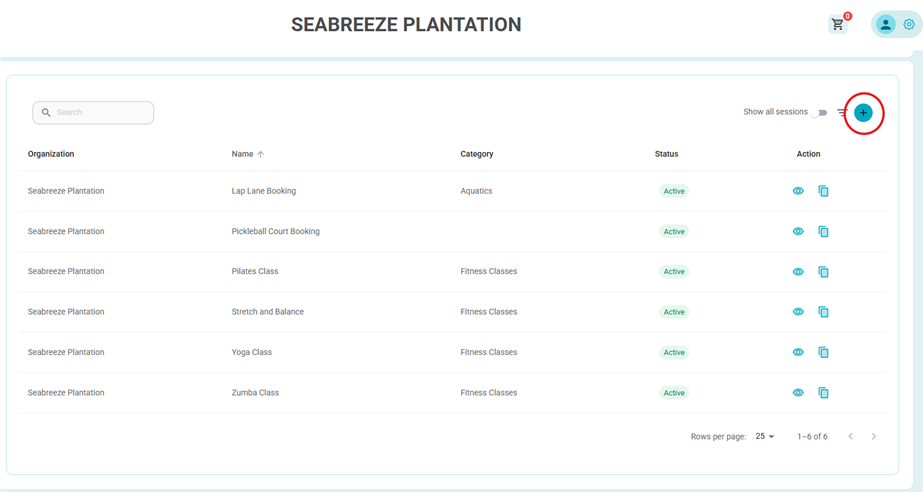
2. Click the "+" icon in the top right corner of the page
3. Once the Add New Session Form Opens, please begin completing the basic information items:
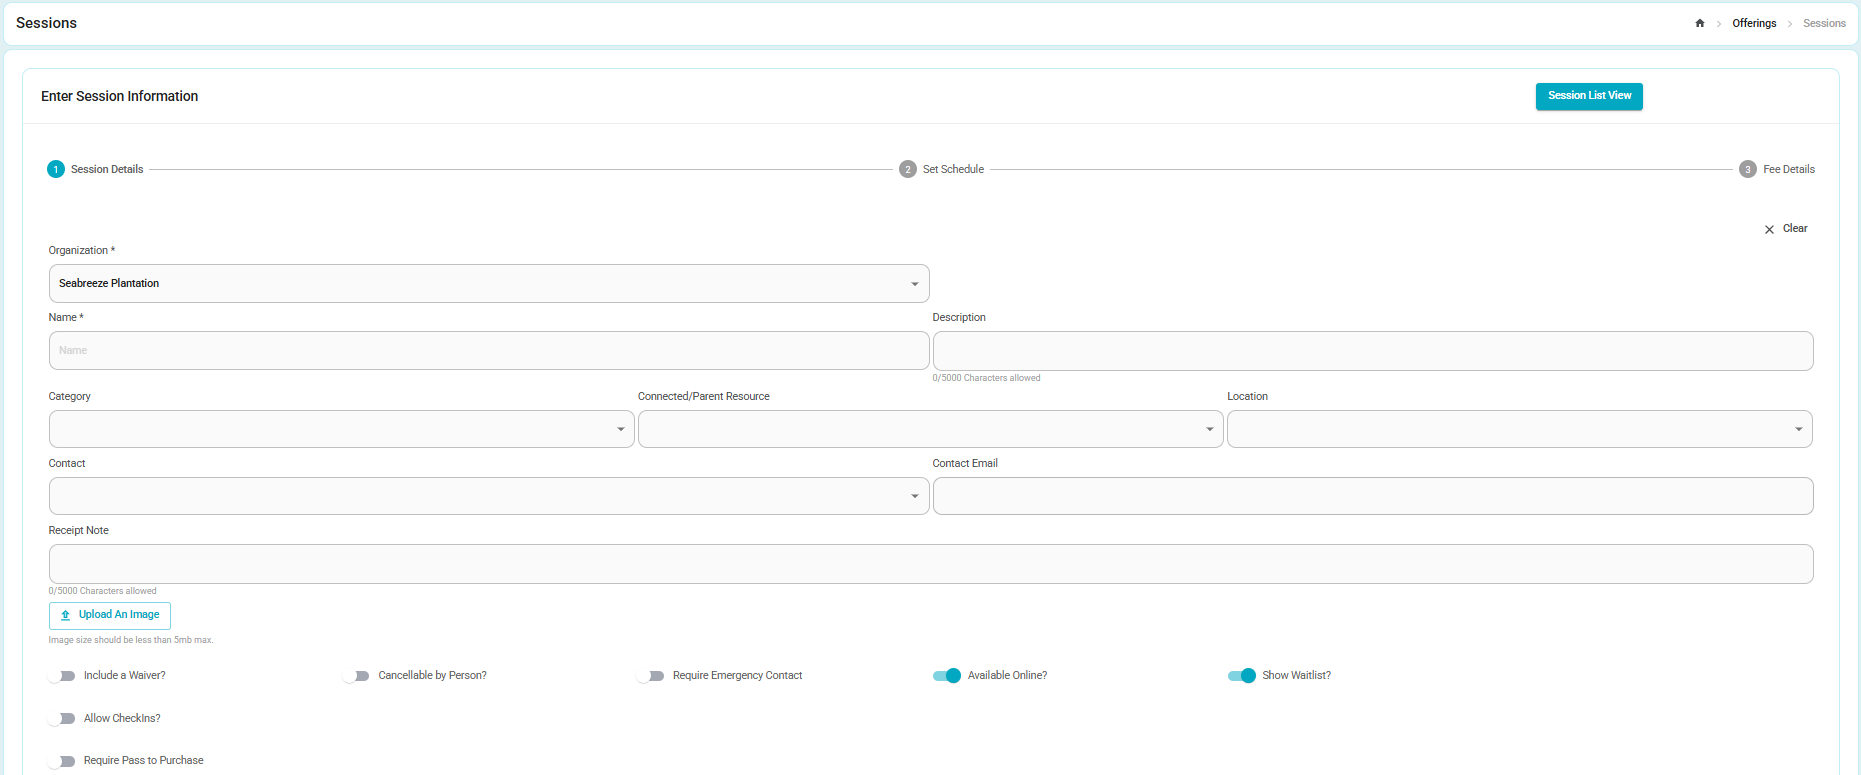
There are 2 Main Items that are required:
- Name
- Max Attendance *shown in session rules
Some other important items that should be considered on this step:
- Description
- To give your users additional information about the offering
- Category
- To help people quickly find the session(s) in the catalog.
- Upload an Image
- This helps to advertise the session in your catalog and an appealing experience.
- Include a Waiver
- This requires the customer to agree to a waiver to process their registration.
- Cancellable by Person
- This allows a customer to cancel themselves from a registration without needing to contact staff.
- Show Waitlist
- This will allow a customer to join a waitlist once the session time reaches maximum attendance.
- Allow Checkins
- This will present the session as an option at check in allowing you view registrations and attendance separately
- Require a Pass to Purchase
- This will only allow customers with specific pass(es) to register for this session.
4. Once the basic information items are completed move onto filling in the session rules fields
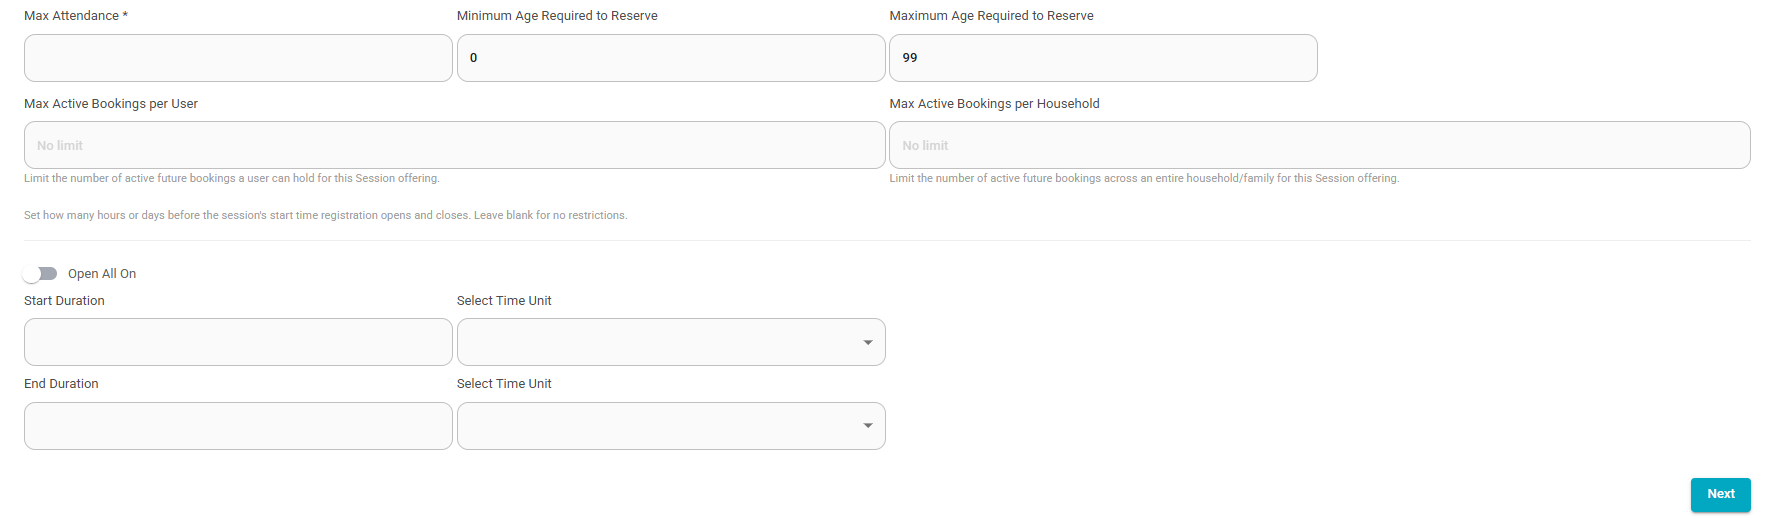
These fields will control how many people can register, how many times someone can register, and when they can register.
- Max Attendance
- This will be the maximum attendance per session time slot
- Max Active Bookings Per User/Household
- This will be the maximum number of active meaning registrations that are at any point in the future that the individual or household can have. These can be set to the same value if your restriction is per grouping and not individual user. Or if you only want to restrict registration based on unique user you can limit it just in Max Active Bookings per User.
- Example: Sessions are being used to book lap lanes in a swimming pool and you do not allow someone to book more than 3 at a time. You can set the user limit to 3 and prevent a user from booking for the anymore than 3 session slots. Once the first session passes the user can then book for another session.
- This will be the maximum number of active meaning registrations that are at any point in the future that the individual or household can have. These can be set to the same value if your restriction is per grouping and not individual user. Or if you only want to restrict registration based on unique user you can limit it just in Max Active Bookings per User.
- Session registration time frame. This will provide you 3 options for registration time frame rules
- 1. If you leave this blank all sessions created will be available for registration immediately upon completion
- 2. Toggle on the Open All On, this will have you enter a singular date and time where all session timeslots that are created will open for registration at that time.
- 3. The Start Duration and End Duration. This allows you to create rolling registration rule from the current date and time. If you do not want customers to register more than a week in advance you will set the Start Duration to 7 days. This will show the customer all dates scheduled for the session but only allow them to register within the 7 day window from the date and time they are registering. You can also include a cut off time with the End Duration, setting to 1 day will close registration one day (24 hours) prior to the start of the session. The time unit for these allows for hours and days
5. Step 2: Setting up the available schedule for the sessions:
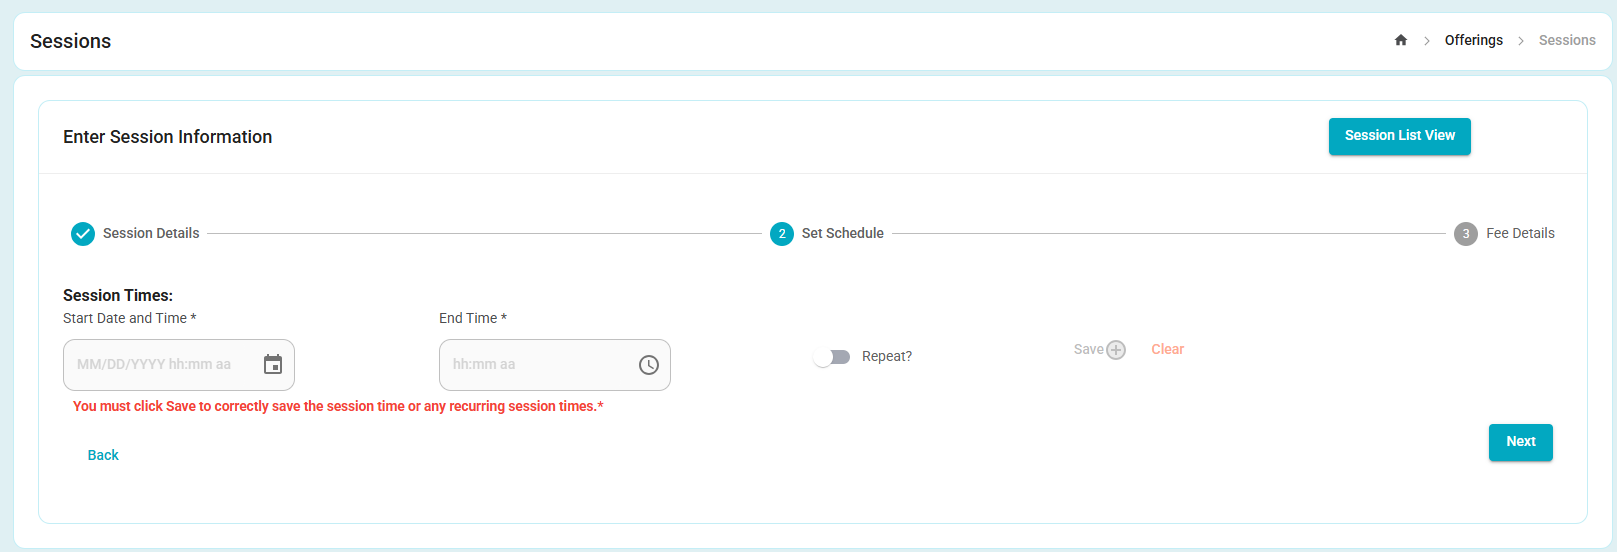
6. Select the Start Date and Time of your first Session Schedule:
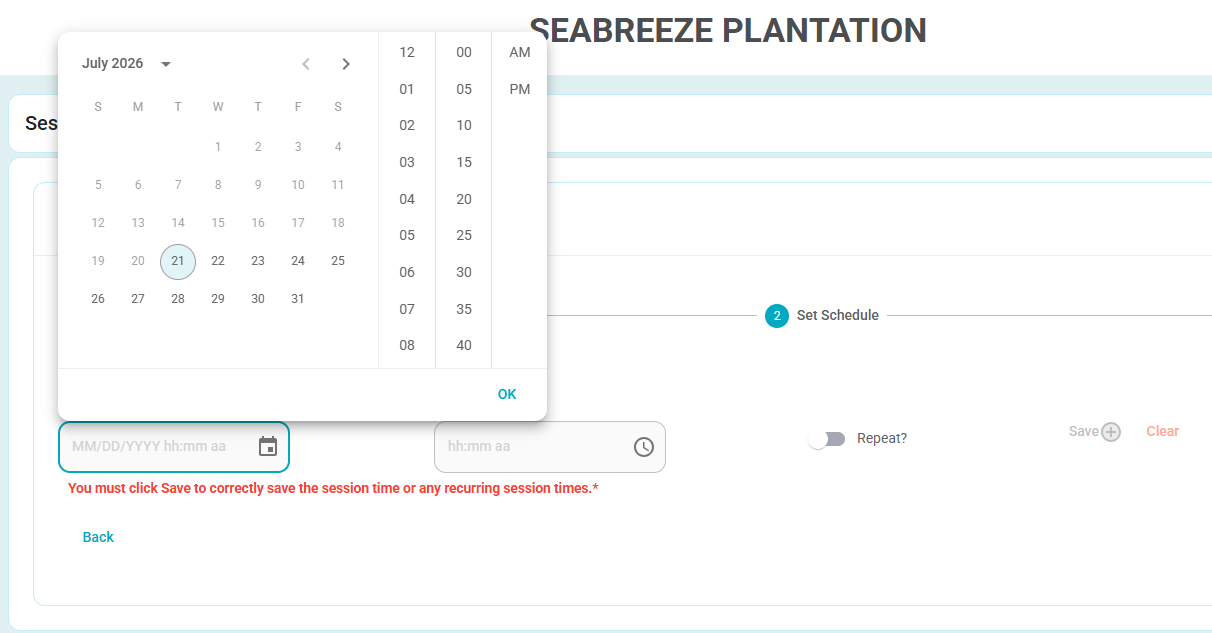
Select the Start Date of your first session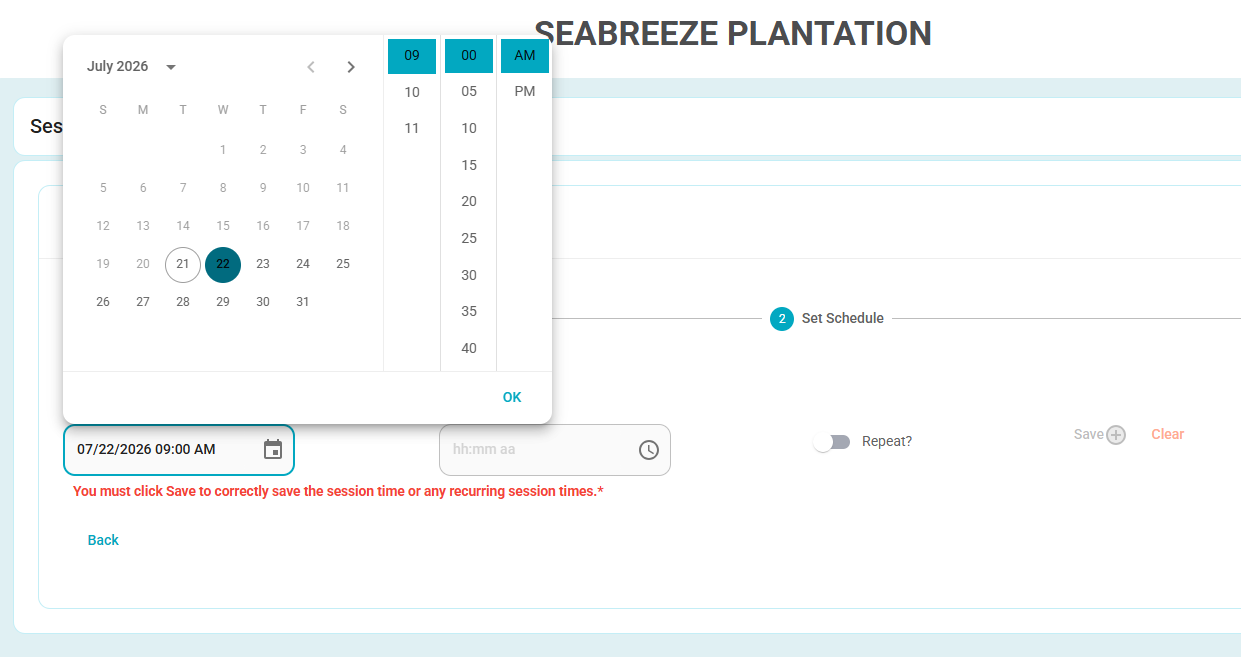
Select the start time.
Tip: Select the Hour, then the AM or PM, Then the Minute of the start time.
7. Now Select the End Time (Note: Sessions are designed to happen within the same day, and that is why there isn't an end date field):
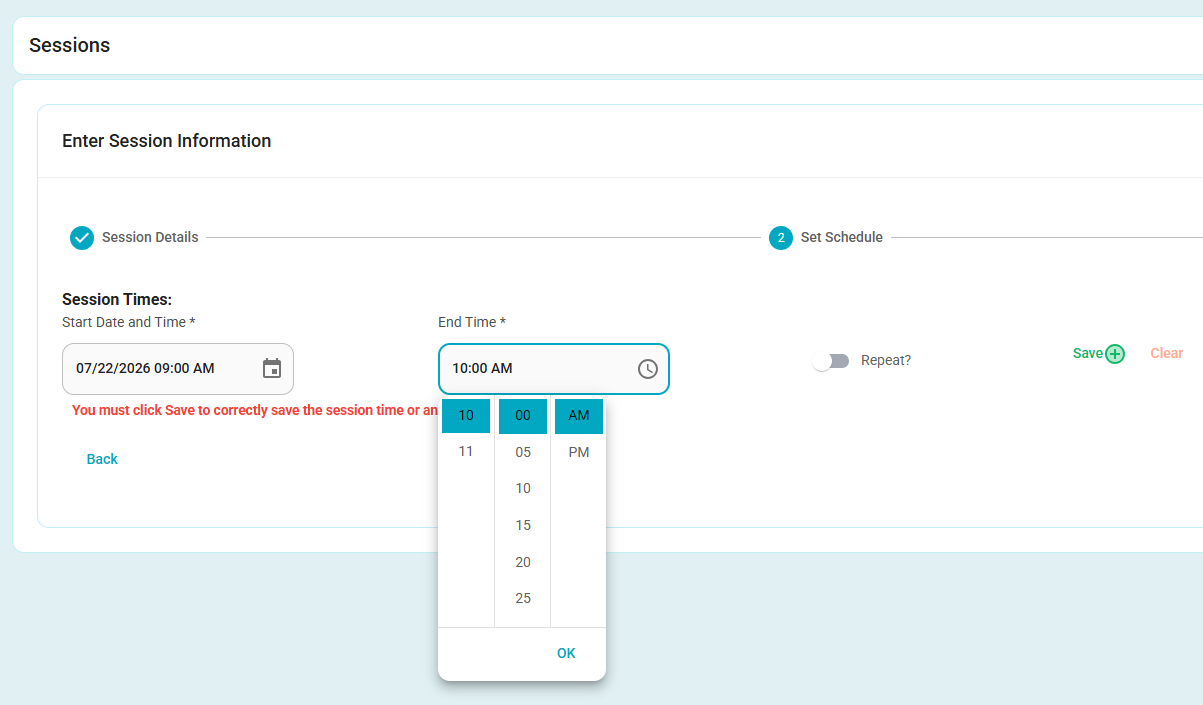
Tip: Select the Hour, then the AM or PM, Then the Minute of the start time.
8. Repeat?
- When clicking on repeat you can set the repeat schedule of these sessions.
- Example: If you have a workout class that happens Monday to Friday from 11am to 12pm, you would select the repeat switch.
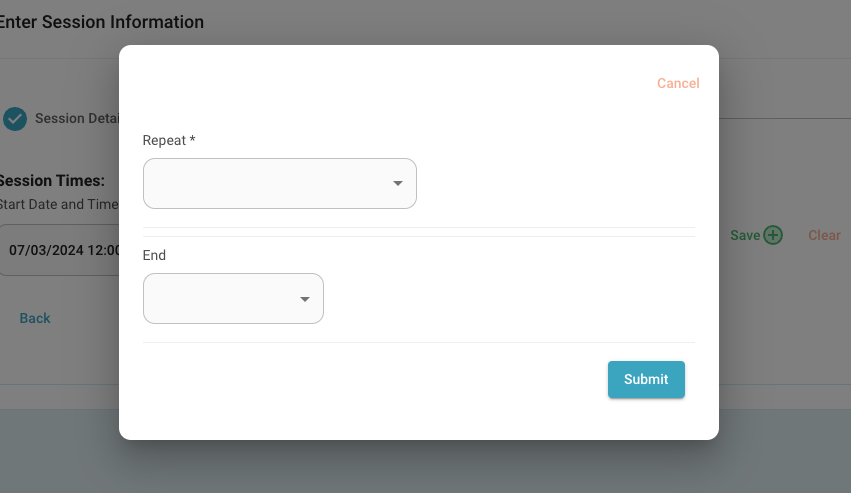
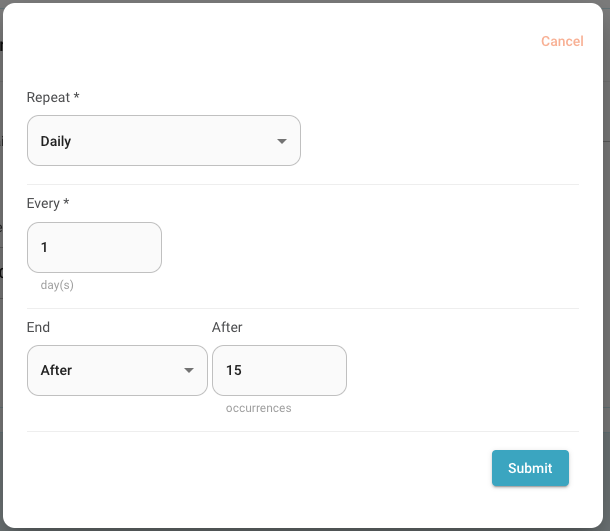
8b. Select your repeat type:
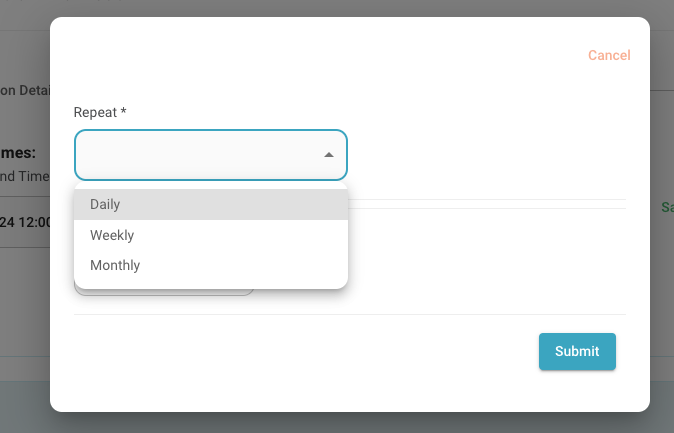
8c. Complete the "Every" Field
- This will tell the system how often you want to repeat this schedule
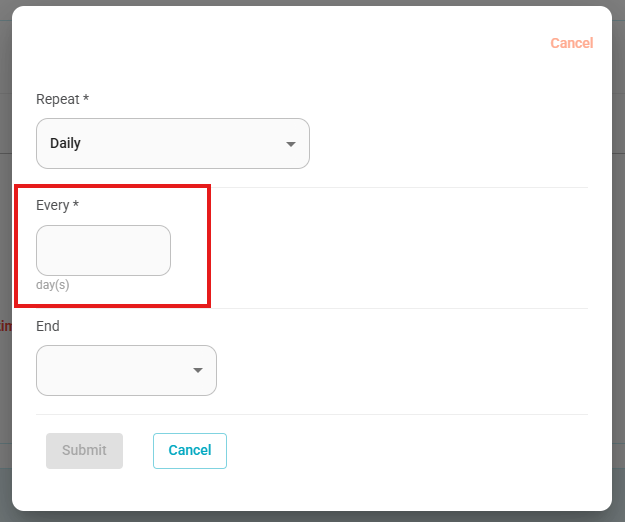
8d. Depending on the option chosen you will have to complete some more options:
- Daily
- Just Complete the "Every" Field, and this will tell the system if you want it repeated everyday or just every 5
days.
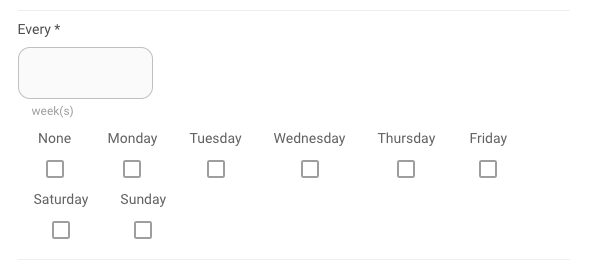
- Weekly
- Complete the "Every" Field, and this will tell the system if you want it repeated every Wednesday week or every
other week.
- Pick the days of the week to tell the systems if you want it on Monday, Tuesday, and Friday (for example)
8e. Select the End
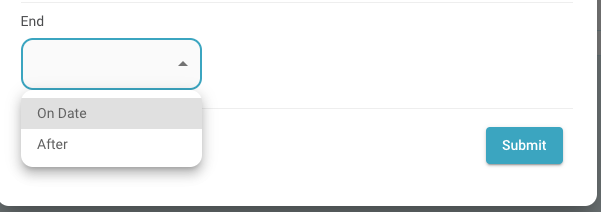
- On Date allows you to pick a specific date that the reoccurring schedule will end
- After will allow it to repeat for the number of times you specify
8f. Click Submit
Note: If you don't complete all the fields it will likely lead to errors in the schedule as well as making the offering available to purchase.
9. Click Save next to repeat to ensure that your schedule is saved
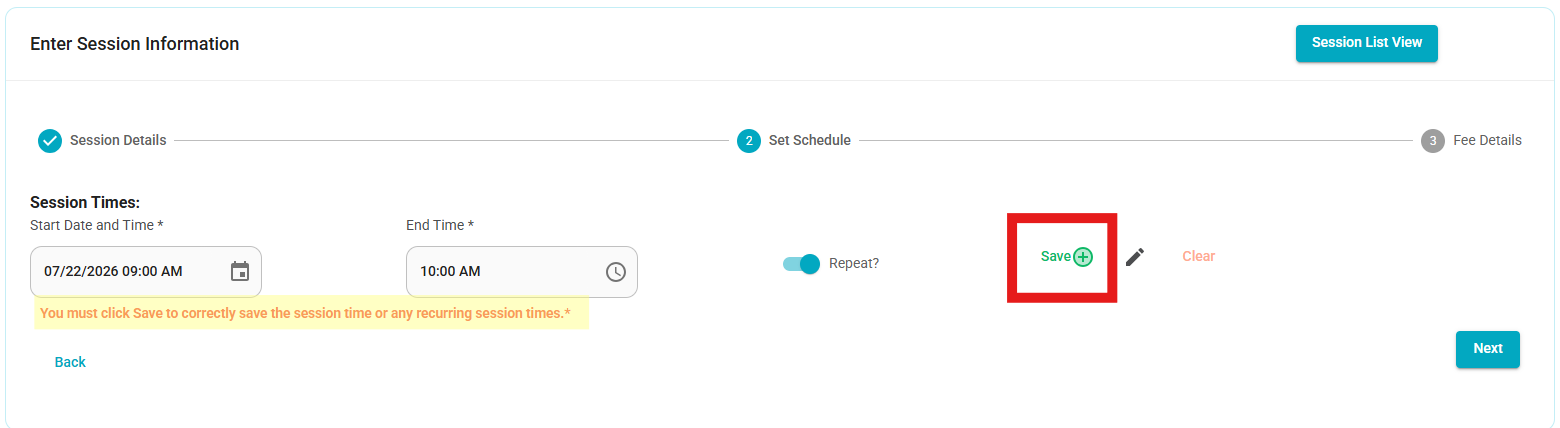
(Note: If you don't click save and then you click next you will not save your schedule and your session will be missing a schedule for people to register.)
Once you clicked Save you will see it appear above the start date and time:

*If you would like to add more schedules, you can do this by repeating steps 6 through 9.
10. Once the Session times are all set, click Next
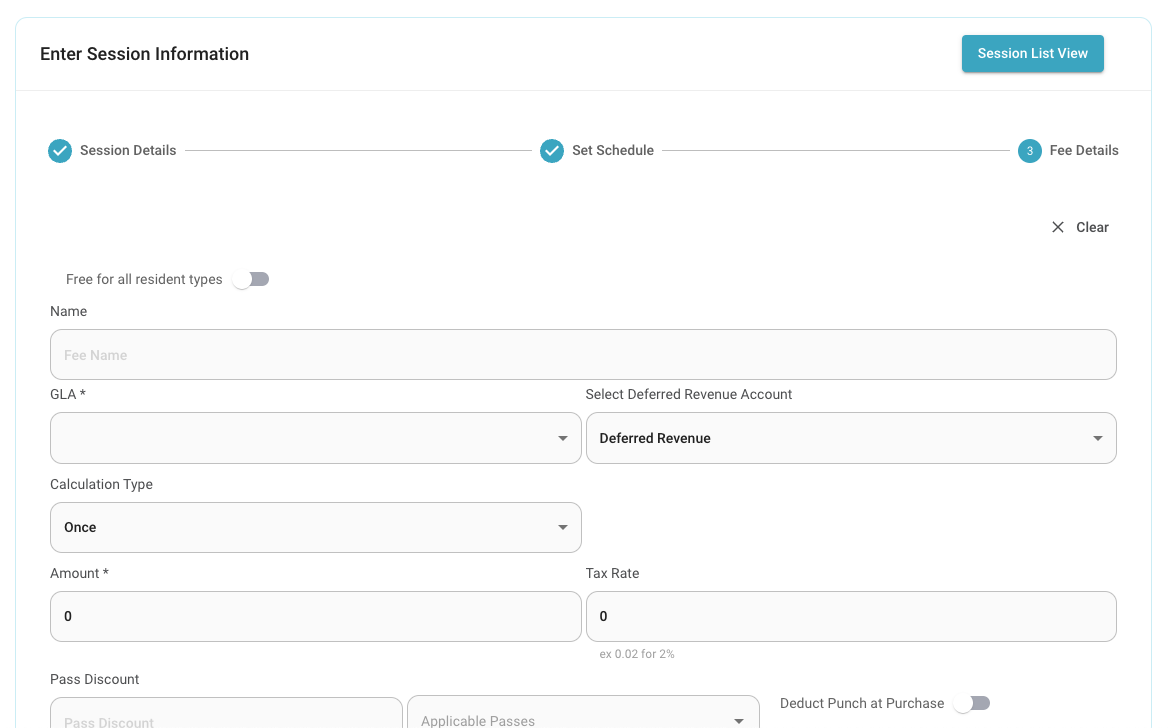
11. Set your Session Fee. Please follow the standard procedure for setting fees. (DO NOT FORGET THIS STEP OR PEOPLE WONT BE ABLE TO REGISTER)
Was this article helpful?
That’s Great!
Thank you for your feedback
Sorry! We couldn't be helpful
Thank you for your feedback
Feedback sent
We appreciate your effort and will try to fix the article