There are 3 ways to initiate the creation of a reservation.
Option #1 - From the resource page
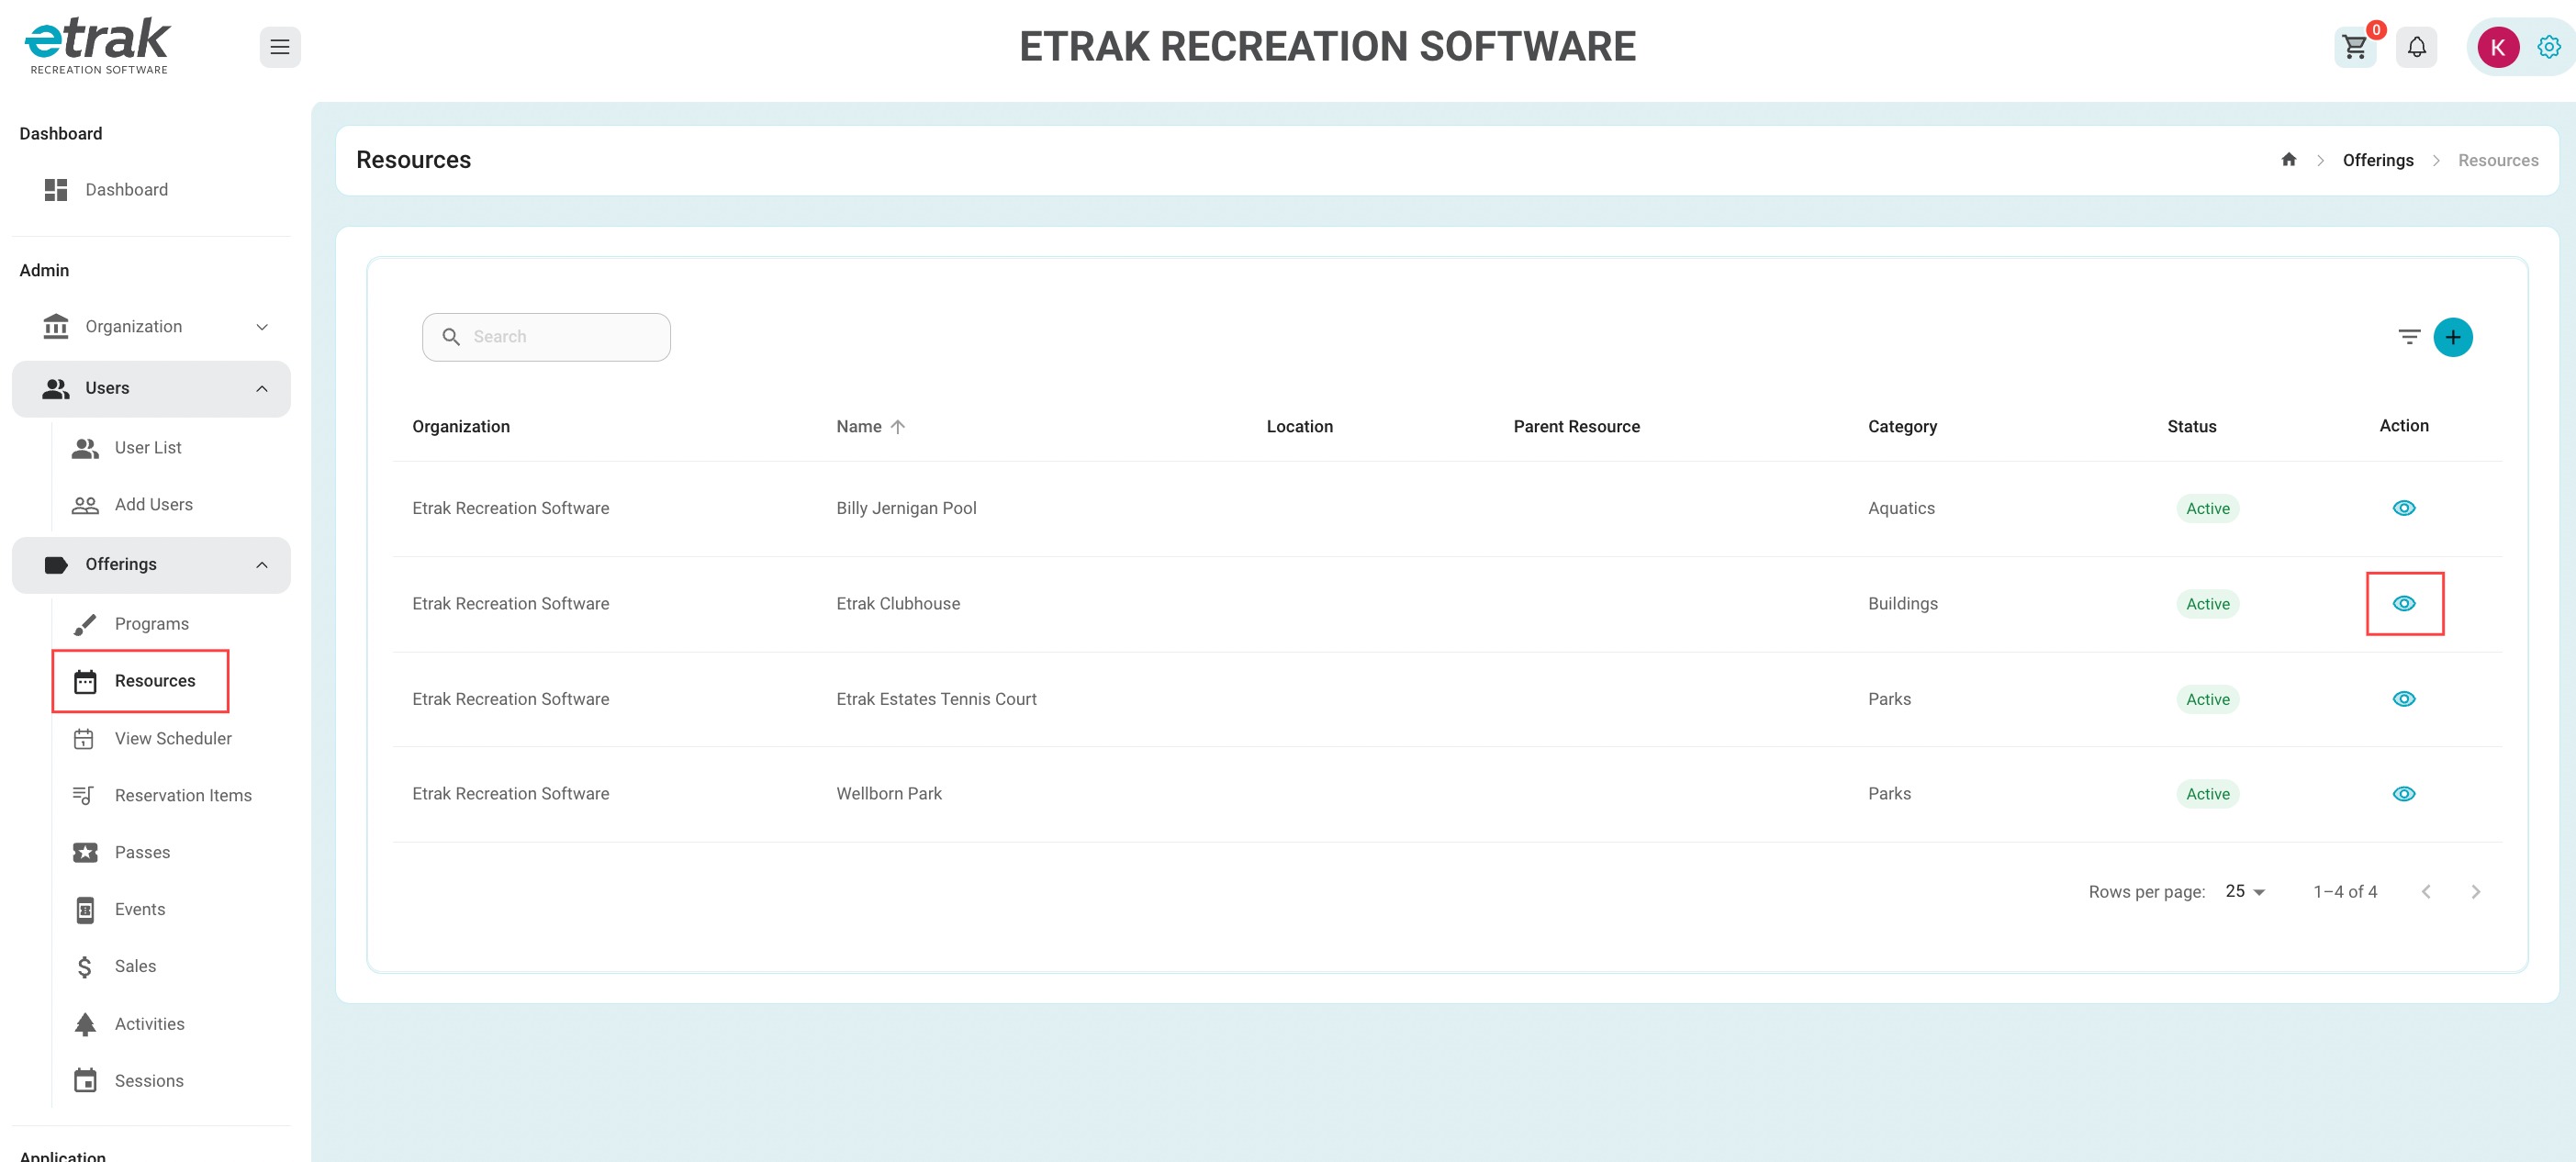
Select 'Resources' from the 'Offerings' tab on the left side of the screen.
Press the eye icon that coordinates with the resource that is being reserved.
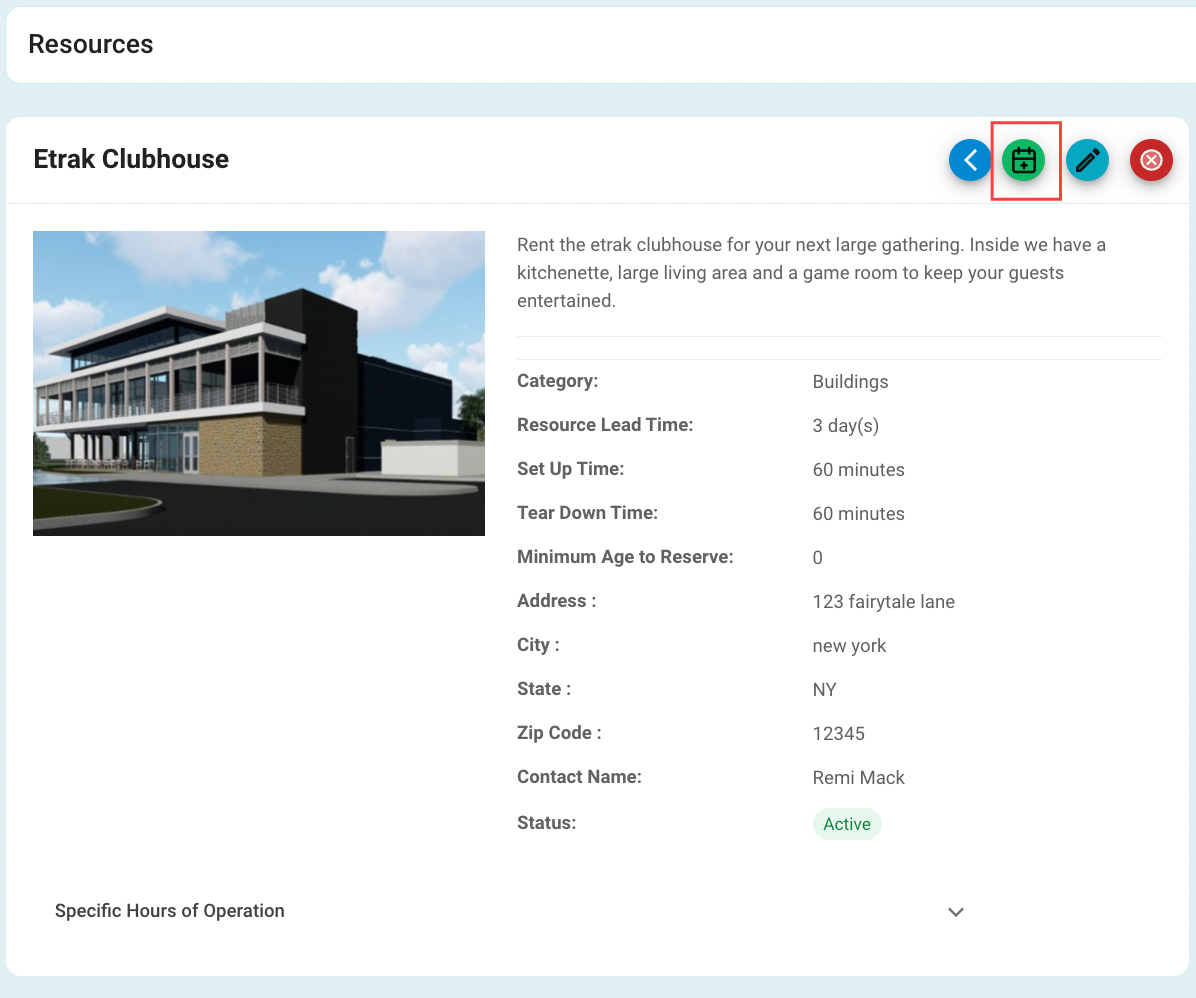
Select the green calendar icon located in the resource details box.
Option #2 - from the view scheduler
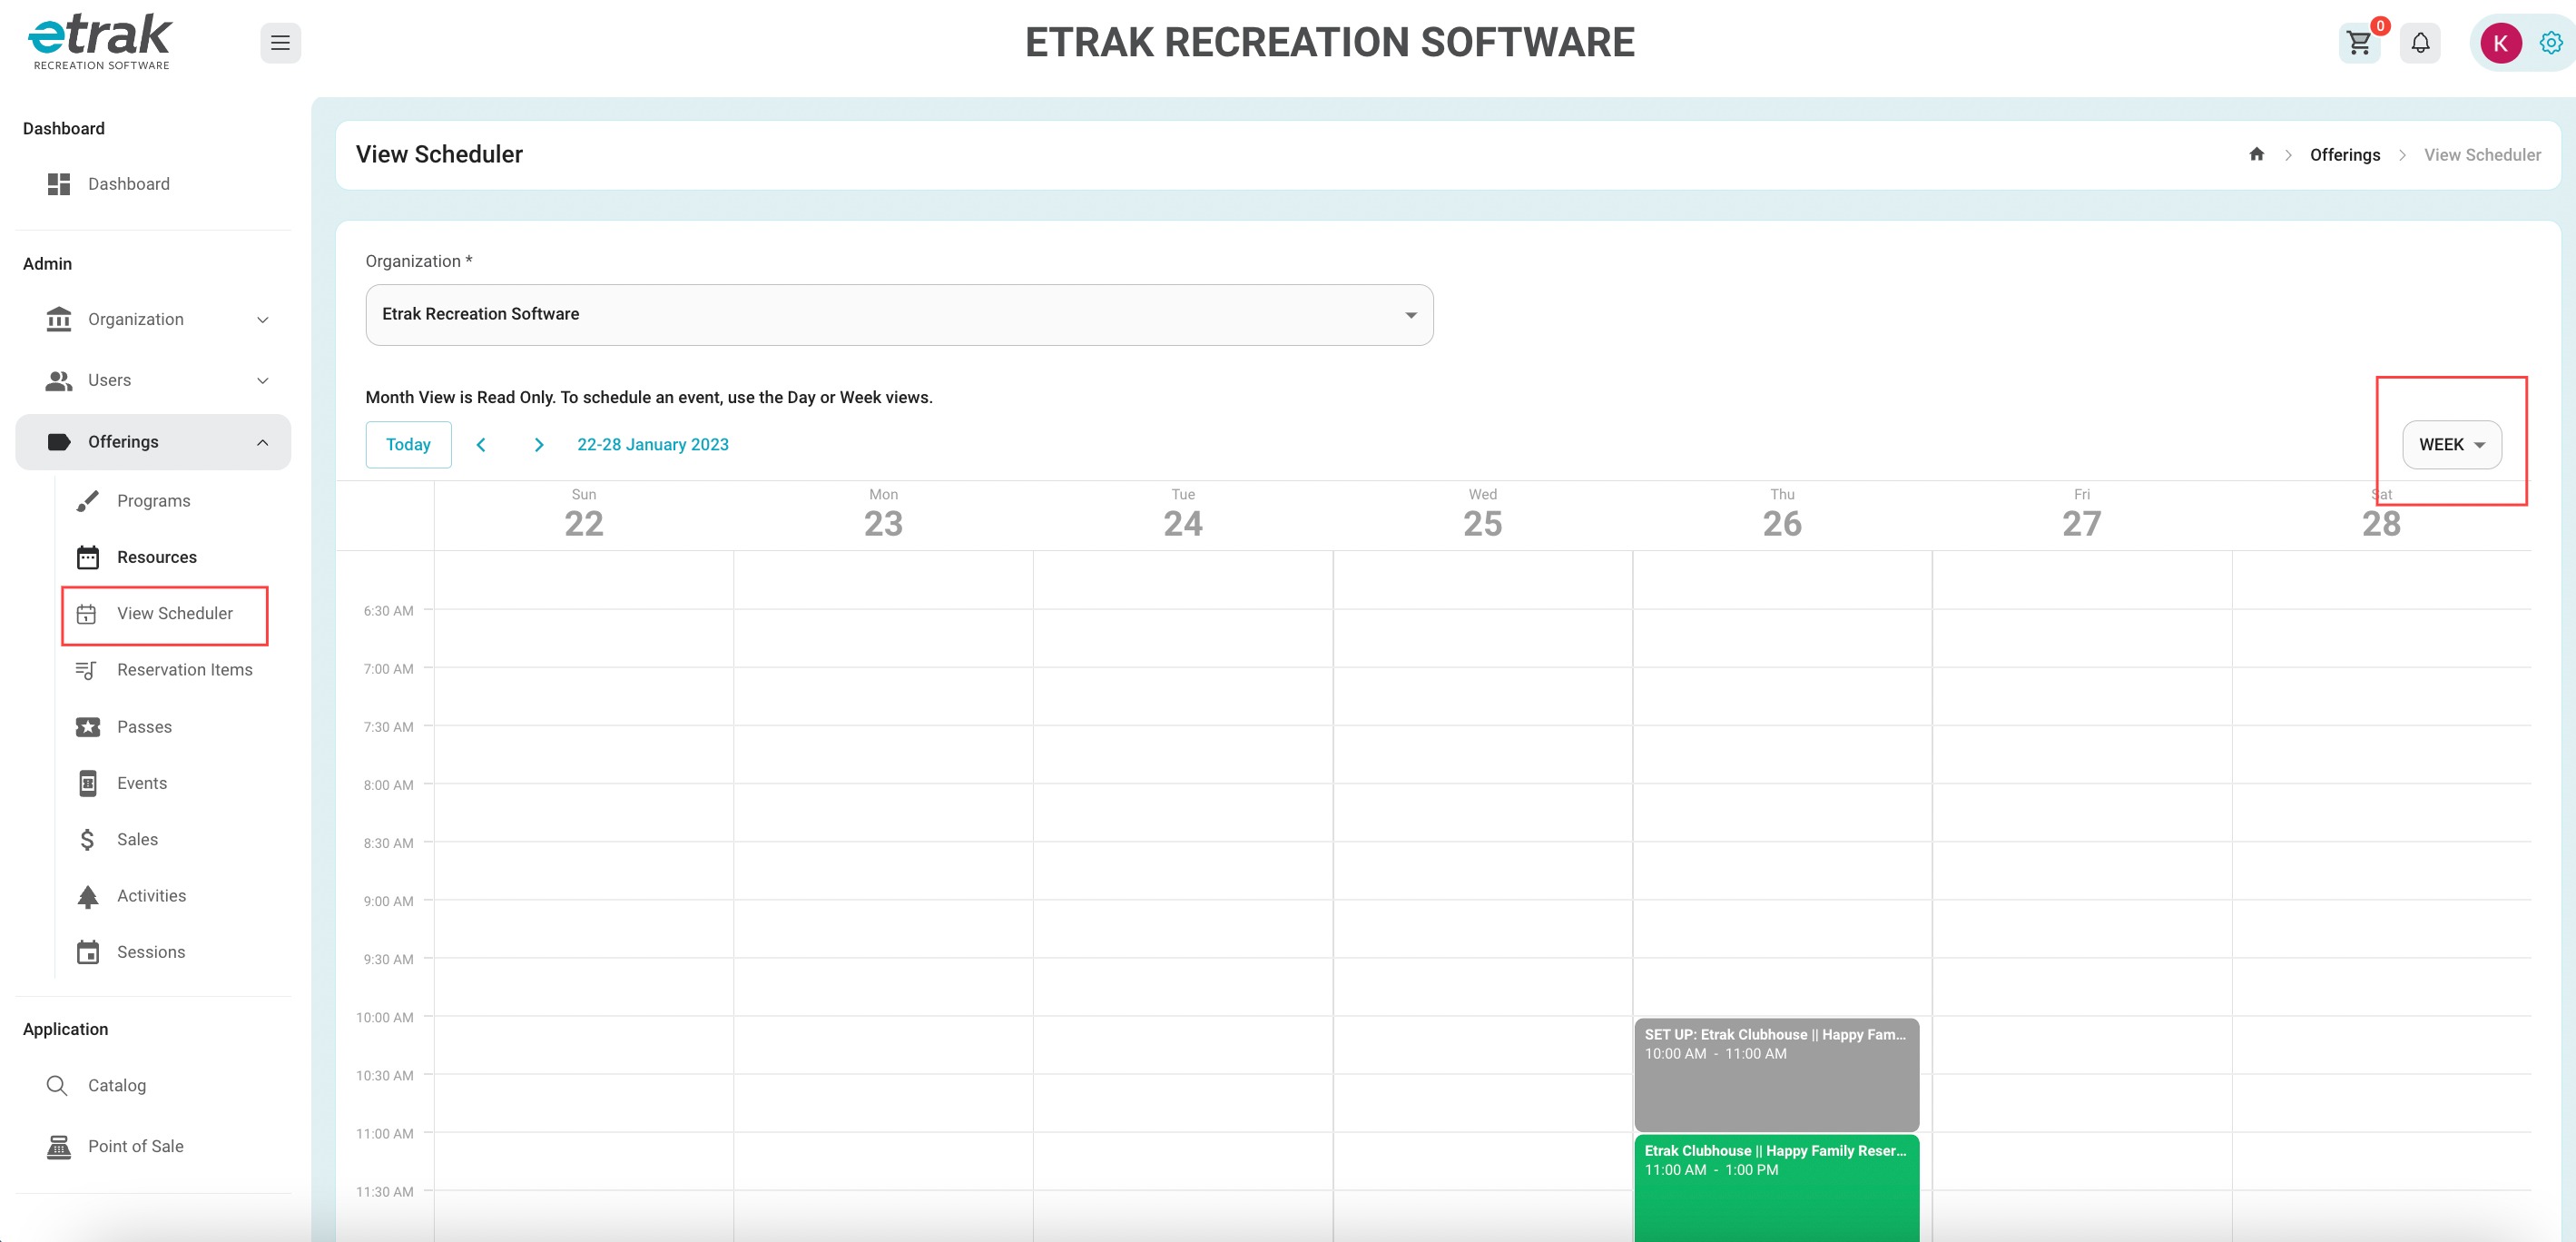
Select 'View Scheduler' from the 'Offerings' tab on the left side of the screen.
Use the filter on the right side of the screen to change the view from weekly to monthly or daily.
*Month view is read only.
Option #3 from the catalog
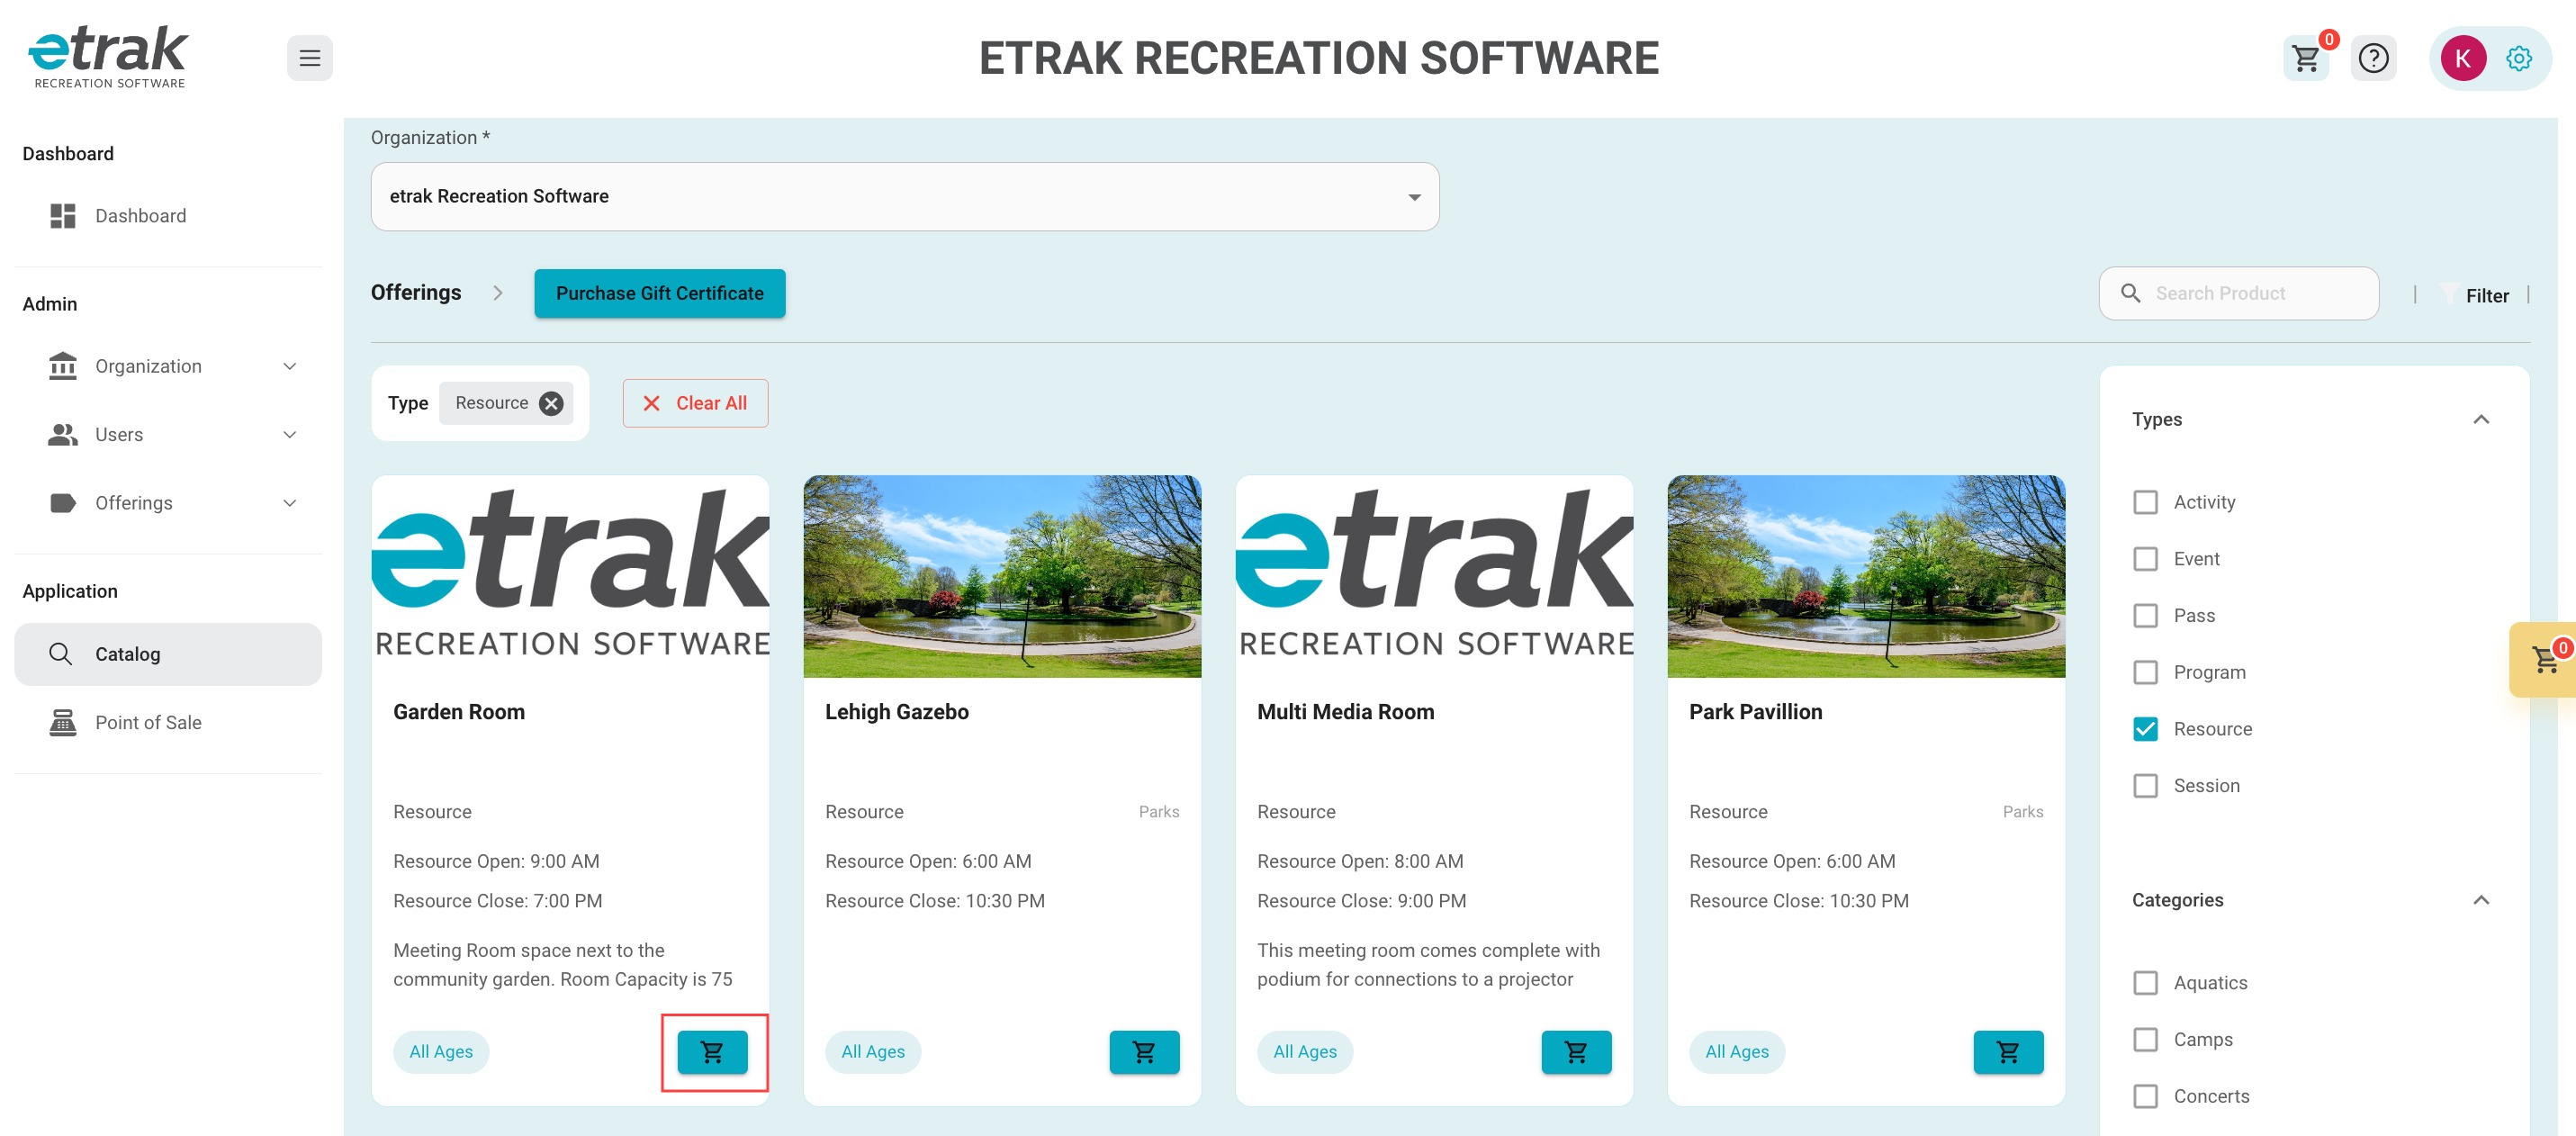
Select ‘Catalog’ from the navigation menu on the left side of the screen
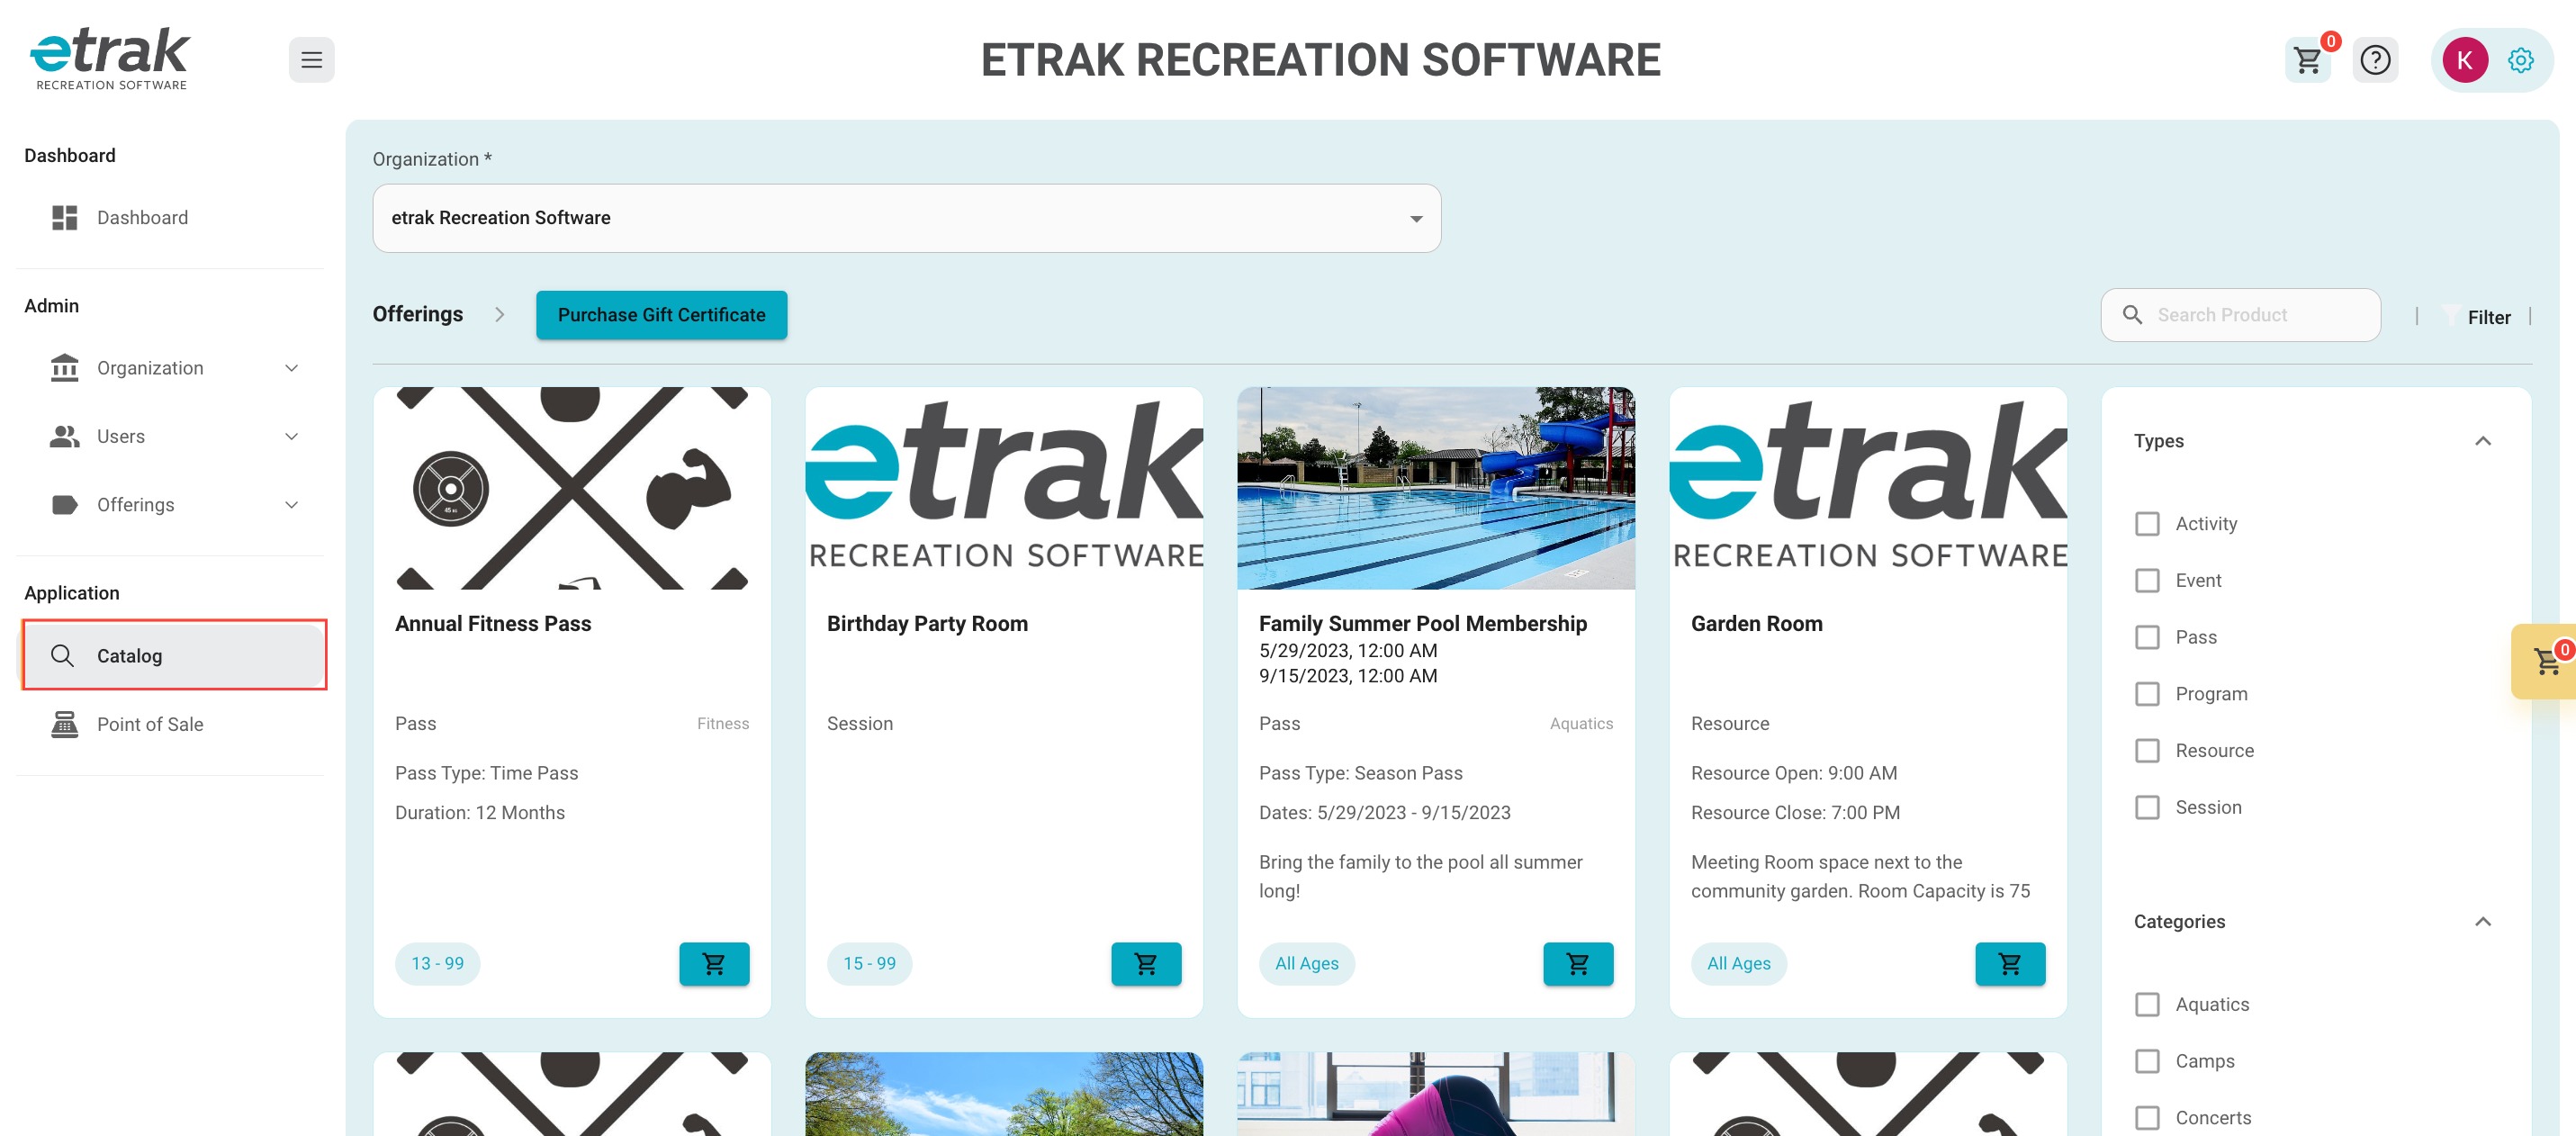
Use the search bar or the filter options to identify the resource that the customer wants to reserve.
Select the cart icon to start the reservation process.
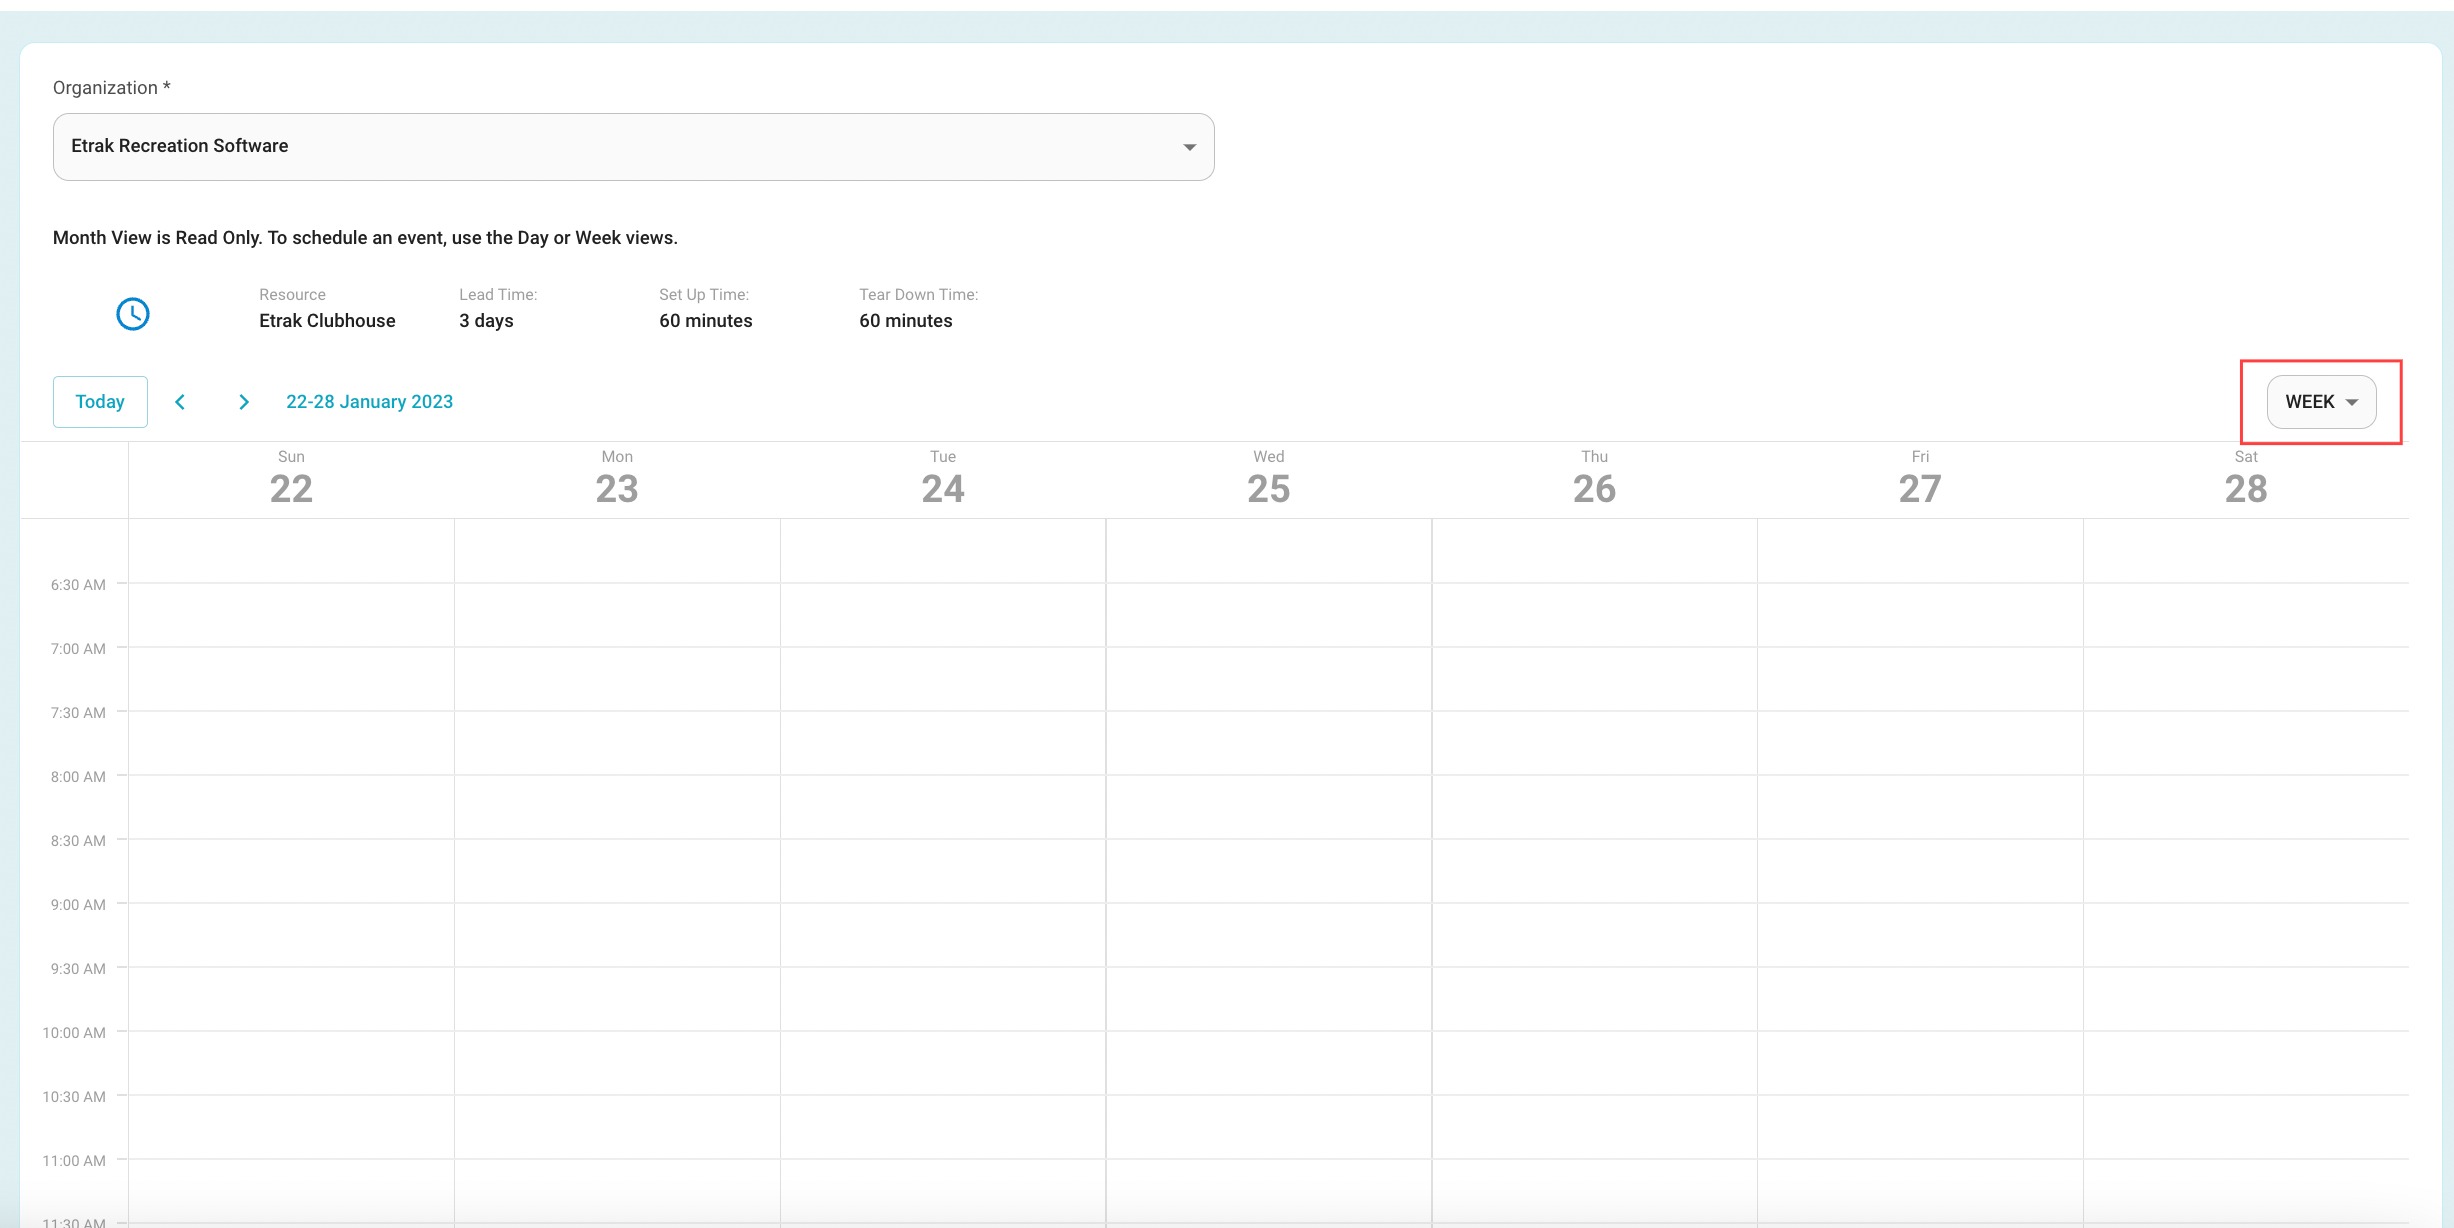
All 3 options bring you to the scheduler, once on this page:
Double click the calendar on the date and time the reservation is for.
Use the filter on the right side of the screen to change the view from weekly to monthly or daily.
*Month view is read only.
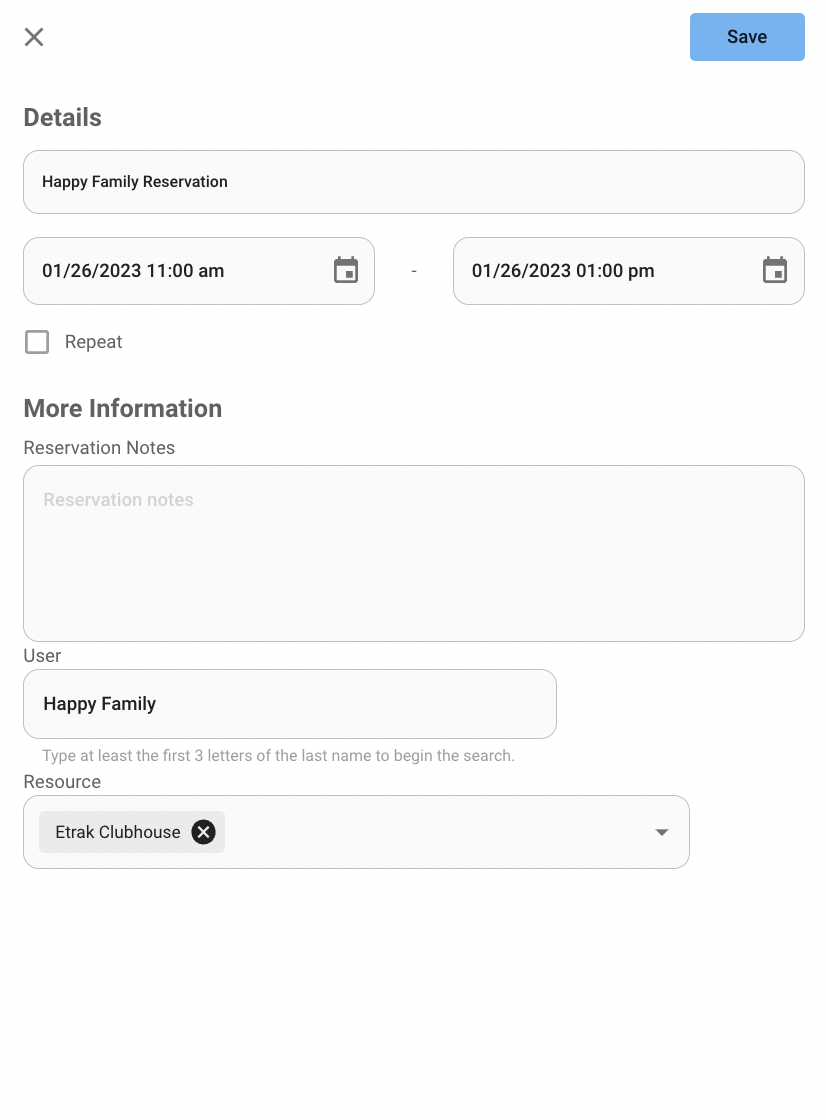
| Reservation Name | Reservation Start Date/ Time | Reservation End Date/ Time | Repeat |
| Reservation notes | User | Resource |
Click here to learn more about repeating reservations/programs.
Select ‘Save’ to proceed.
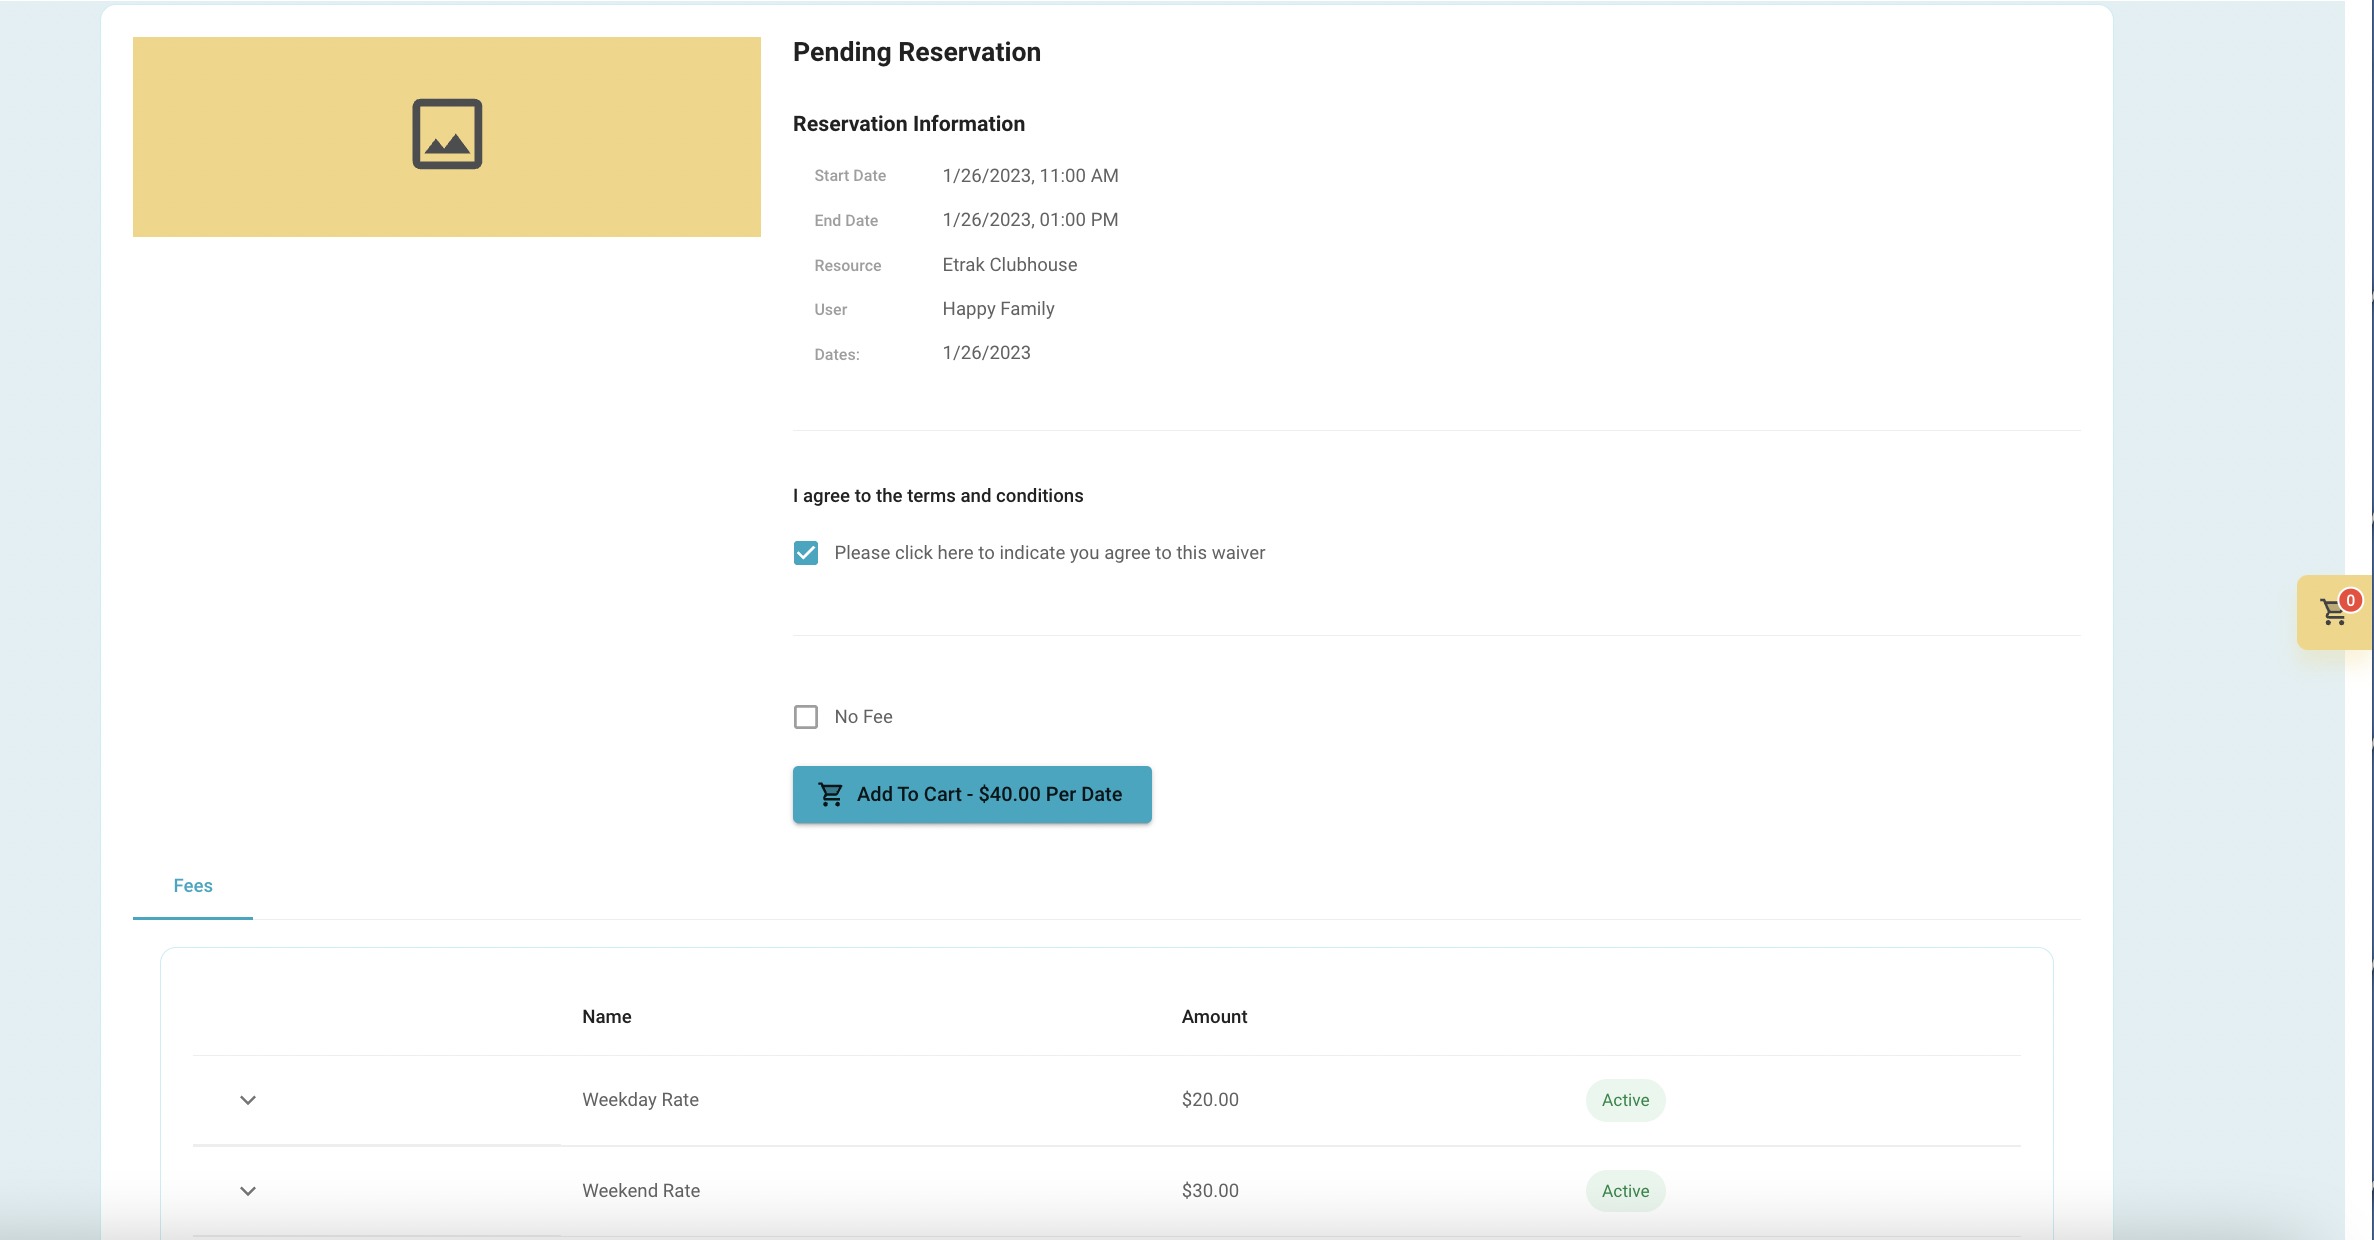
Review reservation details from this screen.
If a waiver is attached to this resource, user must agree to the waiver before adding reservation to the cart.
Admins have the option to select ‘No Fee’ for in-house reservations.
The total will calculate automatically based on the fees that are shown at the bottom of the screen.
Press ‘Add to Cart’ to proceed.
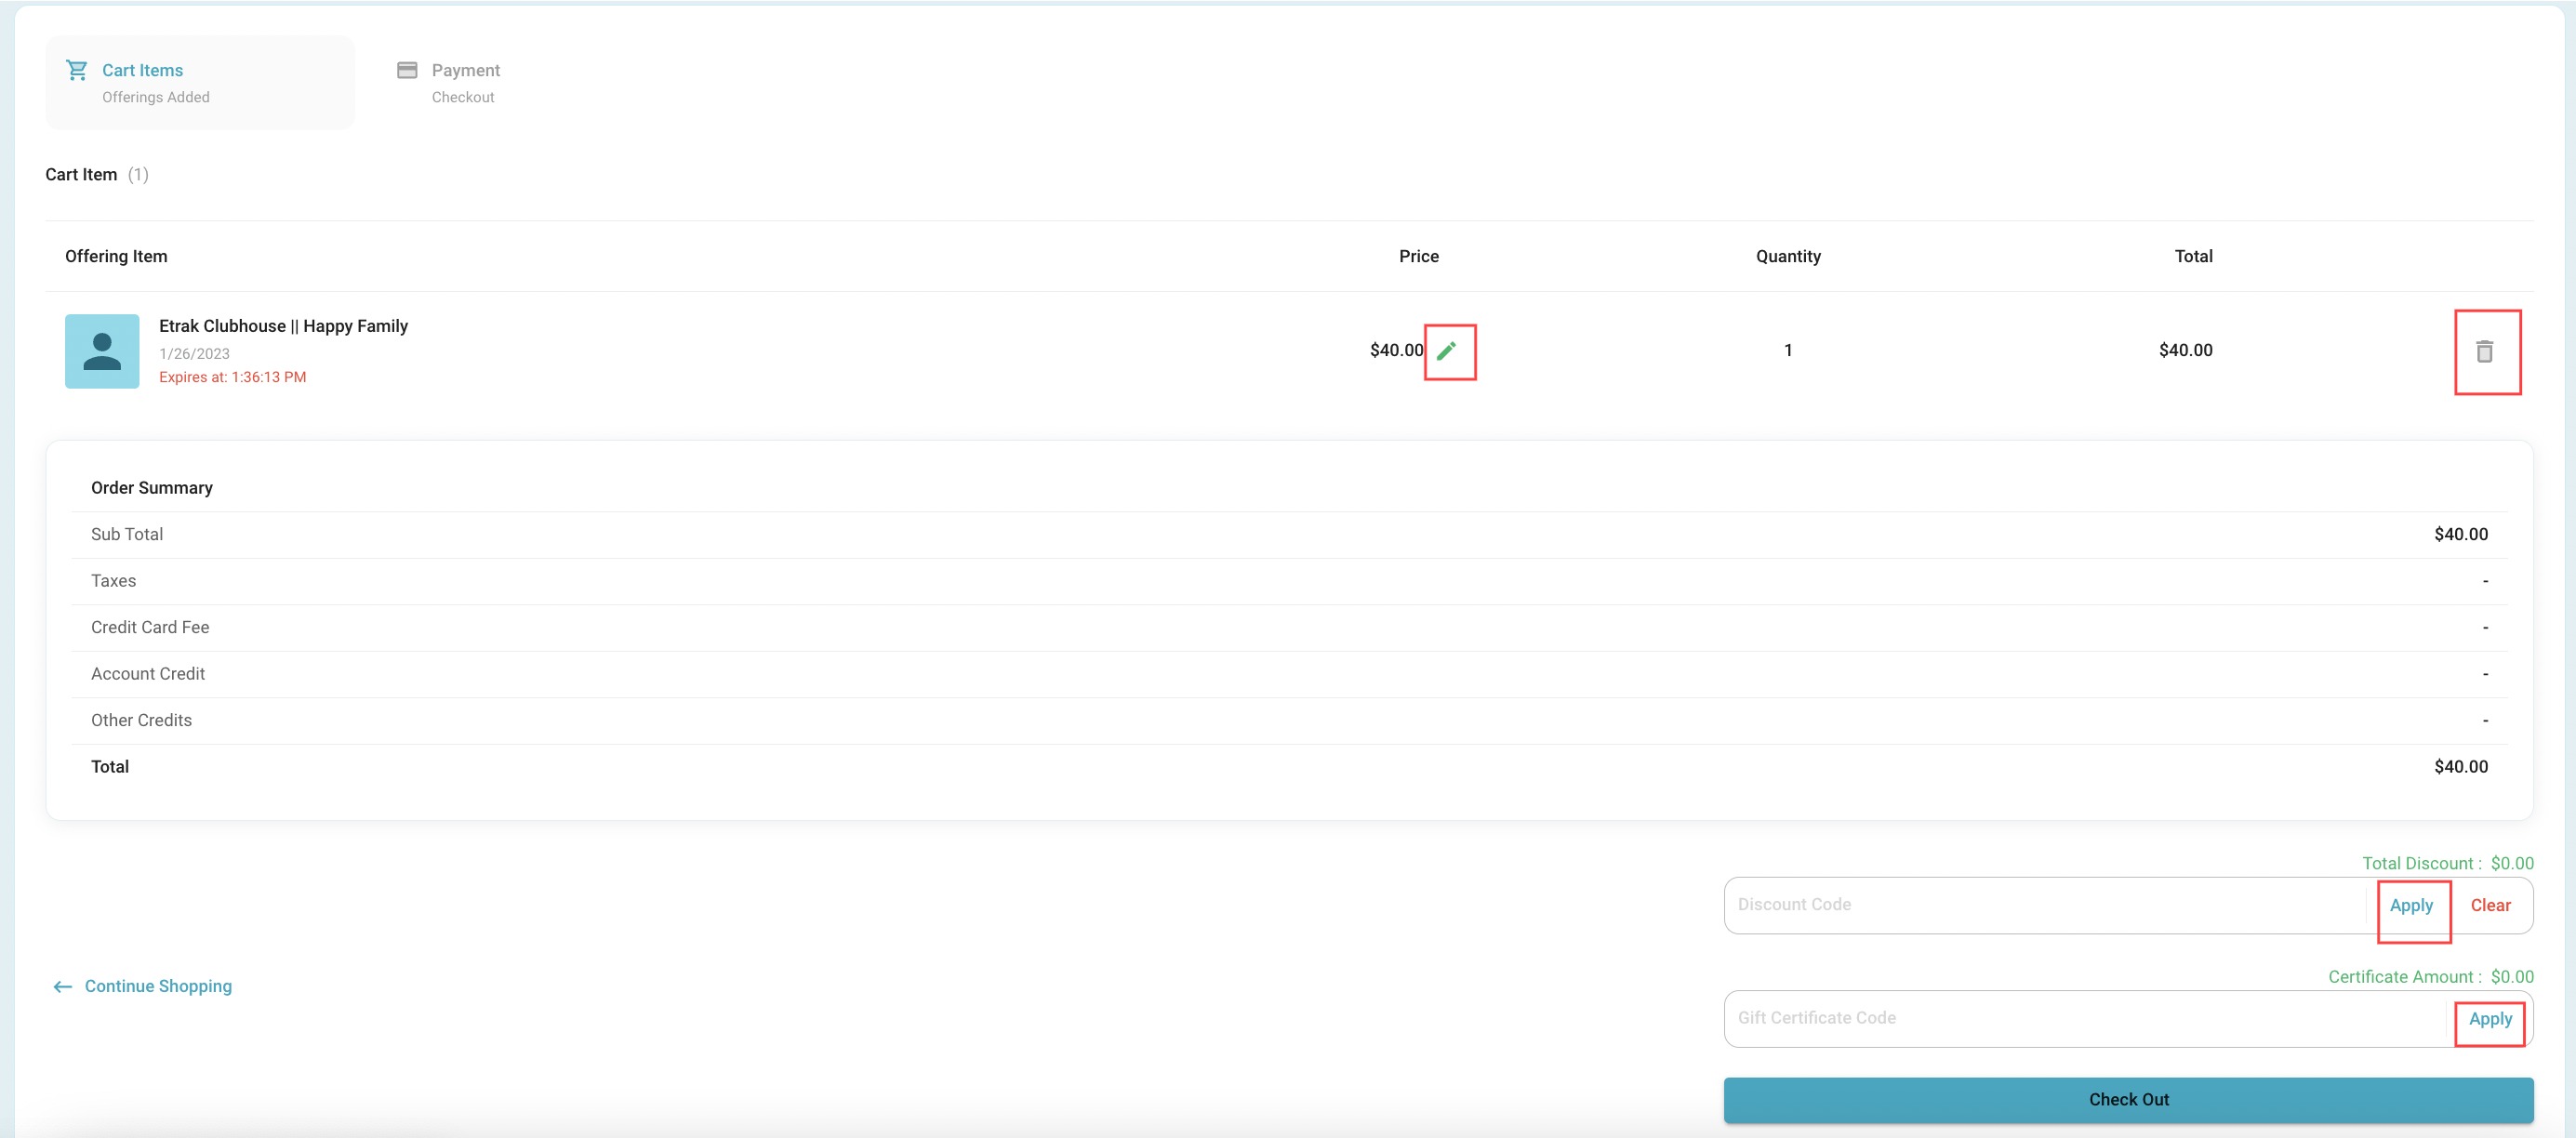
Review the items in the cart.
Price changes can be made by selecting the green pencil icon.
Reservation can be removed from the cart by pressing the trash can icon.
Discount or Gift Card codes can be entered at the bottom of the screen. Press ‘Apply’ after entering code before proceeding to ‘Check Out’.
If an Account Credit is on this users account that will also be an option at the bottom of the screen.
Press 'Check Out' to move on.
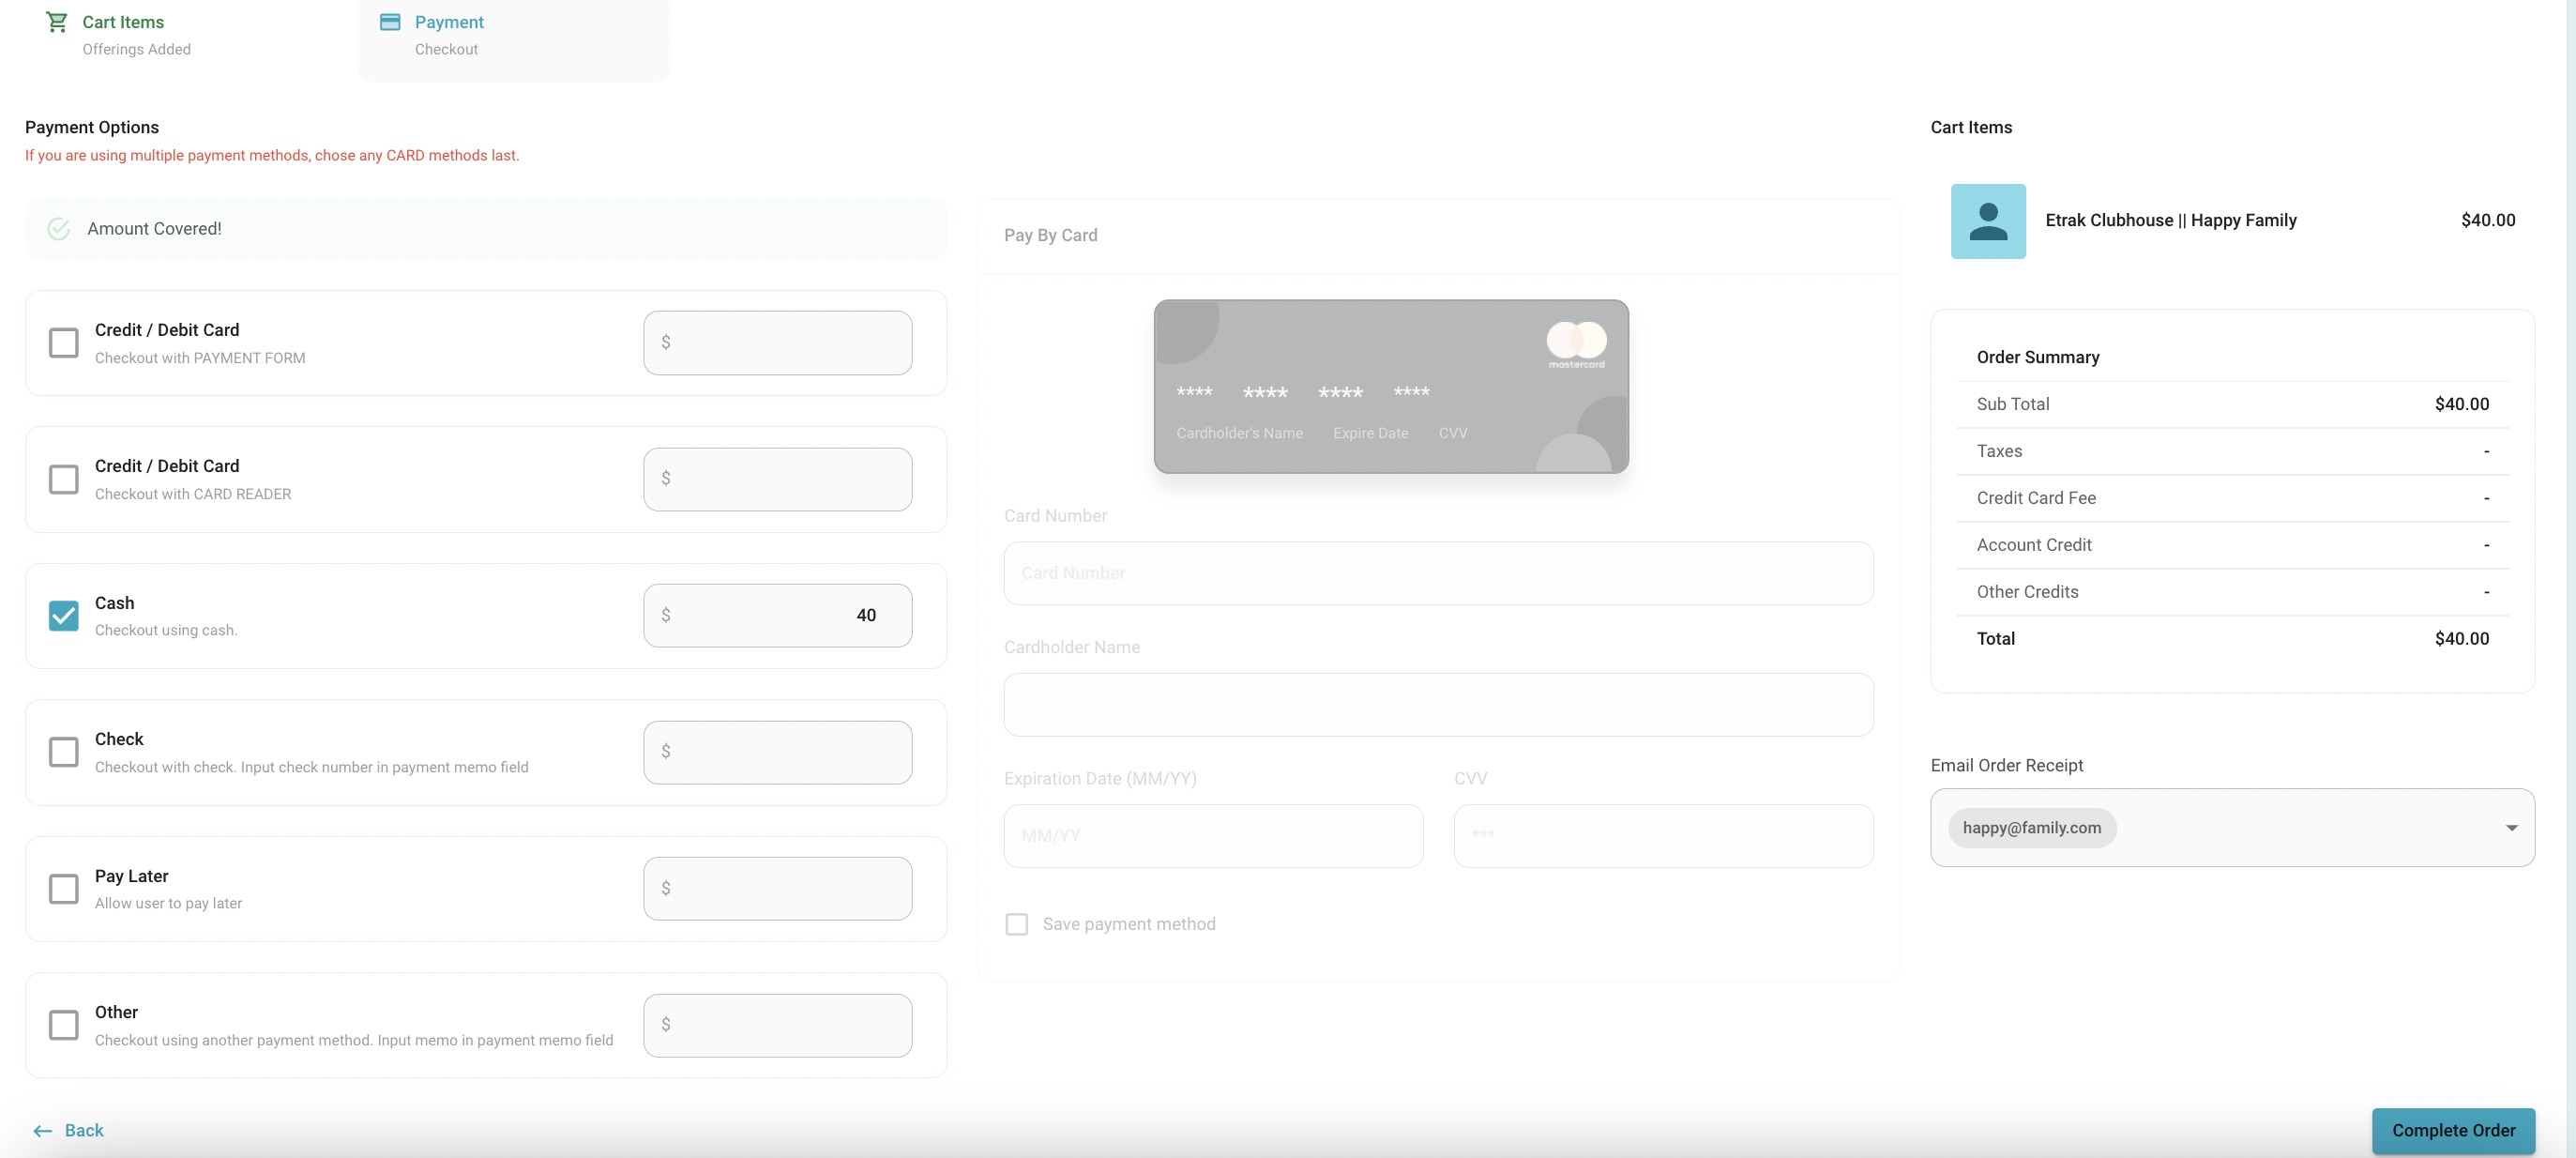
As an admin there are many payment options when checking out customers.
| Credit/ Debit Card- Payment Form | Credit/ Debit Card- Card Reader | Cash |
| Check | Pay Later | Other |
The users email will be connected to automatically send email receipt. If an emailed receipt is not necessary simply unselect the email from the drop down.
Press ‘Complete Order’ to move on to view the receipt.
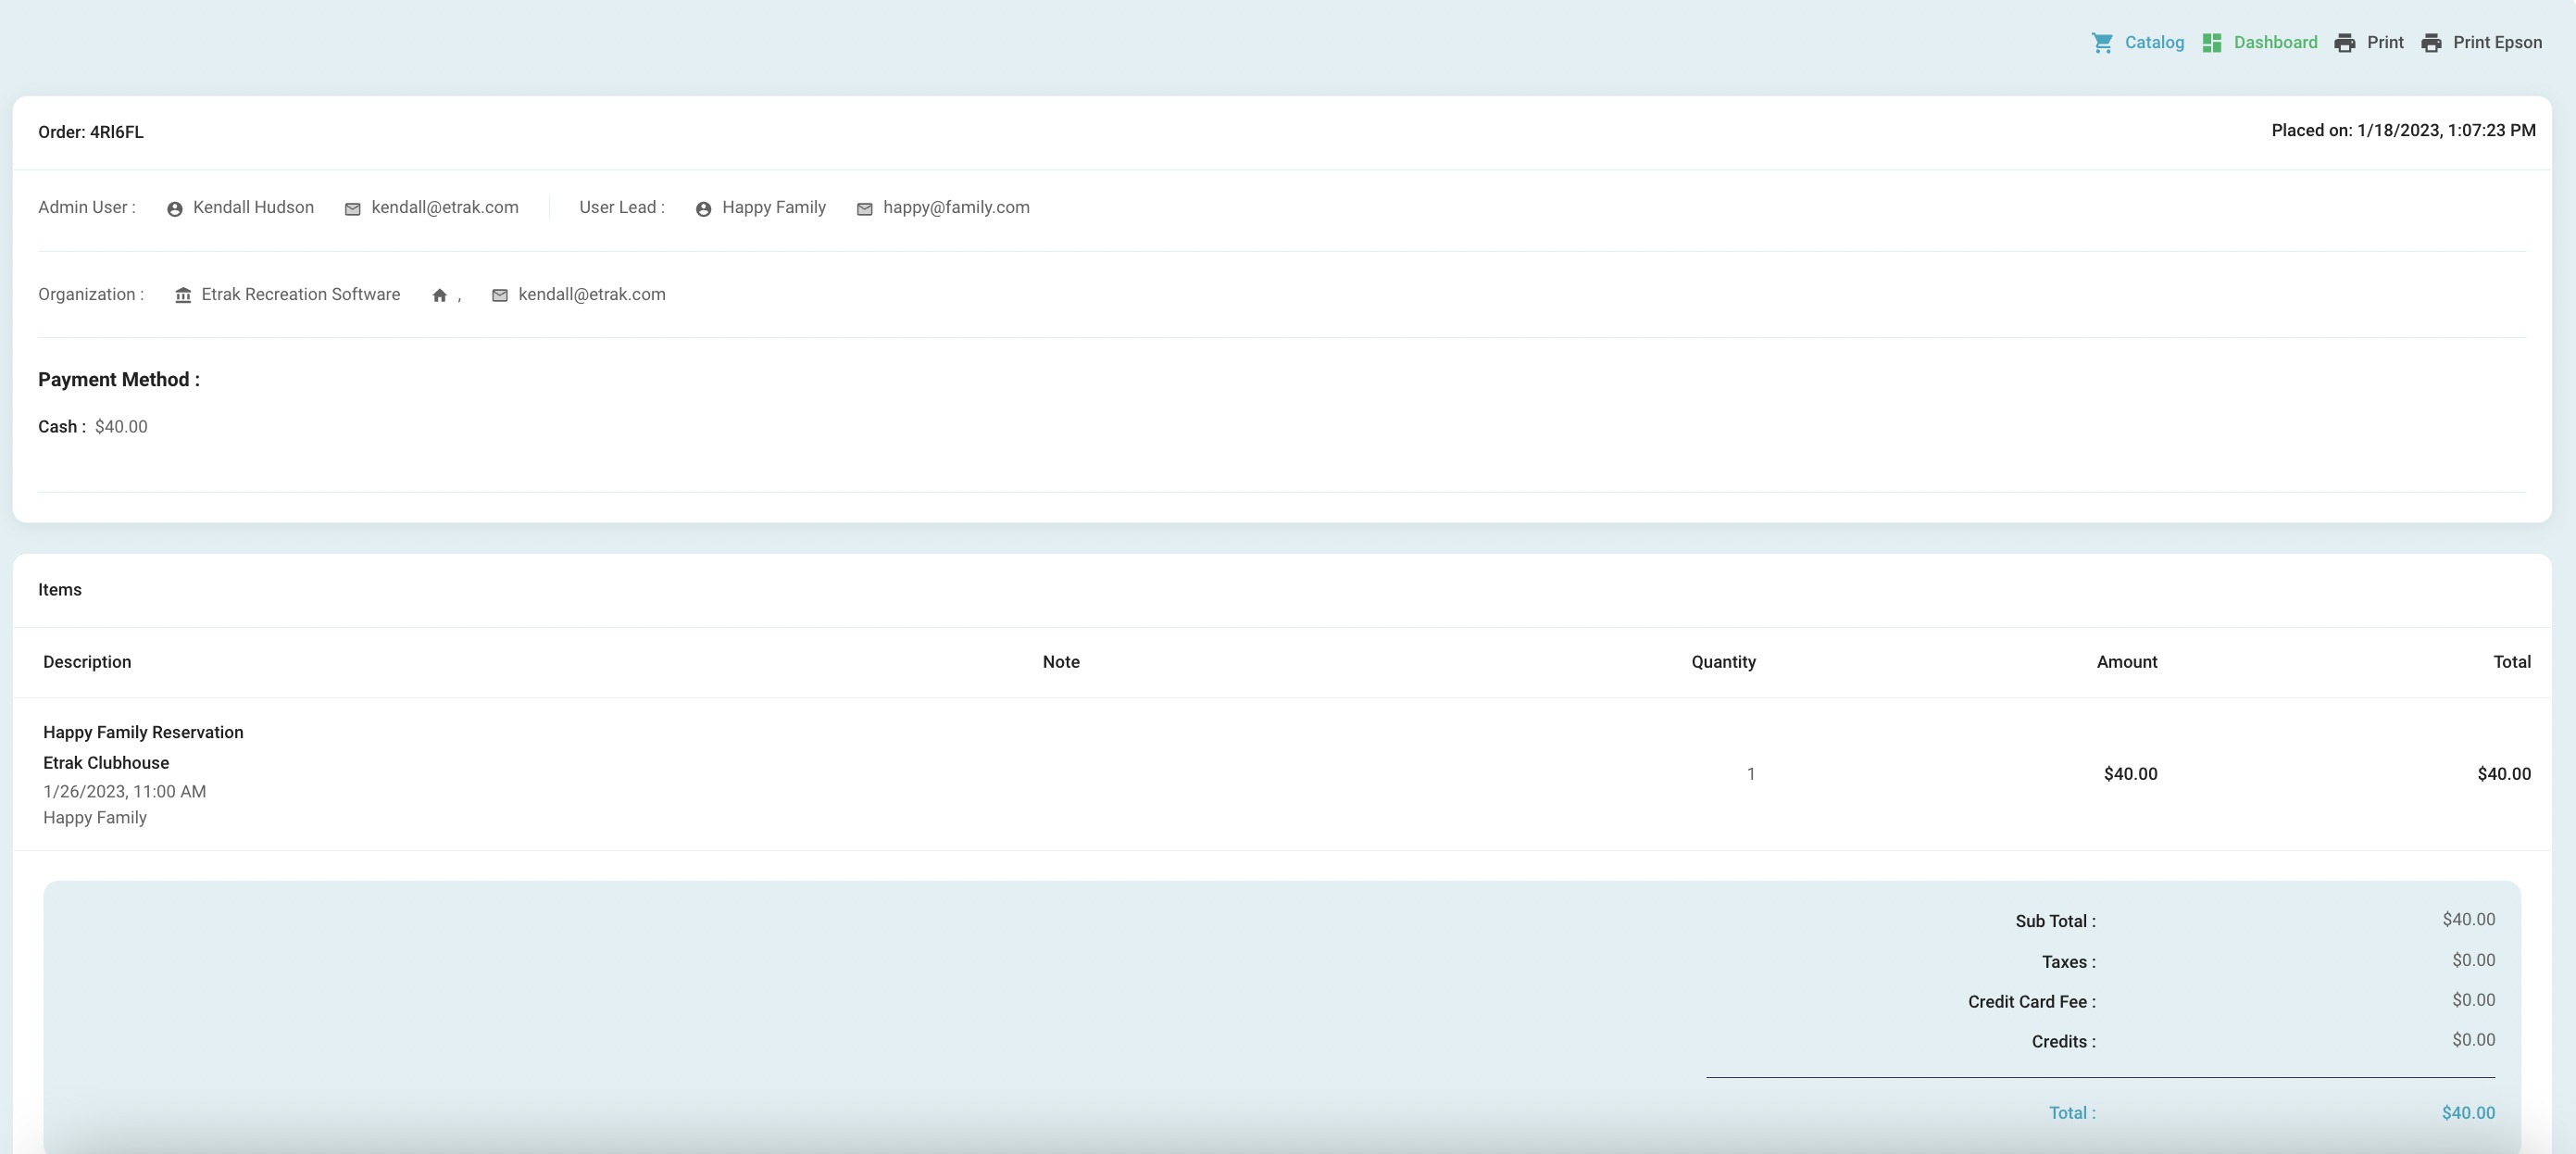
Receipt can be printed on standard printer paper view as well as an epson printer view.
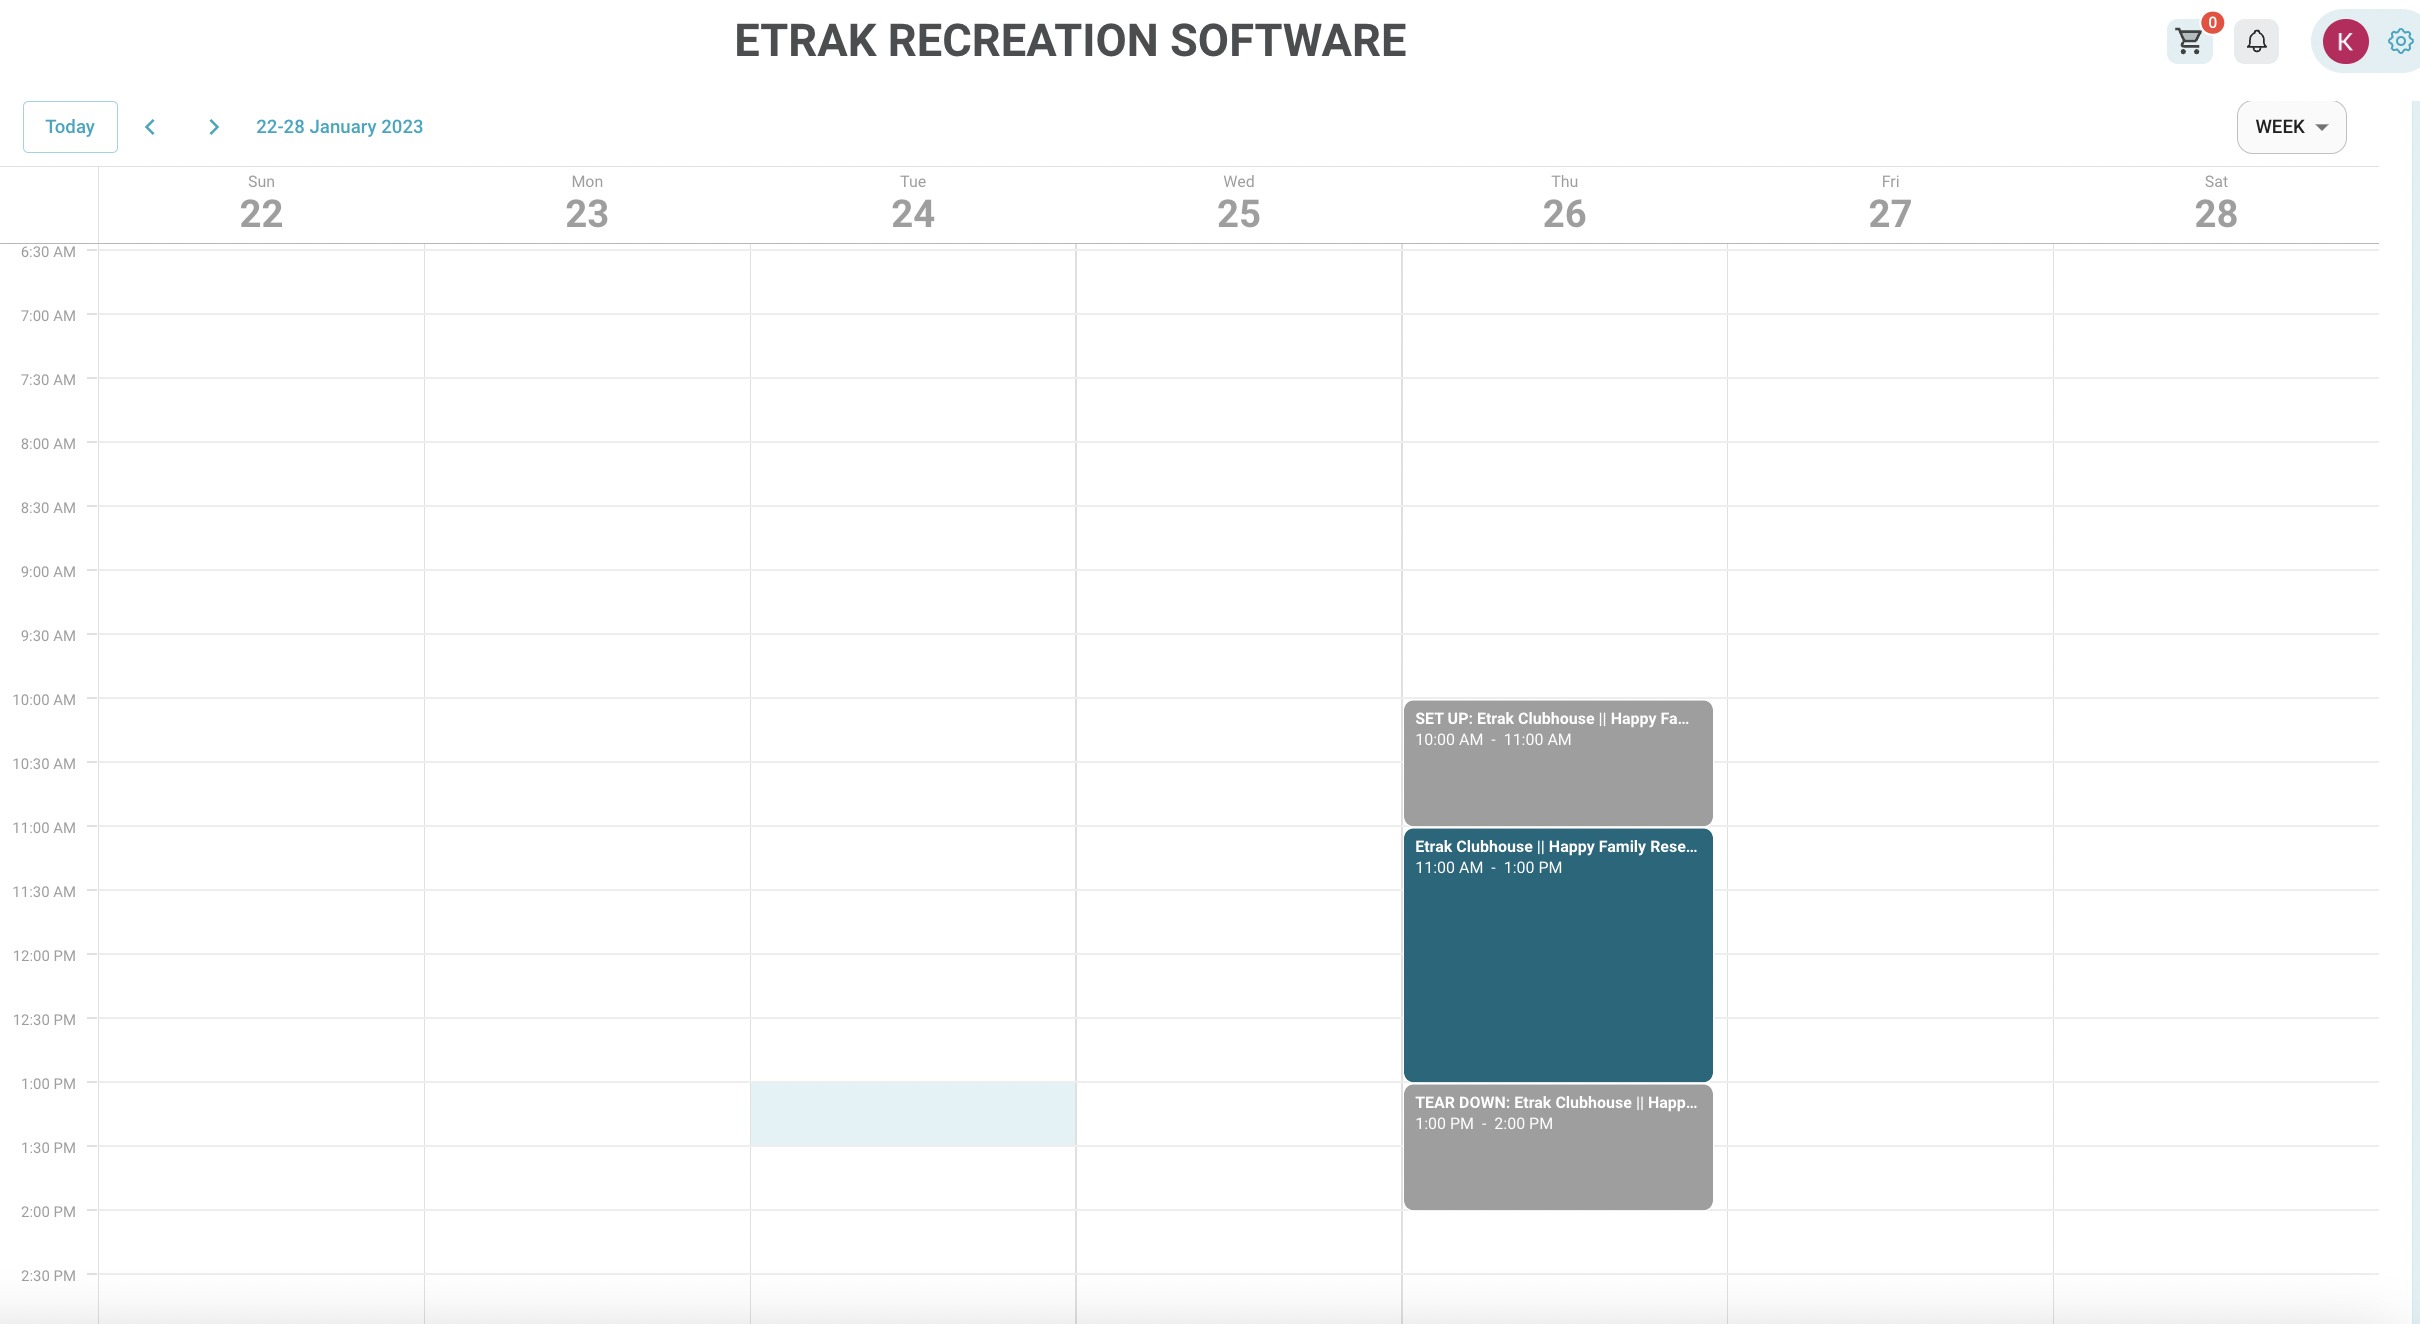
The scheduler will show the reservation blocked off like below:
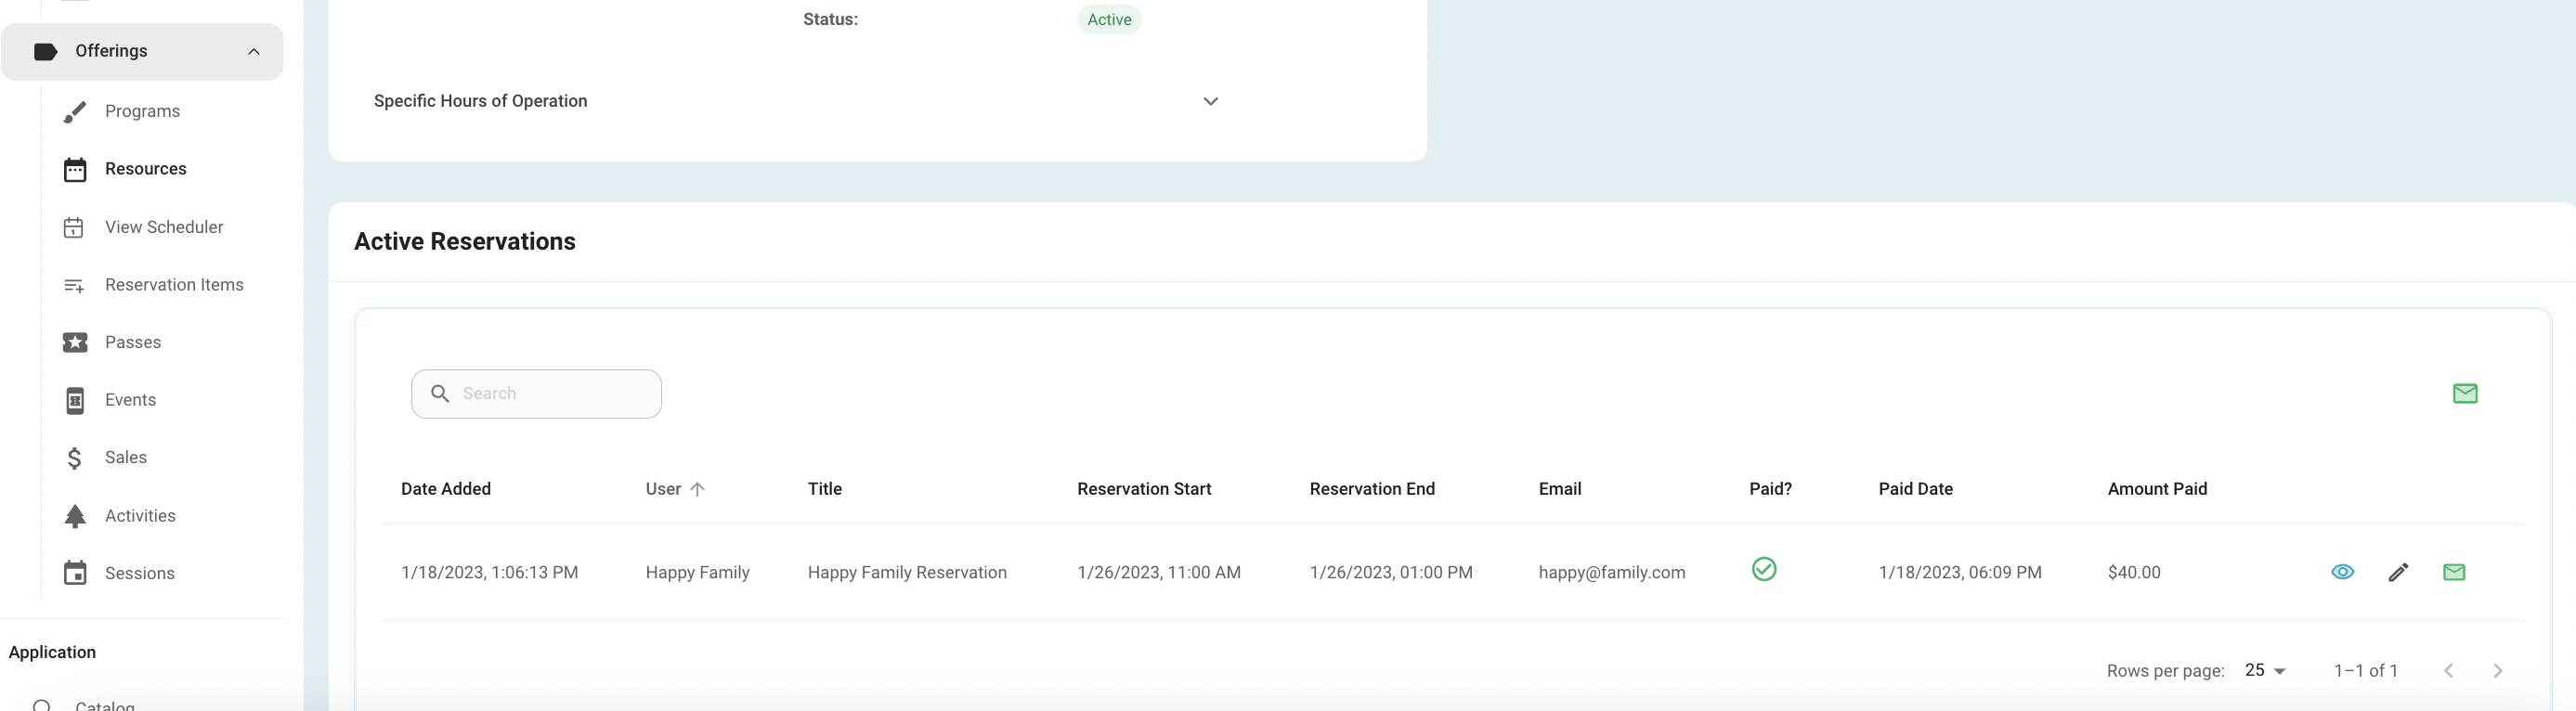
The specific resource page will show the reservation under ‘Active Reservations’.
The reservation can be refunded by clicking on the ‘pencil icon' that corresponds with the reservation.
An email can be sent directly to the user by selecting the ‘envelope icon’
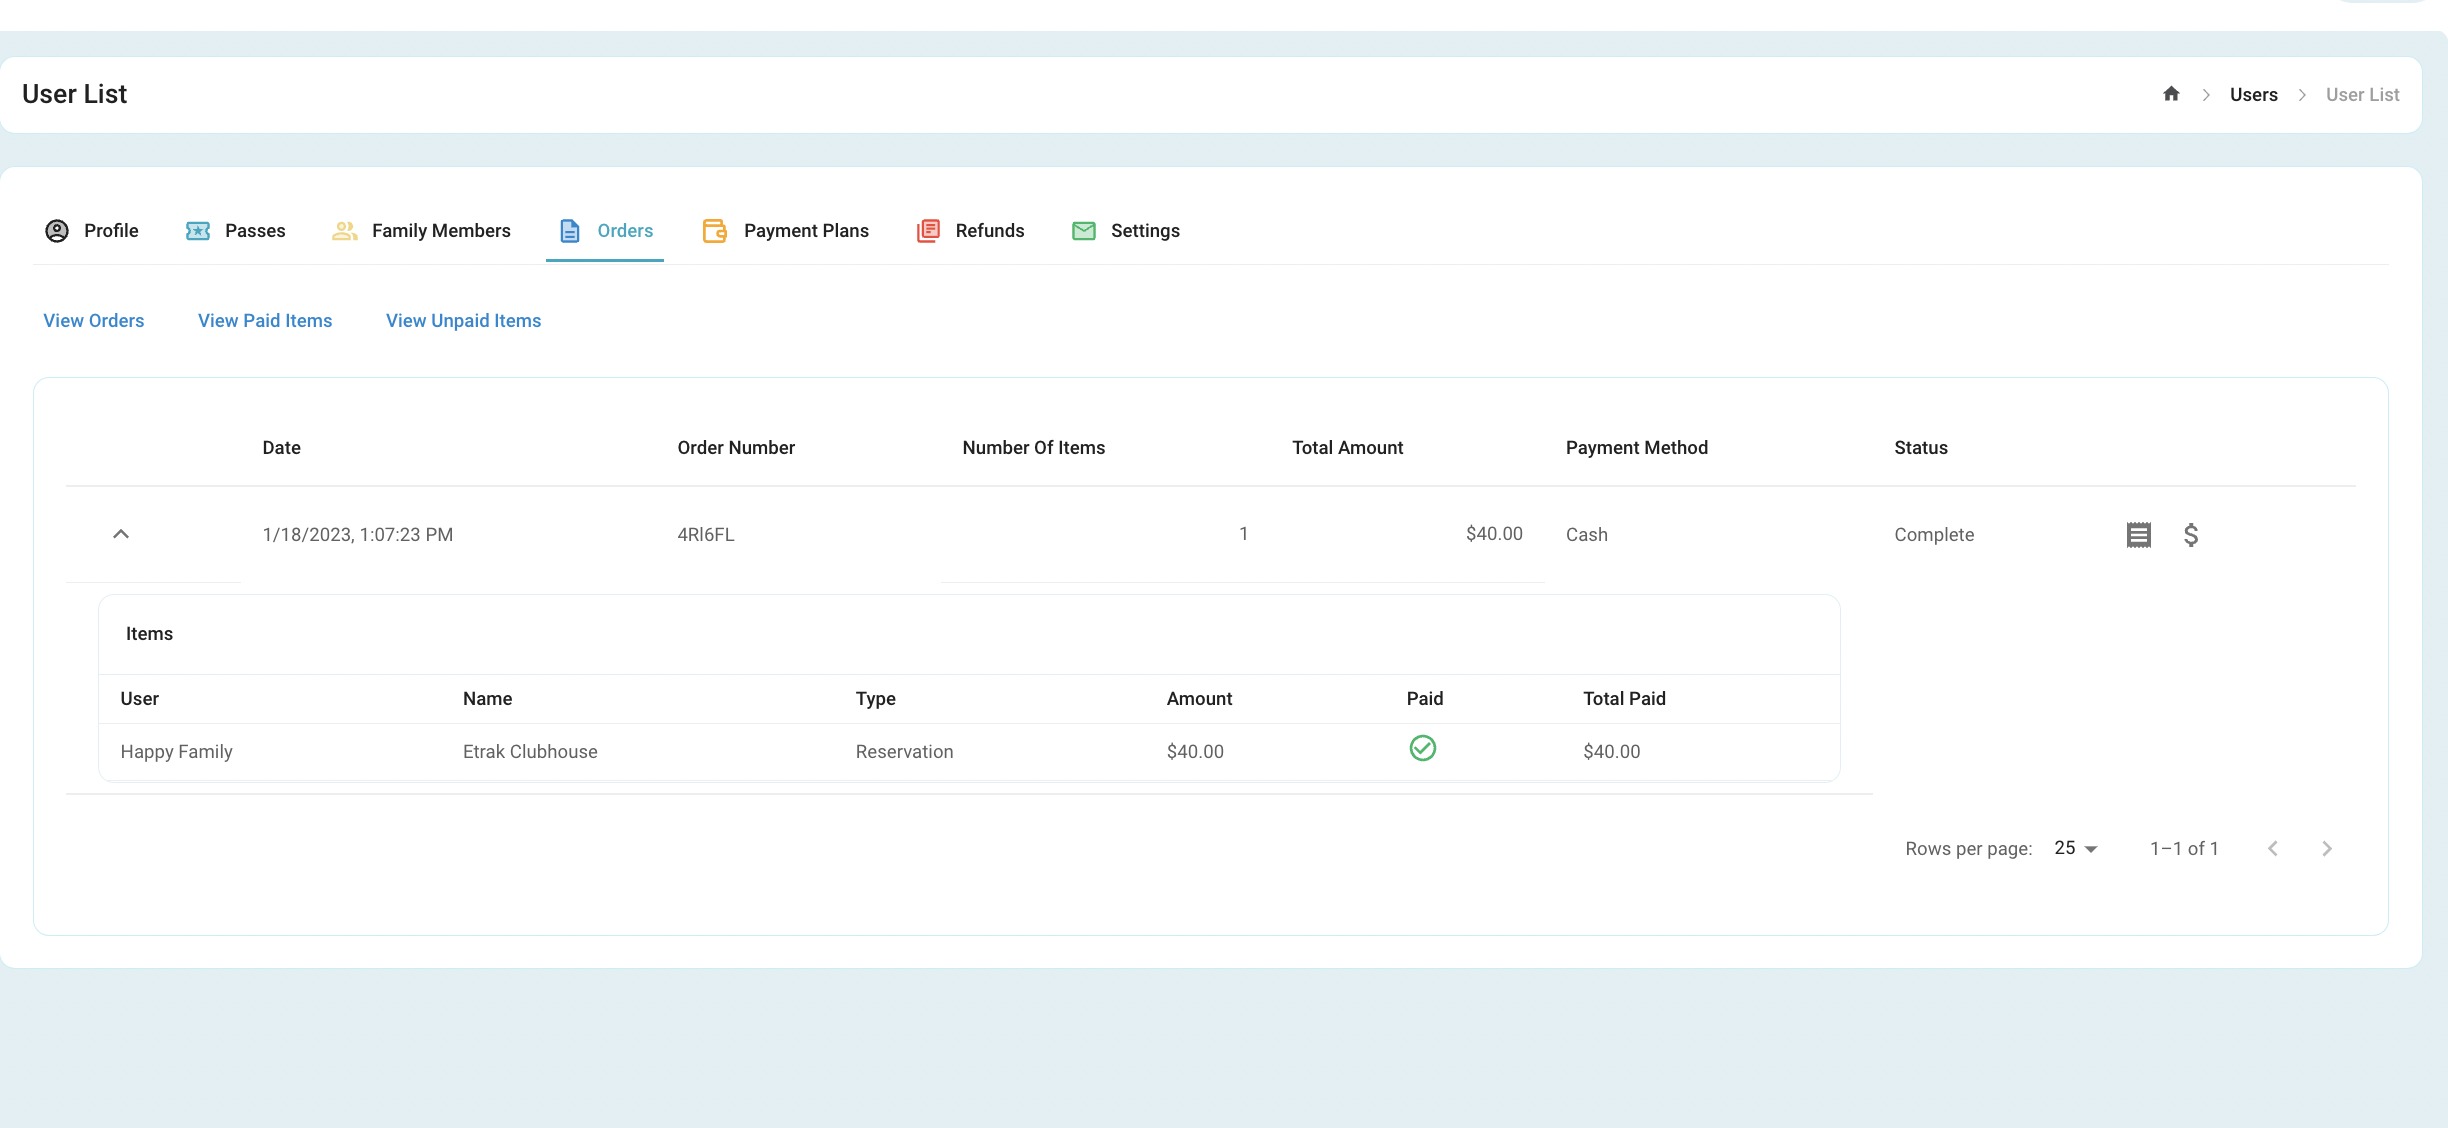
The reservation can also be found under the ‘Orders’ tab in the user profile.
View a receipt by clicking the ‘receipt’ icon to the right side of the screen.
Refund by clicking the ‘$’ icon on the right side of the screen.
Success!