1. Full session registration opening.
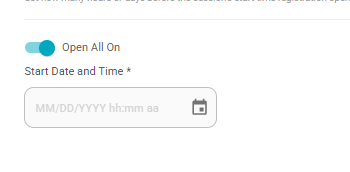
We have implemented the ability to open registration for all occurrences of a session at once.
To enable this option, simply toggle the setting on during session creation.
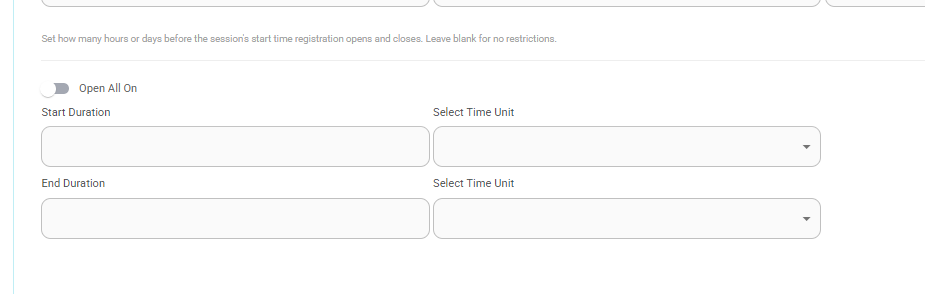
Next, select the date and time when users will be allowed to register for any of the session’s occurrences.
2. Display board capability
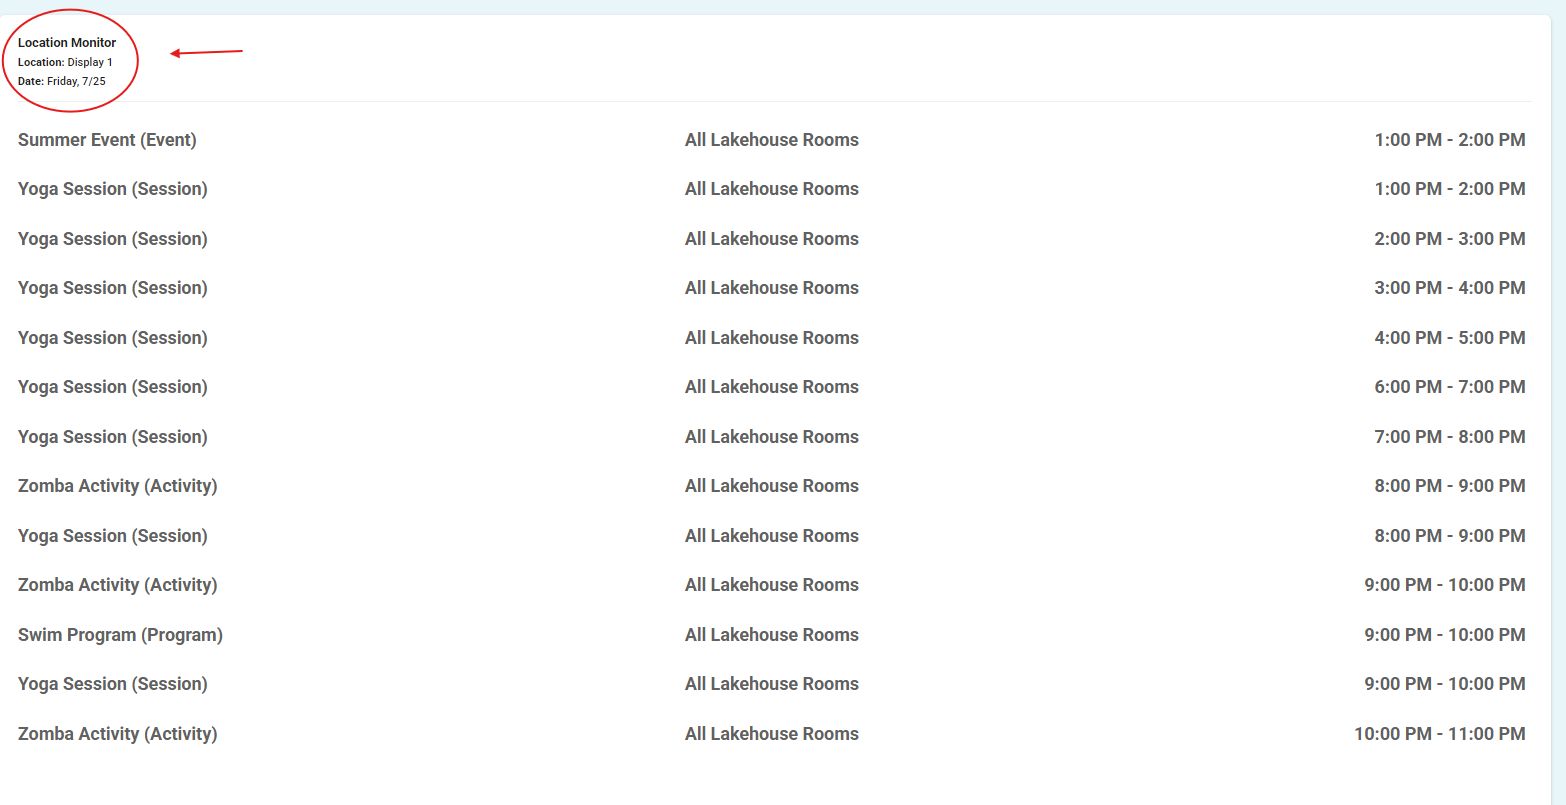
We have now included the ability to create a display board link in a list scroll view.
Notes -
*Programs, Activities, Events, and Sessions are the only offerings that will show in this screen.
*In order for an offering to display here, you will need to ensure a Resource is selected in the Offering setup.
*At this time, all offerings will display here for the given day, even after their end time has been reached.
To set up:
Navigate to the Organization tab on the right-hand side.
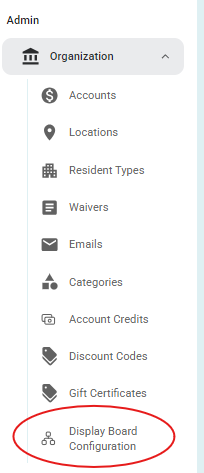
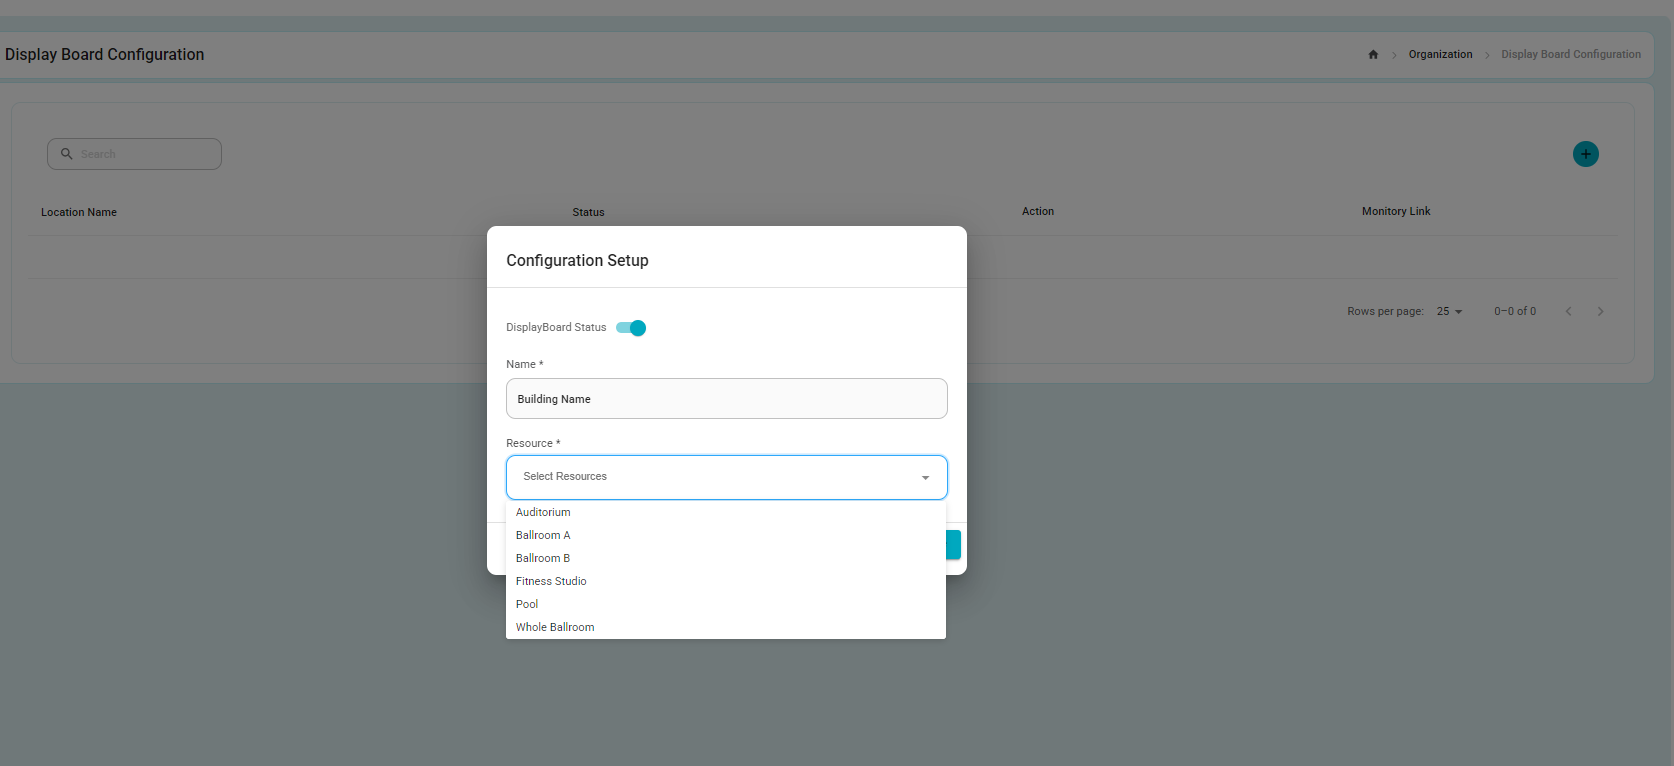
Click the blue + icon to open a new creation window.
Enter the name of the display board and assign the resources you want to display.
Note: Once a resource has been assigned to a board, it will no longer appear in the dropdown options.
After creation, you will be returned to the list of your existing display boards.
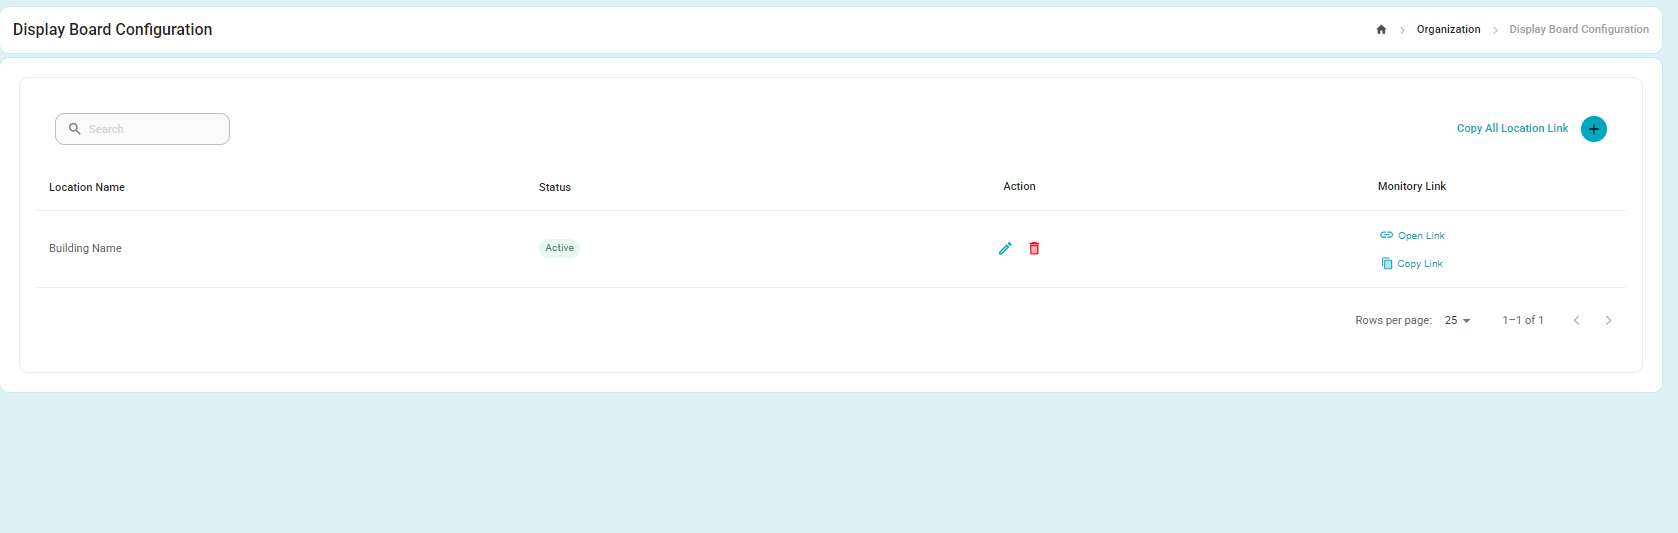
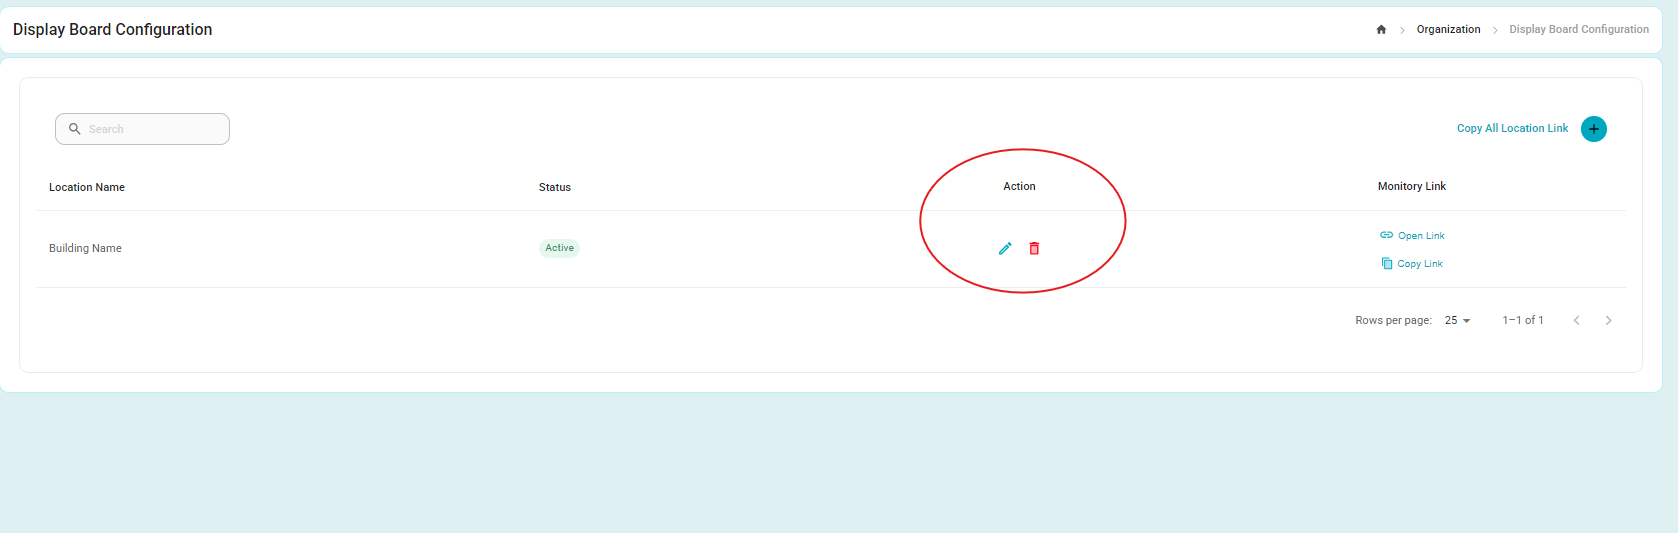
To edit a display, click the pencil icon.
To delete a display, click the red trash can icon.
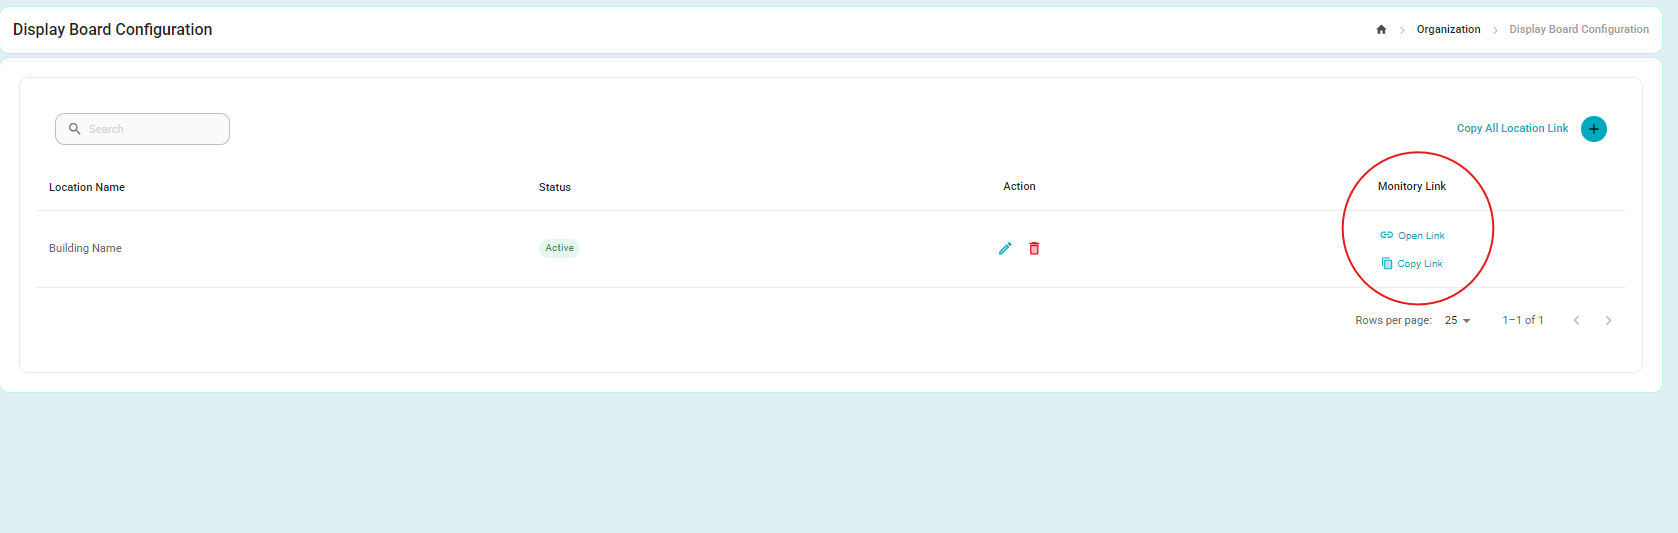
To view the display, click "Open Link." This link should be opened on the screen where you want the information displayed.
To copy the display link, click "Copy Link."
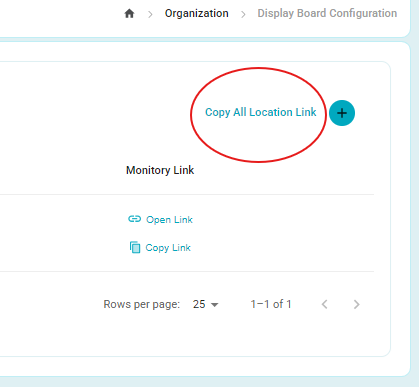
You can also use "Copy All Location Link" to copy the link in which all offerings across all resources will be displayed.
The View:
This screen functions as a scroll. When all assigned resources have been displayed, it will automatically transition to show all resources/locations.
Once the full view has completed, it will return to displaying only the assigned resources. This cycle repeats continuously.
The top section displays the name of the display and the current date and time.
If there are not enough offerings to initiate a scroll, the screen will pause for 30 seconds before moving to the next screen.
3. Age Restriction Override
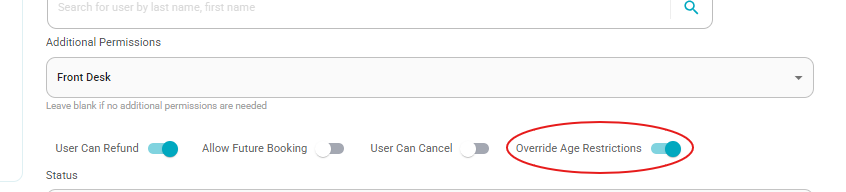
A new toggle has been added to individual user profiles, allowing front desk employees to override age restrictions.
This setting is turned off by default. To enable it for specific staff, go to their user profile and turn the toggle on.
4. Reservation Notes
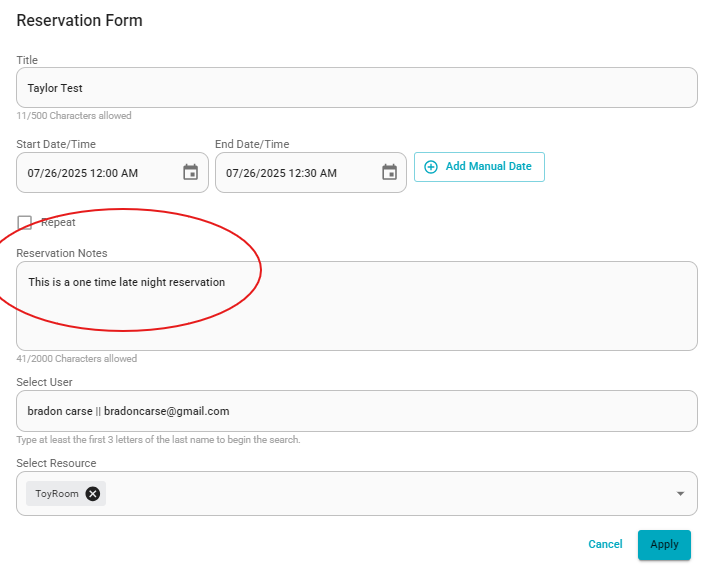
We’ve added the ability to create multiple reservation notes and to print reservation notes.
During reservation creation, you can add a note directly.
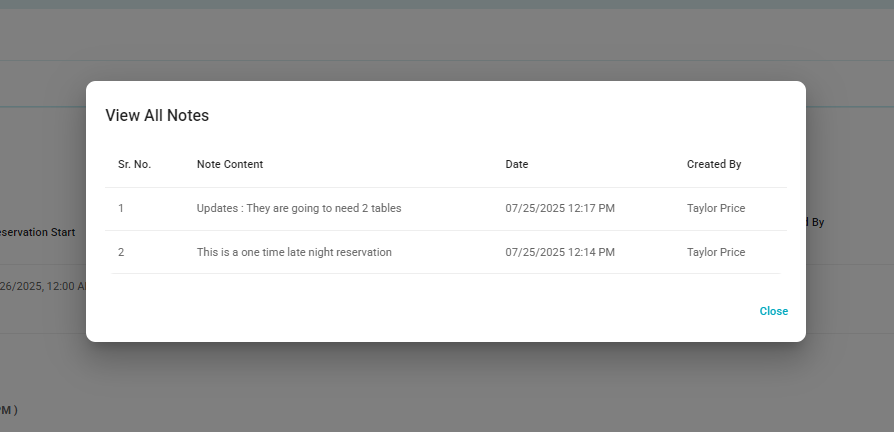
A new button in the Active Reservations window allows you to view all notes associated with a reservation.
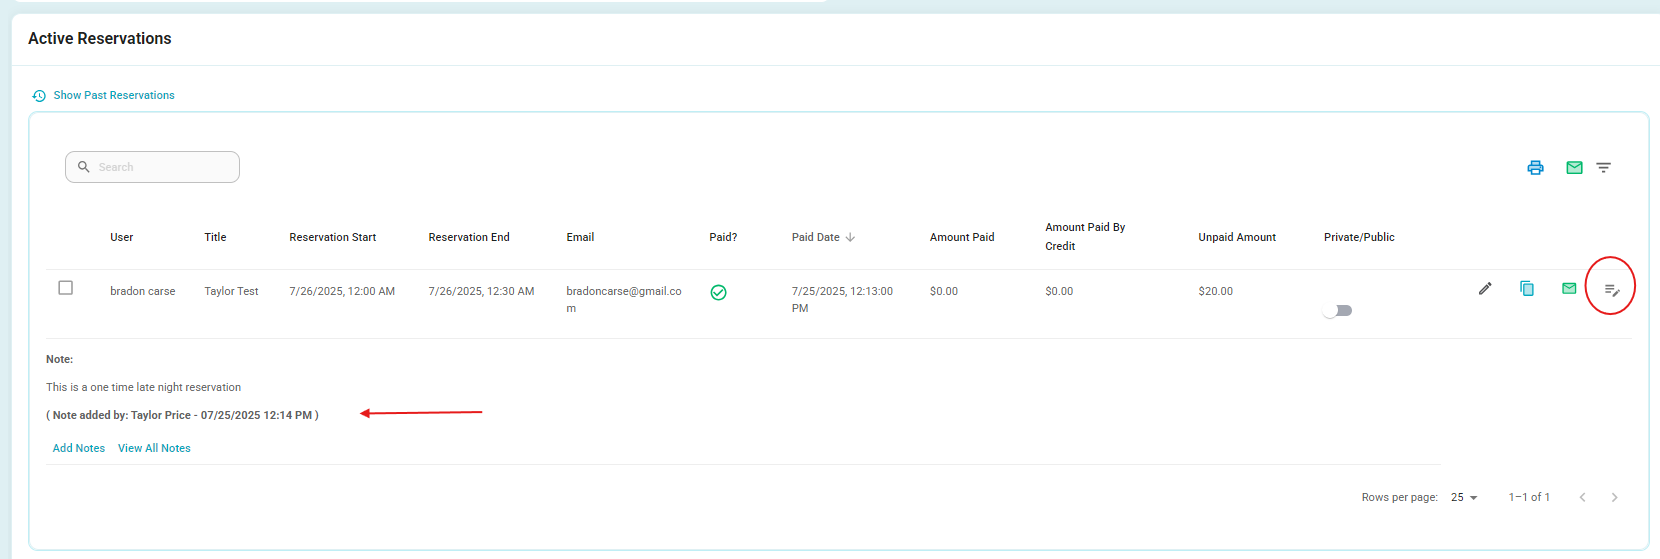
Use the provided links to add new notes or view the note history.
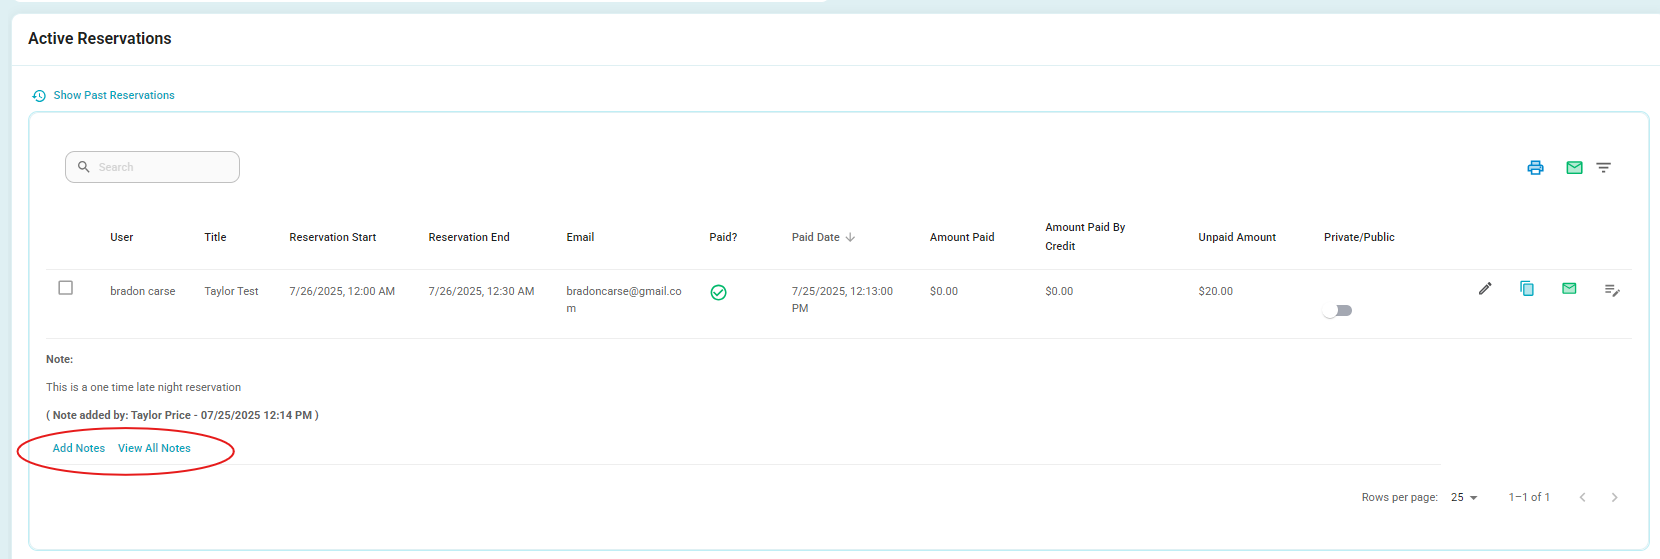
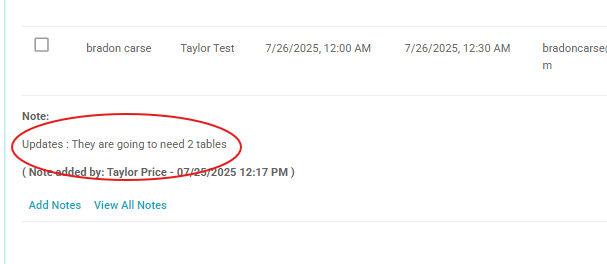
The most recently added note will be the one displayed on screen.
You can track all past notes through the note history.
When printing reservation information, both the original note and the most recent note will be visible.
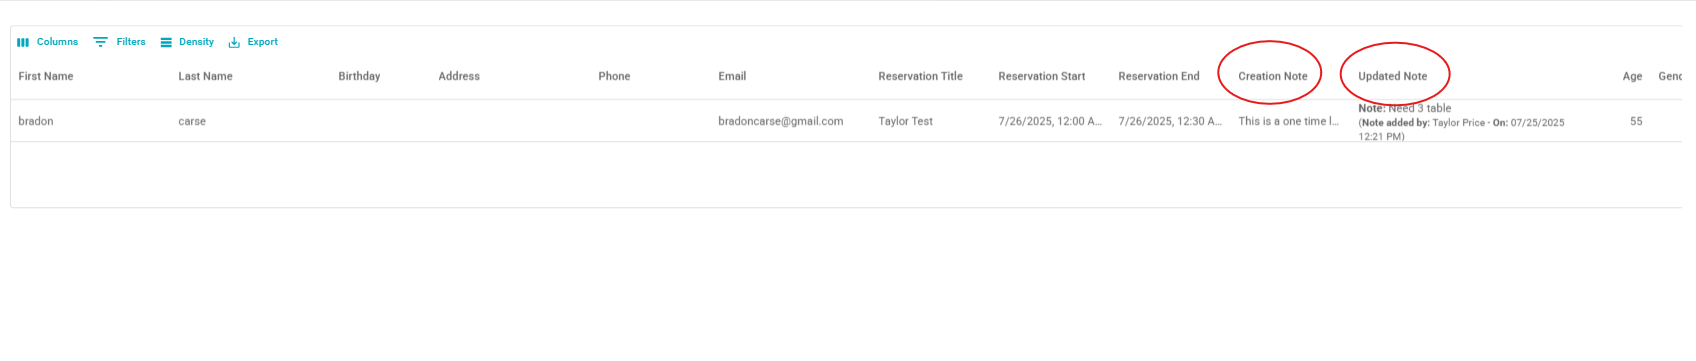
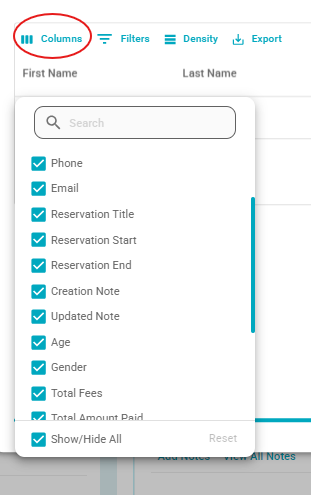
Reminder: You can filter printed information by selecting the column button.
Reservation notes are also visible under the User Profile in the Reservations section.
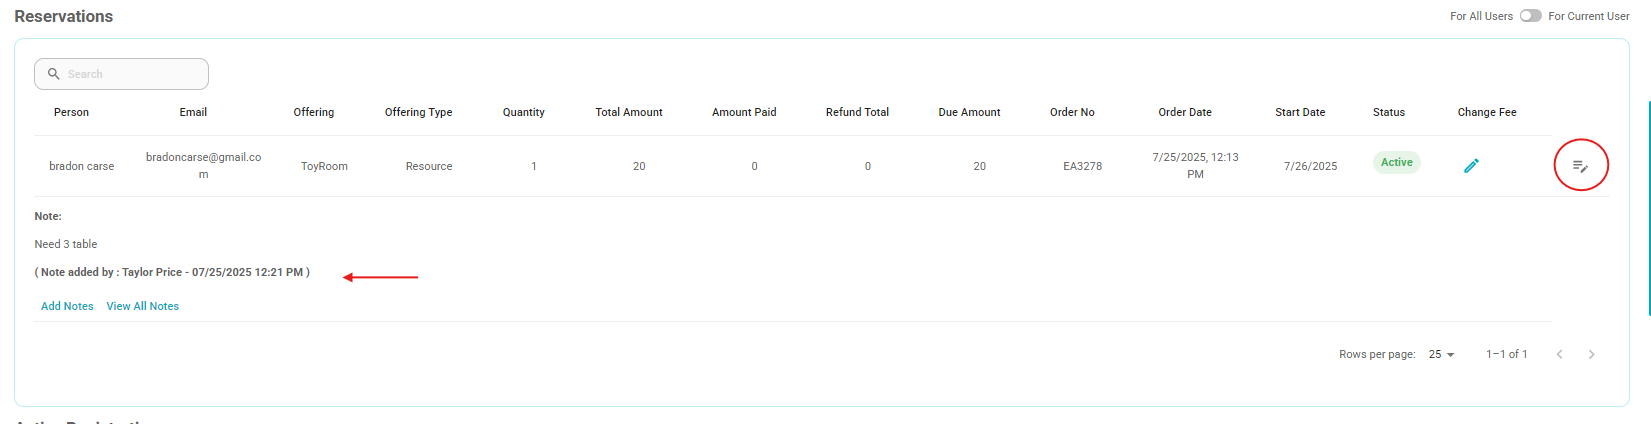
Any notes added under the Resource Details screen or User Profile will appear in both areas once saved.
5. Change a free Reservation into a charged Reservation
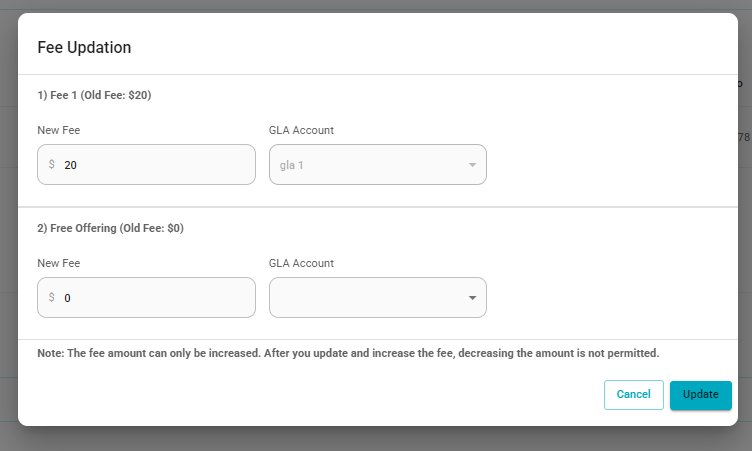
Within the User Profile under Reservations, you will now see a "Change Fee" button.

Click the pencil icon to begin edits.
If the resource has multiple fee setups, select the appropriate one.
After making changes, click the blue Update button.
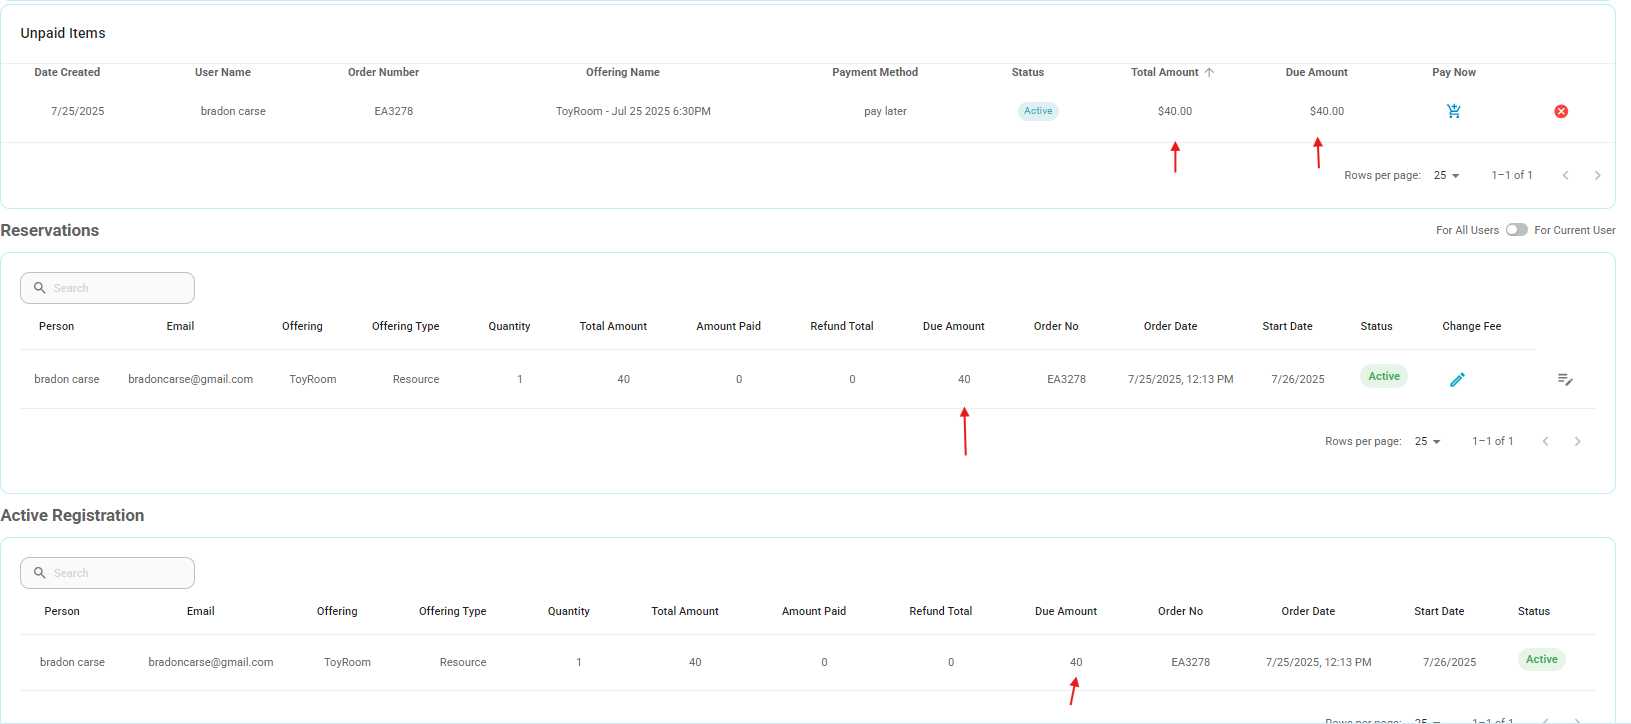
The updated fee will be reflected across the User Profile, and you’ll be able to add the unpaid item to the cart for payment collection.
Refunds:
If a reservation was originally free and later charged a fee, refunds must be processed individually.
You can do this from either:
The User Profile, by selecting each transaction line and processing the refund as normal.
The Resource Details screen, where a new Refund button is available.
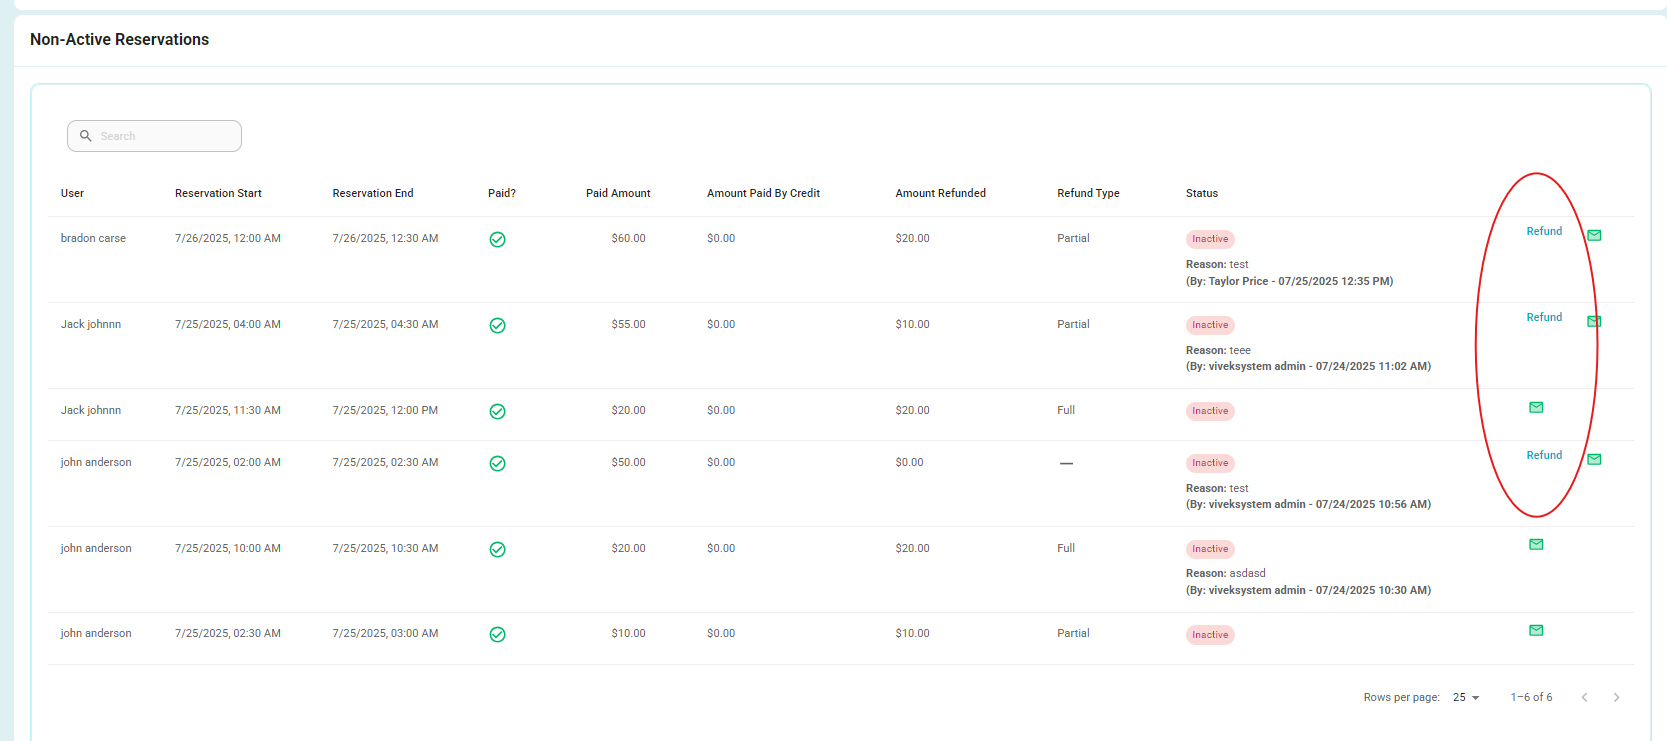
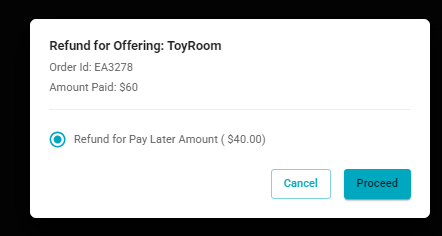
Example: If a user paid $60 and was already refunded $20, you would select the remaining transaction to refund the balance. Once you click Proceed, you’ll be taken to the refund processing screen.

6. Merchant Account setup on a Location Level.
You can now configure merchant account processing not only at the Organization level but also at the Location level. This allows different banking setups per location.
A Location field has also been added to the User Profile.
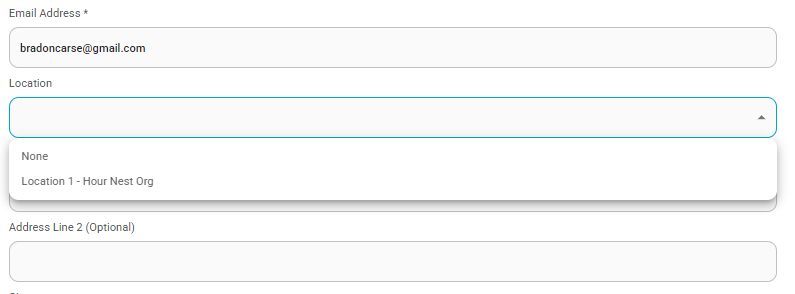
When selected in a Front Desk account, the system will default to this location for credit card processing at login.
Employees working in multiple locations can switch locations from the profile dropdown.
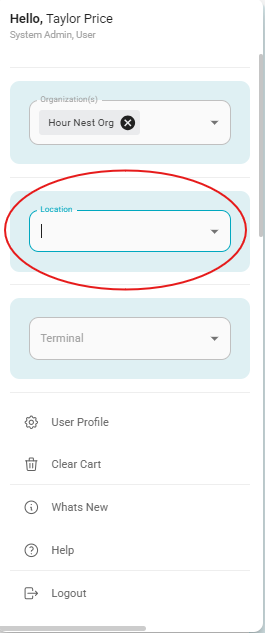
Bonus: This setting will also filter the catalog for Front Desk or Org Admin users accordingly.
7. Refund on pay later not working
We identified an issue where refund transactions for "Pay Later" purchases did not always populate correctly.
This has now been resolved.
8. Discount code showed not working when using Account Credit.
Previously, applying an account credit before entering a discount code caused issues with order processing.
This has been fixed. The order of applying account credit and discount codes no longer matters.
9. Shift report changes -
Bugs Fixed:
Duplicate lines were appearing when multiple fees were applied to a transaction.
The report was referencing the total transaction instead of the actual amount paid, causing inaccuracies in summary values.
When multiple payment types were used, only one was reflected in the report details.
All of these issues have been corrected.
Enhancements:
Improved speed and performance of the report.
Renamed column titles for better clarity.
Grouped multiple items under a single transaction for a more user-friendly display.
Was this article helpful?
That’s Great!
Thank you for your feedback
Sorry! We couldn't be helpful
Thank you for your feedback
Feedback sent
We appreciate your effort and will try to fix the article